

Looking for a way to start your day on a calming note? Classic Greek breakfast recipes might be just what you need. Think creamy Greek yogurt with a drizzle of honey and a sprinkle of crunchy nuts. Or perhaps a flaky spanakopita filled with spinach and feta. Let’s explore these delightful options to add some Greek flair to your mornings.
Greek Yogurt With Honey and Nuts
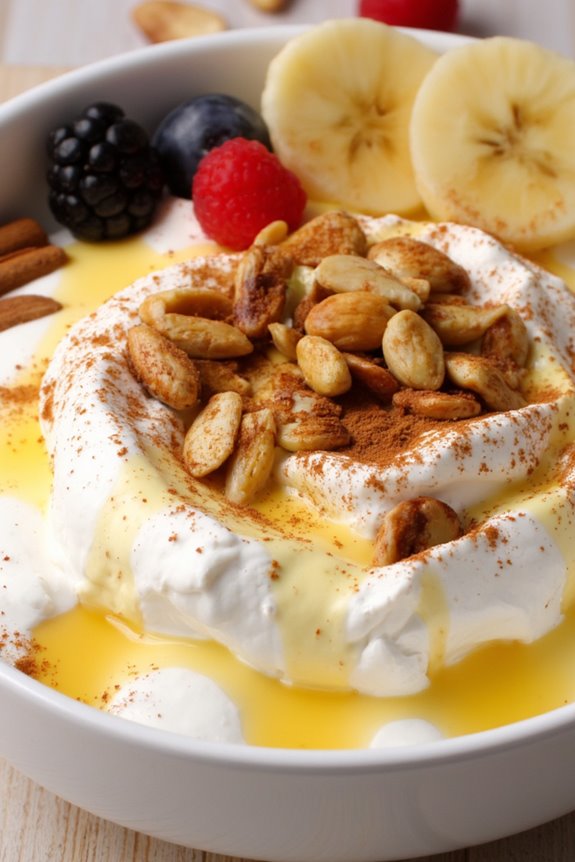
Greek Yogurt With Honey and Nuts is a classic and nutritious breakfast that perfectly embodies the flavors of Greece. This simple yet delicious dish isn’t only easy to prepare, but it also offers a delightful combination of creamy yogurt, sweet honey, and crunchy nuts. Ideal for a light morning meal or a revitalizing snack, this breakfast is packed with protein and healthy fats, guaranteeing you start your day off right.
With its roots deeply embedded in the Mediterranean diet, this dish allows you to enjoy the richness of Greek yogurt, which is famous for its thick texture and tangy flavor. Topped with a generous drizzle of honey and a mix of your favorite nuts, this breakfast becomes a wholesome affair. Whether you’re entertaining guests or simply treating yourself to a nourishing breakfast, Greek Yogurt With Honey and Nuts is sure to please.
Ingredients (Serves 4-6)
- 4 cups of Greek yogurt
- 1/2 cup of honey
- 1 cup of mixed nuts (such as walnuts, almonds, and pistachios)
- 1 teaspoon of cinnamon (optional)
- Fresh fruit (such as berries or sliced bananas) for garnish (optional)
Cooking Instructions
- Prepare the Yogurt Base: Start by placing the Greek yogurt in a large serving bowl or divide it into individual bowls. If you prefer a creamier texture, you can whisk the yogurt gently before serving, but it’s delicious as is.
- Add the Honey: Drizzle the honey generously over the yogurt. You can adjust the amount of honey depending on your sweetness preference. For a more artistic presentation, drizzle the honey in a zig-zag motion over the yogurt.
- Prepare the Nuts: Chop the mixed nuts into smaller pieces if desired, which will make them easier to eat and distribute evenly over the yogurt. You can toast them lightly in a pan for added flavor if you prefer a warm nutty taste.
- Top with Nuts: Sprinkle the chopped nuts evenly over the yogurt and honey mixture. Confirm every serving has a good amount of nuts for that perfect crunch in each bite.
- Add Cinnamon (Optional): If you’re using cinnamon, dust it lightly over the top of the yogurt and nuts for an extra layer of flavor. This step is optional but can enhance the dish’s overall taste.
- Garnish with Fresh Fruit (Optional): For a revitalizing touch, add fresh fruit like berries or sliced bananas on top of the nuts. This not only elevates the presentation but also adds natural sweetness and freshness to the dish.
Extra Tips
When preparing Greek Yogurt With Honey and Nuts, consider using full-fat Greek yogurt for a richer flavor and creamier texture. If you’re looking to add variety, experiment with different types of nuts or even seeds, such as chia or sunflower seeds.
For a more indulgent twist, you can also mix in some dark chocolate shavings or dried fruits, which pair wonderfully with the yogurt and honey. Enjoy this delicious dish as part of a balanced breakfast or as a healthy dessert option!
Spanakopita (Spinach Pie)

Spanakopita, a traditional Greek dish, is a savory pie filled with spinach and feta cheese wrapped in crispy phyllo pastry. This delightful dish isn’t only popular in Greece but has also found its way into the hearts of many around the world, often served as an appetizer or a main course.
The combination of earthy spinach, tangy feta, and aromatic herbs creates a flavor profile that’s both satisfying and wholesome. Preparing spanakopita may seem intimidating at first, but with a bit of patience and the right technique, you can create this flaky, delicious pie in your own kitchen.
The versatility of spanakopita allows it to be enjoyed at any time of the day, making it a perfect breakfast option or a light lunch. This recipe serves 4-6 people, making it ideal for family gatherings or brunch with friends.
The layers of phyllo pastry aren’t only visually appealing but also provide a delightful crunch that contrasts beautifully with the creamy filling. Let’s explore the ingredients and step-by-step instructions to make your very own spanakopita.
Ingredients
- 1 package (16 oz) phyllo dough, thawed
- 1 pound fresh spinach, washed and chopped (or 1 package frozen spinach, thawed and drained)
- 1 cup feta cheese, crumbled
- 1 cup ricotta cheese
- 1 small onion, finely chopped
- 2 cloves garlic, minced
- 2 large eggs
- 1/4 cup fresh dill, chopped (or 1 tablespoon dried dill)
- 1/4 cup olive oil (plus extra for brushing)
- Salt and pepper to taste
Cooking Instructions
1. Preheat the Oven: Begin by preheating your oven to 375°F (190°C). This guarantees that the spanakopita cooks evenly and the pastry becomes perfectly golden and crispy.
2. Prepare the Filling: In a large skillet, heat a tablespoon of olive oil over medium heat. Add the finely chopped onion and sauté until it becomes soft and translucent, about 5 minutes.
Then, add the minced garlic and cook for an additional minute until fragrant. If using fresh spinach, add it to the skillet and cook until wilted, about 3-4 minutes. If using frozen spinach, make sure it’s well drained before mixing it in. Remove from heat and let it cool for a few minutes.
3. Mix Ingredients: In a large mixing bowl, combine the sautéed spinach mixture with crumbled feta cheese, ricotta cheese, eggs, and chopped dill. Season with salt and pepper to taste. Stir until all ingredients are well combined.
4. Prepare the Phyllo Dough: Carefully unroll the phyllo dough and cover it with a damp kitchen towel to prevent it from drying out. Take one sheet of phyllo and lay it on a clean surface. Brush it lightly with olive oil.
Layer another sheet on top and brush it again. Repeat this process with 3-4 sheets, creating a sturdy base for your pie.
5. Assemble the Pie: Spread half of the spinach filling along one long edge of the phyllo layers. Gently fold the sides over the filling and roll it up tightly to form a log shape.
Place the rolled spanakopita seam side down on a baking sheet lined with parchment paper. Repeat the process with the remaining phyllo and filling to create additional rolls or shape it into a pie if preferred.
6. Bake: Brush the top of the rolled spanakopita with olive oil to guarantee a golden crust. Place it in the preheated oven and Bake for approximately 30-40 minutes or until the phyllo is crispy and golden brown.
7. Serve: Once baked, remove from the oven and let it cool for a few minutes before slicing. Serve warm or at room temperature.
Extra Tips
When making spanakopita, make sure that your phyllo dough remains covered with a damp cloth to prevent it from drying out and becoming brittle.
You can experiment with additional herbs such as parsley or mint for added flavor. For a heartier version, consider adding cooked chicken or mushrooms to the filling.
Spanakopita can also be made ahead of time and frozen; simply bake from frozen, adding a few extra minutes to the cooking time for a fresh-out-of-the-oven taste. Enjoy your cooking adventure!
Tiropita (Cheese Pie)

Tiropita, a beloved Greek cheese pie, is a staple of Greek cuisine that showcases the delightful use of flaky phyllo pastry filled with a rich and creamy cheese mixture. This savory pastry is perfect for breakfast, as a snack, or even as a side dish at lunch or dinner. With its golden, crispy exterior and luscious cheesy interior, tiropita is bound to please anyone who takes a bite. The combination of feta cheese, eggs, and a hint of herbs creates a flavor profile that’s both comforting and satisfying.
Making tiropita may seem intimidating due to the use of phyllo pastry, but it’s easier than it looks. The key to achieving the perfect tiropita lies in handling the phyllo with care and making sure the filling is well seasoned. This recipe is designed to serve 4-6 people, making it a wonderful addition to any gathering or a cozy family breakfast. With just a few ingredients and some simple steps, you can create a delicious tiropita that will transport you straight to the sun-kissed shores of Greece.
Ingredients:
- 1 package of phyllo pastry (16 oz)
- 1 cup feta cheese, crumbled
- 1 cup ricotta cheese
- 2 large eggs
- 1/4 cup grated Parmesan cheese
- 1/4 cup chopped fresh parsley (optional)
- 1/4 teaspoon black pepper
- 1/4 teaspoon salt
- 1/2 cup unsalted butter, melted
- Cooking spray (for greasing the baking dish)
Cooking Instructions:
- Prepare the Filling: In a large mixing bowl, combine the crumbled feta cheese, ricotta cheese, grated Parmesan cheese, and chopped parsley (if using). Beat the eggs in a separate bowl and then add them to the cheese mixture. Season with black pepper and salt. Mix everything together until smooth and well combined.
- Preheat the Oven: Preheat your oven to 375°F (190°C). This guarantees that the tiropita will bake evenly and achieve that golden-brown crust.
- Prepare the Baking Dish: Grease a 9×13 inch baking dish with cooking spray or a little melted butter to prevent the phyllo pastry from sticking to the dish.
- Layer the Phyllo Pastry: Take a sheet of phyllo pastry and lay it in the prepared baking dish, allowing the edges to hang over the sides. Brush the sheet with melted butter. Repeat this process, layering about 6-8 sheets of phyllo, brushing each layer with butter before adding the next.
- Add the Filling: Spread the cheese filling evenly over the layered phyllo in the baking dish.
- Top with Phyllo: Continue layering more phyllo sheets over the filling, brushing each with melted butter, until you have about 6-8 layers again. Tuck the overhanging edges of the phyllo sheets over the top of the pie.
- Score the Top: Using a sharp knife, lightly score the top layer of phyllo into squares or diamonds. This will allow steam to escape and help the pie bake evenly.
- Bake: Place the tiropita in the preheated oven and bake for 30-40 minutes or until the top is golden brown and crispy.
- Cool and Serve: Once baked, remove the tiropita from the oven and allow it to cool for a few minutes before cutting into pieces. Serve warm or at room temperature.
Extra Tips:
When working with phyllo pastry, it’s important to keep the sheets covered with a damp cloth while you work to prevent them from drying out.
If you prefer a richer flavor, consider adding a bit of melted butter to the cheese filling. Additionally, feel free to experiment with different cheeses or herbs to customize the filling to your taste.
Tiropita can also be made ahead of time and reheated, making it a convenient option for busy mornings or gatherings. Enjoy your homemade tiropita with a side of Greek yogurt or a fresh salad for a complete meal!
Greek Feta Omelette

The Greek Feta Omelette is a delightful and savory breakfast dish that showcases the rich flavors of Greece. This dish combines the creamy tang of feta cheese with fresh vegetables, creating a satisfying meal that’s perfect for breakfast or brunch. The omelette isn’t only easy to prepare but also packed with nutrients, making it a wholesome option to start your day.
Served with crusty bread or a light salad on the side, this omelette is sure to please everyone at the breakfast table. Incorporating ingredients like spinach, tomatoes, and olives, the Greek Feta Omelette draws inspiration from traditional Greek flavors. The combination of herbs and spices elevates the taste, while the feta adds a deliciously salty kick.
Whether you’re cooking for family or hosting friends, this dish is versatile and can be customized to suit your preferences. Get ready to whip up a delicious Greek-style breakfast that will transport you to the Mediterranean with every bite!
Ingredients (Serves 4-6)
- 8 large eggs
- 1 cup crumbled feta cheese
- 1 cup fresh spinach, chopped
- 1 medium tomato, diced
- 1/2 cup black olives, sliced
- 1/4 cup fresh parsley, chopped
- 1/4 cup milk
- 1/2 teaspoon salt
- 1/4 teaspoon black pepper
- 1 tablespoon olive oil
- Optional: additional herbs (oregano, dill) for garnish
Cooking Instructions
- Prepare the Ingredients: Begin by gathering all your ingredients. Chop the spinach, dice the tomato, and slice the olives. Crumble the feta cheese if not already done. This will guarantee that everything is ready to go once you start cooking.
- Whisk the Eggs: In a large mixing bowl, crack the eggs and add the milk, salt, and black pepper. Use a whisk to beat the eggs until they’re fully combined and a little frothy. This will create a light and airy texture in your omelette.
- Heat the Pan: Place a non-stick skillet over medium heat and add the olive oil. Allow the oil to heat up for a minute, making sure it coats the bottom of the pan evenly. This helps to prevent the omelette from sticking.
- Cook the Vegetables: Add the chopped spinach, diced tomato, and sliced olives into the skillet. Sauté the vegetables for about 2-3 minutes until the spinach is wilted and the tomatoes are slightly softened. Stir occasionally to guarantee even cooking.
- Add the Eggs: Once the vegetables are ready, pour the beaten eggs into the skillet, making sure they cover the vegetables evenly. Allow the eggs to cook undisturbed for about 3-4 minutes, or until the edges start to set.
- Add Feta and Herbs: Sprinkle the crumbled feta cheese and chopped parsley over one half of the omelette. This will allow the cheese to melt slightly while the eggs continue to cook.
- Fold the Omelette: Carefully use a spatula to fold the omelette in half, covering the feta and herbs. Cook for another 2 minutes, or until the eggs are fully set but still moist.
- Serve: Gently slide the omelette onto a serving plate. If desired, garnish with additional herbs or a sprinkle of extra feta. Cut into wedges and serve warm with crusty bread or a side salad.
Extra Tips
To enhance the flavors of your Greek Feta Omelette, consider adding other ingredients like sautéed bell peppers or mushrooms. Fresh herbs such as dill or oregano can also add an aromatic touch.
Be careful not to overcook the omelette; it should be fluffy and slightly moist inside. For a creamier texture, you can substitute half of the milk with Greek yogurt. Enjoy experimenting with different vegetable combinations to make this dish your own!
Lahanosalata (Cabbage Salad)

Lahanosalata, a delightful Greek cabbage salad, is a revitalizing dish that perfectly complements any meal. This salad isn’t only healthy but also easy to prepare, making it a popular choice for breakfast or as a side dish in any Greek feast.
The crisp texture of the cabbage, combined with the tangy dressing and the crunch of fresh vegetables, creates a vibrant and flavorful dish that’s sure to please everyone at the table.
In addition to being delicious, Lahanosalata is also versatile. You can easily customize it by adding other vegetables or herbs based on your preference. Whether enjoyed on its own or alongside grilled meats or fish, this salad is a staple in Greek cuisine that showcases the simplicity and freshness of Mediterranean ingredients.
Ingredients (Serves 4-6):
- 1 small head of green cabbage, finely shredded
- 2 large carrots, grated
- 1 small red onion, thinly sliced
- 1 bell pepper (any color), diced
- 1 cup of cherry tomatoes, halved
- 1/4 cup of fresh parsley, chopped
- 1/4 cup of extra virgin olive oil
- 2 tablespoons of red wine vinegar (or lemon juice)
- Salt and pepper, to taste
Cooking Instructions:
- Prepare the Vegetables: Start by thoroughly washing the cabbage, carrots, red onion, bell pepper, and cherry tomatoes. Remove the outer leaves of the cabbage and cut it into quarters. Finely shred the cabbage using a sharp knife or a mandoline for more uniform slices. Grate the carrots and thinly slice the red onion. Dice the bell pepper and halve the cherry tomatoes.
- Combine the Ingredients: In a large mixing bowl, combine the shredded cabbage, grated carrots, sliced red onion, diced bell pepper, halved cherry tomatoes, and chopped parsley. Gently toss the ingredients together with your hands or a large spoon until they’re well mixed.
- Prepare the Dressing: In a small bowl, whisk together the extra virgin olive oil, red wine vinegar (or lemon juice), salt, and pepper. Make sure the dressing is well combined and emulsified.
- Dress the Salad: Pour the dressing over the combined vegetables in the mixing bowl. Toss the salad gently to guarantee that all the ingredients are coated with the dressing. Taste and adjust the seasoning with more salt and pepper if necessary.
- Serve: Allow the salad to sit for about 10-15 minutes before serving. This resting time allows the flavors to meld together and enhances the overall taste of the dish. Serve the Lahanosalata at room temperature or chilled, as a revitalizing accompaniment to your breakfast or lunch.
Extra Tips:
When making Lahanosalata, feel free to experiment by adding other ingredients such as cucumbers or radishes for additional crunch.
If you prefer a spicier kick, consider adding a pinch of red pepper flakes to the dressing. Additionally, this salad can be made a few hours in advance; just keep it refrigerated until you’re ready to serve, but be cautious not to let it sit too long, as the cabbage can become wilted.
Enjoy this vibrant salad as part of a traditional Greek breakfast or any meal throughout the day!
Roti With Olive Oil and Za’atar
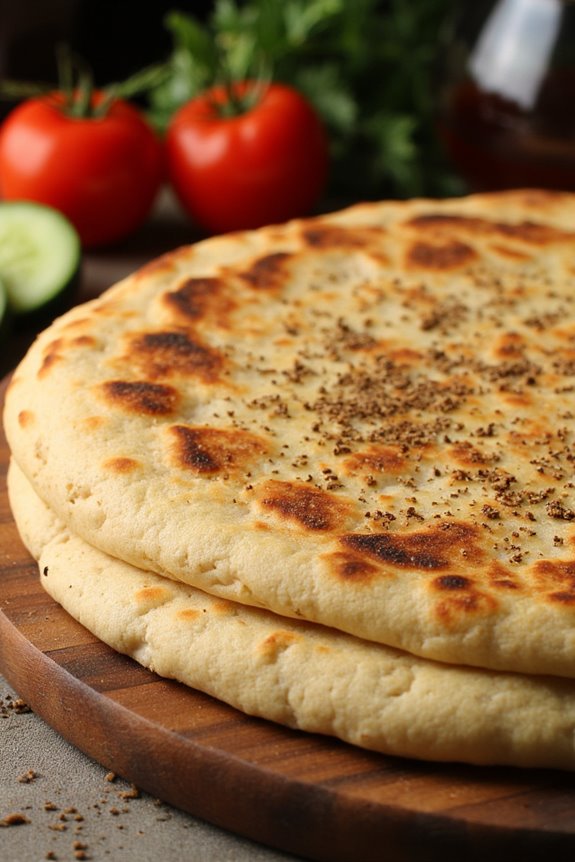
Roti with Olive Oil and Za’atar is a delightful addition to any Greek breakfast, combining the flavors of crispy, warm bread with the aromatic spices of the Middle East. This dish isn’t only simple to prepare but also versatile, allowing it to be served as a side or a centerpiece for a breakfast spread. The za’atar, a flavorful herb blend, elevates the basic roti to a new level, making it a satisfying and nourishing choice to start the day.
To make this dish, you’ll need just a few basic ingredients that come together to create a soft, pliable bread infused with the rich taste of olive oil and the earthy notes of za’atar. Paired with fresh vegetables, yogurt, or even a simple egg, this roti serves as an excellent base for various toppings. Whether you’re entertaining guests or enjoying a quiet morning at home, Roti with Olive Oil and Za’atar is sure to impress.
Ingredients (Serves 4-6):
- 3 cups all-purpose flour
- 1 teaspoon salt
- 1 tablespoon baking powder
- 1 cup warm water
- 1/4 cup olive oil (plus extra for brushing)
- 2-3 tablespoons za’atar seasoning
Cooking Instructions:
- Prepare the Dough: In a large mixing bowl, combine the all-purpose flour, salt, and baking powder. Mix well to guarantee that the dry ingredients are evenly distributed. Gradually add warm water and olive oil to the flour mixture, stirring until a dough begins to form.
- Knead the Dough: Transfer the dough onto a lightly floured surface. Knead the dough for about 5-7 minutes, or until it becomes smooth and elastic. If the dough is too sticky, add a little more flour, but be careful not to overdo it.
- Rest the Dough: Form the kneaded dough into a ball and place it in a lightly oiled bowl, covering it with a damp cloth. Allow the dough to rest for at least 30 minutes. This resting period helps to relax the gluten, making the dough easier to roll out.
- Shape the Roti: After the resting period, divide the dough into 6 equal pieces. Roll each piece into a ball, then use a rolling pin to flatten each ball into a thin round disc, about 1/8 inch thick. If the dough sticks, sprinkle a little flour on the surface and the dough itself.
- Cook the Roti: Heat a large skillet or griddle over medium-high heat. Once hot, place one roti in the skillet and cook for about 1-2 minutes on each side, or until golden brown spots appear. Brush each side with olive oil while cooking for added flavor.
- Add Za’atar: Once the roti is cooked, remove it from the skillet and immediately sprinkle the za’atar seasoning on top, pressing it gently to adhere. Repeat the cooking and seasoning process with the remaining pieces of dough.
- Serve: Serve the warm roti immediately, drizzled with additional olive oil if desired. It pairs perfectly with yogurt, fresh vegetables, or as a standalone snack.
Extra Tips:
When making Roti with Olive Oil and Za’atar, consider experimenting with different variations of za’atar to suit your taste. You can also add ingredients such as minced garlic or herbs into the dough for added flavor.
For a more robust experience, serve your roti with a side of feta cheese, olives, or a fresh salad. Remember that the key to achieving the perfect texture is in the resting and kneading of the dough, so don’t rush through those steps!
Greek Coffee

To make authentic Greek coffee, one must embrace the slow process of brewing. The coffee grounds are combined with cold water in the briki and heated gradually, allowing the flavors to develop beautifully. The choice of sugar, whether for sweetness or not, is a personal preference that’s often debated among coffee lovers.
The key to a perfect cup lies in the technique of pouring and serving, guaranteeing that the sludge of coffee grounds stays at the bottom of the cup, leaving a smooth sip for the drinker.
Ingredients (Serves 4-6 people)
- 2 cups of cold water
- 4 tablespoons of finely ground Greek coffee
- Sugar (to taste, optional)
- A pinch of ground cardamom (optional)
Instructions
- Measure the Water: Begin by measuring 2 cups of cold water. Pour the water into the briki, which is the traditional Greek coffee pot. Confirm that the briki is clean for the best flavor.
- Add the Coffee: Add 4 tablespoons of finely ground Greek coffee into the briki with the cold water. If desired, add sugar to taste at this stage. For a traditional approach, you might use 1-2 teaspoons of sugar.
- Mix Ingredients: Gently stir the mixture to combine the coffee and water (and sugar, if added) before placing it on the heat. This guarantees that the coffee grounds are evenly distributed and the flavors will meld properly.
- Heat the Briki: Place the briki on low to medium heat. Be patient as the coffee heats; this process shouldn’t be rushed. Keep an eye on the coffee as it starts to heat and bubble.
- Watch for Froth: As the coffee begins to froth and rise, remove the briki from heat to prevent it from overflowing. This froth, known as “kaimaki,” is essential for a proper Greek coffee experience.
- Pour the Coffee: Allow the coffee to settle for a moment and then carefully pour it into small demitasse cups, guaranteeing that the grounds remain in the briki. Don’t stir the coffee in the cup, as the grounds will settle at the bottom.
- Serve and Enjoy: Serve your Greek coffee hot and enjoy it alongside a glass of cold water. It’s customary to drink the coffee slowly, allowing the rich flavors to unfold.
Extra Tips
When making Greek coffee, the quality of the coffee used is vital. Opt for high-quality, finely ground Greek coffee for the best flavor.
Additionally, the brewing process should be slow and deliberate; rushing it will affect the taste. If you’re new to Greek coffee, start with less sugar and adjust according to your taste preferences.
Fresh Bread With Tomato and Feta

Fresh Bread with Tomato and Feta is a classic Greek breakfast dish that beautifully combines crusty bread, juicy tomatoes, and tangy feta cheese. This vibrant dish isn’t only a simple delight but also a celebration of fresh ingredients that embody the Mediterranean spirit.
The combination of flavors creates a revitalizing and satisfying meal, making it perfect for breakfast, brunch, or even a light lunch.
To prepare this dish, you’ll need some crusty bread as the base, which acts as a canvas for the toppings. Ripe, juicy tomatoes bring a burst of flavor and hydration, while feta cheese adds a creamy texture and a salty punch. Drizzled with olive oil and sprinkled with herbs, this dish isn’t only delicious but also visually appealing, showcasing the bright colors of the ingredients.
Ingredients (serves 4-6):
- 1 large loaf of crusty bread (like a country loaf or ciabatta)
- 4 medium ripe tomatoes
- 200g feta cheese
- 4 tablespoons of extra virgin olive oil
- Salt to taste
- Freshly ground black pepper to taste
- 1 teaspoon dried oregano (or fresh, if available)
- Fresh basil or parsley for garnish (optional)
Cooking Instructions:
- Prepare the Bread: Begin by slicing the crusty bread into thick slices, approximately 1 inch thick. Arrange the slices on a baking sheet. If desired, you can toast the bread in an oven at 375°F (190°C) for about 5-7 minutes until lightly golden, enhancing its texture and flavor.
- Slice the Tomatoes: While the bread is toasting, wash the tomatoes thoroughly and slice them into thin rounds or wedges, depending on your preference. Confirm the tomatoes are ripe, as this will contribute to the overall flavor of the dish.
- Crumble the Feta: Take the feta cheese and crumble it into small pieces. You can use your hands or a fork to achieve the desired consistency. The feta should be crumbly but not too dry.
- Assemble the Dish: Once the bread is toasted, remove it from the oven and arrange the slices on a serving platter. Layer the sliced tomatoes evenly over the bread, followed by the crumbled feta cheese on top of the tomatoes.
- Season and Drizzle: Drizzle the extra virgin olive oil generously over the assembled bread, tomatoes, and feta. Sprinkle salt, freshly ground black pepper, and dried oregano over the top to enhance the flavors.
- Garnish and Serve: If you’re using fresh herbs like basil or parsley, chop them finely and sprinkle them over the dish for an added touch of color and flavor. Serve immediately and enjoy this delicious and revitalizing dish.
Extra Tips:
For the best flavor, make sure to use the freshest ingredients possible, especially the tomatoes and feta cheese. If you can find heirloom tomatoes, they’ll add a wonderful sweetness and complexity to the dish.
Additionally, feel free to customize the toppings by adding olives, capers, or even a drizzle of balsamic glaze for a unique twist. Enjoy this dish with a cup of Greek coffee or a revitalizing herbal tea to complete your authentic Greek breakfast experience.
Choriatiki (Greek Village Salad)
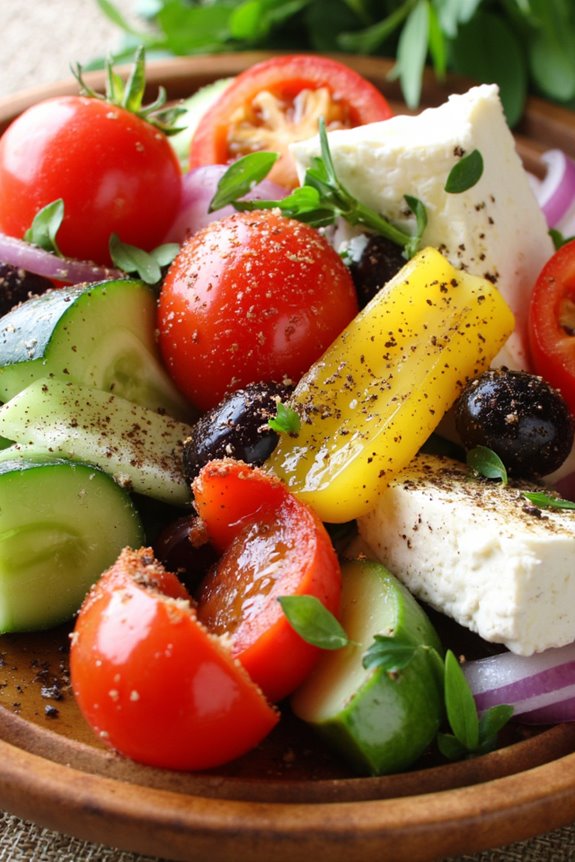
Choriatiki, also known as Greek Village Salad, is a invigorating and vibrant dish that perfectly encapsulates the flavors of the Mediterranean. This salad is a staple in Greek cuisine and is often served as a side dish or a light meal, especially during warm weather. Made with fresh, locally sourced ingredients, Choriatiki isn’t only simple to prepare but also incredibly healthy, making it a great addition to any breakfast table or brunch spread.
The beauty of Choriatiki lies in its rustic presentation and the quality of the ingredients used. With juicy tomatoes, crisp cucumbers, pungent red onions, and briny olives mixed with creamy feta cheese, each bite is a delightful explosion of flavors. The salad is typically dressed with olive oil, oregano, and a splash of red wine vinegar, enhancing the natural tastes of the fresh produce.
Whether enjoyed alongside crusty bread or on its own, Choriatiki is a delicious way to start your day.
Ingredients (serving size: 4-6 people)
- 4 medium ripe tomatoes, chopped
- 1 large cucumber, peeled and sliced
- 1 red onion, thinly sliced
- 1 bell pepper (any color), chopped
- 200g feta cheese, crumbled or in blocks
- 100g Kalamata olives, pitted
- 4 tablespoons extra virgin olive oil
- 2 tablespoons red wine vinegar
- 1 teaspoon dried oregano
- Salt and black pepper to taste
- Fresh parsley for garnish (optional)
Cooking Instructions
- Prepare the Vegetables: Begin by washing all the vegetables thoroughly. Chop the tomatoes into bite-sized pieces and place them in a large mixing bowl. Peel the cucumber, slice it in half lengthwise, and then cut it into half-moons. Add the cucumber slices to the bowl with the tomatoes.
- Add the Onion and Pepper: Thinly slice the red onion and chop the bell pepper into small pieces. Add both the red onion and bell pepper to the bowl, combining all the vegetables together for a colorful mix.
- Incorporate Olives and Feta: Next, add the pitted Kalamata olives to the bowl. If you have feta cheese in blocks, you can break it into larger pieces or crumble it over the salad. This adds a creamy texture that complements the crunch of the vegetables.
- Dress the Salad: In a small bowl, whisk together the extra virgin olive oil, red wine vinegar, dried oregano, salt, and black pepper. Pour this dressing over the salad and gently toss everything together, ensuring all the ingredients are well-coated with the dressing.
- Garnish and Serve: Once mixed, taste the salad and adjust seasoning if necessary. Transfer the Choriatiki to a serving platter and garnish with fresh parsley if desired. Serve immediately or let it sit for a few minutes to allow the flavors to meld.
Extra Tips
When preparing Choriatiki, using the freshest ingredients will greatly enhance the flavor of the salad. Opt for ripe, in-season tomatoes and high-quality olive oil for the best results.
Feel free to customize the salad by adding other ingredients such as radishes, capers, or even artichoke hearts for a twist. This dish can be made ahead of time; however, it’s best enjoyed fresh to preserve the crispness of the vegetables.
Sweet Bougatsa (Custard Pie)

Sweet Bougatsa is a delightful Greek pastry that captures the essence of traditional Greek breakfasts. This rich and creamy custard-filled pie is wrapped in layers of flaky phyllo dough and dusted with powdered sugar, creating a perfect balance of textures and flavors. Often enjoyed warm, Bougatsa can be found in various forms throughout Greece, but the sweet version is particularly beloved for its indulgent filling and satisfying crunch.
Making Sweet Bougatsa at home may seem intimidating at first, but with a little patience and attention to detail, you can create this delicious dish to impress your family and friends. The custard is made from scratch, ensuring a rich and creamy filling, while the phyllo dough adds that signature crunch. Serve it as a sweet breakfast treat, a dessert, or even as a delightful snack to enjoy throughout the day.
Ingredients (Serves 4-6):
- 6 sheets of phyllo dough
- 1/2 cup (115g) unsalted butter, melted
- 1 cup (240ml) milk
- 1 cup (240ml) heavy cream
- 1/2 cup (100g) granulated sugar
- 3 large eggs
- 1/4 cup (30g) cornstarch
- 1 teaspoon vanilla extract
- Powdered sugar, for dusting
- Ground cinnamon, for optional garnish
Cooking Instructions:
1. Prepare the Custard Filling: In a medium saucepan, combine the milk, heavy cream, and half of the granulated sugar. Heat over medium heat until warm but not boiling.
In a separate bowl, whisk the eggs, cornstarch, vanilla extract, and the remaining sugar until smooth. Gradually add the warm milk mixture to the egg mixture, whisking constantly to avoid curdling. Return the mixture to the saucepan and cook over medium heat, stirring continuously, until thickened (about 5-7 minutes). Remove from heat and let it cool slightly.
2. Prepare the Phyllo Dough: Preheat your oven to 350°F (175°C). Lay out one sheet of phyllo dough on a clean surface and brush it lightly with melted butter. Place another sheet on top and brush it again with butter. Repeat this process until you have layered three sheets.
3. Add the Custard Filling: Once the custard has cooled, pour it in a line down the center of the phyllo layers. Fold the sides of the phyllo over the custard to enclose it, creating a log shape. Flip the log seam-side down and place it on a baking sheet lined with parchment paper. Brush the top with more melted butter.
4. Bake the Bougatsa: Bake in the preheated oven for 30-35 minutes, or until the phyllo is golden brown and crispy. Keep an eye on it to avoid over-browning.
5. Serve: Once baked, remove from the oven and let it cool slightly. Dust generously with powdered sugar and, if desired, sprinkle with ground cinnamon before slicing and serving.
Extra Tips:
When working with phyllo dough, be sure to keep the unused sheets covered with a damp cloth to prevent them from drying out.
If you’re short on time, you can prepare the custard filling ahead of time and store it in the refrigerator until you’re ready to assemble the Bougatsa. Additionally, feel free to experiment with the filling by adding a touch of lemon zest or orange blossom water for an extra layer of flavor.
Enjoy your homemade Sweet Bougatsa warm for the best experience!
Galaktoboureko (Semolina Custard Pie)

Galaktoboureko is a traditional Greek dessert that has captured the hearts of many with its unique combination of semolina custard and flaky phyllo pastry. This delectable dish is often enjoyed during breakfast or as a sweet treat at any time of the day.
With its rich custard filling and crisp, golden-brown exterior, Galaktoboureko is a celebration of textures and flavors that’s sure to impress both family and guests. Making Galaktoboureko may seem intimidating at first, but with the right ingredients and a little patience, anyone can master this classic Greek recipe.
The custard filling, infused with citrus notes, is enveloped in layers of buttery phyllo dough and soaked in a sweet syrup, resulting in a dish that’s utterly irresistible. Follow this recipe to bring a taste of Greece to your breakfast table!
Ingredients (Serves 4-6)
- 1 package (1 lb) phyllo pastry
- 1 cup unsalted butter, melted
- 1 cup semolina
- 1 cup granulated sugar
- 4 cups milk
- 4 large eggs
- 1 teaspoon vanilla extract
- Zest of 1 lemon
- Zest of 1 orange
- 1 cup water
- 1/2 cup granulated sugar (for syrup)
- 1 teaspoon lemon juice (for syrup)
Cooking Instructions
1. Prepare the Syrup: In a small saucepan, combine 1 cup of water and 1/2 cup of granulated sugar. Bring to a boil over medium heat while stirring until the sugar dissolves.
Once boiling, add the lemon juice and lemon zest. Reduce the heat and let it simmer for about 10 minutes. Remove from heat and set aside to cool.
2. Make the Custard Filling: In a medium saucepan, heat the milk over medium heat until it’s warm but not boiling. Gradually whisk in the semolina, stirring continuously to prevent lumps.
Cook for about 10 minutes, or until the mixture thickens and becomes a custard-like consistency. Remove from heat and let it cool slightly.
3. Incorporate Eggs and Flavoring: Once the semolina mixture has cooled slightly, whisk in the eggs, vanilla extract, lemon zest, and orange zest until fully combined. Set aside to cool completely.
4. Prepare the Phyllo Pastry: Preheat the oven to 350°F (175°C). Take a large baking dish (approximately 9×13 inches) and brush the bottom with melted butter.
Carefully unroll the phyllo pastry, keeping it covered with a damp kitchen towel to prevent it from drying out. Layer 8 sheets of phyllo in the dish, brushing each layer with melted butter before adding the next.
5. Add the Custard: Pour the cooled custard filling over the layered phyllo in the baking dish, spreading it evenly.
6. Top with More Phyllo: Layer another 8 sheets of phyllo on top of the custard, brushing each with melted butter as before.
Once all layers are complete, trim any overhanging phyllo and tuck the edges into the dish.
7. Score the Pastry: Using a sharp knife, score the top of the Galaktoboureko into diamond or square shapes, which will make it easier to cut once baked.
This also allows the syrup to soak in properly.
8. Bake: Place the dish in the preheated oven and Bake for about 45 minutes or until the top is golden brown and crispy.
9. Soak with Syrup: Once baked, remove the Galaktoboureko from the oven and immediately pour the cooled syrup evenly over the hot pastry.
Allow it to soak in for at least 30 minutes before serving.
Extra Tips
When preparing Galaktoboureko, it’s important to work quickly with the phyllo dough, as it can dry out easily. Keep a damp cloth over the sheets you’re not currently using.
Additionally, for an extra touch of flavor, consider adding a hint of cinnamon to your custard or syrup. Finally, Galaktoboureko can be served warm or at room temperature and is delightful with a scoop of vanilla ice cream or a dollop of Greek yogurt on the side. Enjoy your homemade taste of Greece!
Olive Oil Cake

Olive oil cake is a delightful and moist dessert that beautifully captures the essence of Mediterranean flavors. This cake isn’t only simple to prepare but also offers a unique twist on traditional cakes by replacing butter with olive oil, contributing to a rich flavor and a tender crumb.
Perfect for a Greek breakfast, this cake can be enjoyed on its own or served with a dollop of yogurt and fresh fruit for a satisfying start to your day.
The secret to a successful olive oil cake lies in the quality of the olive oil used. A good extra virgin olive oil will impart a subtle fruitiness to the cake, elevating its taste. This cake is versatile and can be enjoyed warm or at room temperature, making it a great addition to any brunch spread or as a sweet treat alongside your morning coffee.
Ingredients (Serves 4-6):
- 1 cup all-purpose flour
- 1/2 cup almond flour
- 1 teaspoon baking powder
- 1/2 teaspoon baking soda
- 1/4 teaspoon salt
- 1 cup granulated sugar
- 3 large eggs
- 1/2 cup extra virgin olive oil
- 1/2 cup whole milk
- Zest of 1 lemon
- Zest of 1 orange
- 1 teaspoon vanilla extract
- Powdered sugar (for dusting, optional)
Cooking Instructions:
- Preheat the Oven: Start by preheating your oven to 350°F (175°C). This step is vital as it guarantees that the cake bakes evenly and achieves the right texture.
- Prepare the Baking Pan: Grease a 9-inch round cake pan with olive oil or butter and line the bottom with parchment paper. This will help prevent the cake from sticking and make it easier to remove once baked.
- Mix Dry Ingredients: In a medium bowl, whisk together the all-purpose flour, almond flour, baking powder, baking soda, and salt. Mixing these dry ingredients first helps to evenly distribute the leavening agents throughout the flour.
- Beat the Eggs and Sugar: In a large mixing bowl, beat the granulated sugar and eggs together using an electric mixer on medium speed until the mixture is pale and fluffy, about 3-5 minutes. This aeration is essential for a light and airy cake.
- Add Olive Oil and Milk: Gradually pour in the olive oil and whole milk while continuing to mix. The mixture should become smooth and homogenous.
- Incorporate Zests and Vanilla: Add the lemon zest, orange zest, and vanilla extract to the wet mixture, stirring gently until combined. The zests will add a revitalizing citrus flavor to the cake.
- Combine Wet and Dry Ingredients: Gradually fold the dry ingredients into the wet ingredients using a spatula. Be careful not to overmix; just combine until there are no visible streaks of flour.
- Pour into the Pan: Transfer the batter into the prepared cake pan, spreading it evenly. This guarantees that the cake bakes uniformly.
- Bake: Place the cake in the preheated oven and bake for 30-35 minutes, or until a toothpick inserted into the center comes out clean. Keep an eye on the cake to avoid overbaking, which can lead to dryness.
- Cool and Serve: Once baked, remove the cake from the oven and let it cool in the pan for about 10 minutes before transferring it to a wire rack to cool completely. Dust with powdered sugar before serving if desired.
Extra Tips:
For the best flavor, choose high-quality extra virgin olive oil, as its taste will greatly influence the final outcome of your cake.
Additionally, feel free to experiment by adding nuts, such as chopped pistachios or walnuts, for an added crunch. Storing the cake in an airtight container will keep it moist for several days, making it an excellent make-ahead option for your Greek breakfast gatherings.
Revani (Semolina Cake With Syrup)

Revani is a delightful Greek dessert that captures the essence of traditional Mediterranean flavors. This moist semolina cake, soaked in a sweet syrup, is perfect for breakfast or as a light dessert. Its rich texture and sweet notes make it a favorite among many, and it’s often served alongside a cup of coffee or tea.
The combination of semolina, yogurt, and fragrant syrup creates a unique balance that’s both satisfying and invigorating.
Making Revani is a straightforward process that can be accomplished in a few simple steps. The key to achieving the perfect texture lies in the balance between the semolina and the syrup. Once baked, the cake absorbs the syrup, resulting in a moist and flavorful treat. Whether you’re hosting a brunch or simply looking for a sweet start to your day, Revani is sure to impress.
Ingredients (Serves 4-6):
- 1 cup semolina
- 1 cup sugar
- 1 cup plain yogurt
- ½ cup vegetable oil
- 4 eggs
- 1 teaspoon baking powder
- 1 teaspoon vanilla extract
- Zest of 1 lemon
- 1 cup water (for syrup)
- 1 cup sugar (for syrup)
- 1 tablespoon lemon juice (for syrup)
Cooking Instructions:
- Preheat the Oven: Begin by preheating your oven to 350°F (175°C). This guarantees that your cake bakes evenly and rises properly. Grease a 9-inch round or square baking pan with butter or oil to prevent sticking.
- Prepare the Batter: In a large mixing bowl, combine the semolina, sugar, yogurt, vegetable oil, eggs, baking powder, vanilla extract, and lemon zest. Use a whisk or a hand mixer to blend the ingredients until you achieve a smooth batter. The semolina should be well incorporated, and the mixture should be slightly thick.
- Bake the Cake: Pour the prepared batter into the greased baking pan and spread it evenly. Place the pan in the preheated oven and bake for about 30-35 minutes, or until the top is golden brown and a toothpick inserted in the center comes out clean.
- Make the Syrup: While the cake is baking, prepare the syrup. In a saucepan, combine 1 cup of water and 1 cup of sugar. Bring the mixture to a boil over medium heat, stirring until the sugar is completely dissolved. Once boiling, add the lemon juice and let it simmer for about 5-7 minutes until slightly thickened. Remove from heat and set aside to cool.
- Soak the Cake: Once the cake is done baking, remove it from the oven and allow it to cool for about 10 minutes. Using a skewer or toothpick, poke holes all over the surface of the cake. Slowly pour the cooled syrup evenly over the warm cake, allowing it to absorb the syrup. Let the cake sit for at least 30 minutes before serving, allowing it to soak up all the syrup.
- Serve: Cut the Revani into squares or diamonds and serve it at room temperature. You can garnish it with chopped nuts or a sprinkle of powdered sugar if desired.
Extra Tips:
For an enhanced flavor, consider adding a dash of orange blossom water to the syrup for added aroma.
Make sure your syrup is cool before pouring it over the warm cake, as this helps it soak in better. Revani can also be stored in an airtight container in the refrigerator for up to a week, making it a great make-ahead treat for gatherings or breakfasts.
Enjoy this delicious Greek delicacy with a side of yogurt or fresh fruit for a complete meal!
Koulouri (Sesame Bread Rings)

Koulouri are delightful Greek sesame bread rings that make for a perfect addition to any breakfast spread. These crispy and chewy treats are often enjoyed with a cup of coffee or a rejuvenating glass of milk, making them a popular choice for both locals and visitors in Greece.
The distinct flavor of the sesame seeds combined with the slight sweetness of the dough creates a deliciously unique taste that’s hard to resist.
Making Koulouri at home is a simple process that requires a few basic ingredients and some time for the dough to rise. Once you master this recipe, you can easily experiment with various toppings such as different seeds or spices.
These bread rings not only taste wonderful but also fill your kitchen with an irresistible aroma, making them a delightful treat to serve family and friends.
Ingredients (Serves 4-6)
- 4 cups all-purpose flour
- 1 cup warm water
- 1 packet (2 ¼ tsp) active dry yeast
- 1 tablespoon granulated sugar
- 1 teaspoon salt
- 2 tablespoons olive oil
- 1 cup sesame seeds
- 1 tablespoon honey (optional for a touch of sweetness)
Cooking Instructions
- Activate the Yeast: In a small bowl, combine the warm water, sugar, and active dry yeast. Stir gently and let it sit for about 5-10 minutes until it becomes frothy on the surface. This step is essential as it activates the yeast, which helps the dough rise.
- Prepare the Dough: In a large mixing bowl, combine the flour and salt. Once the yeast mixture is ready, add it to the flour along with the olive oil. Mix the ingredients with a wooden spoon or your hands until a shaggy dough forms.
- Knead the Dough: Transfer the dough to a lightly floured surface and knead it for about 10 minutes until it becomes smooth and elastic. If the dough is too sticky, sprinkle a little more flour as needed. Proper kneading develops the gluten, which gives the bread its structure.
- First Rise: Place the kneaded dough in a lightly greased bowl, cover it with a damp cloth or plastic wrap, and let it rise in a warm place for about 1 hour or until it has doubled in size.
- Shape the Rings: Once the dough has risen, punch it down to release any air bubbles. Divide the dough into equal pieces (about 8-10, depending on your preferred size). Roll each piece into a long rope, then form it into a ring by pinching the ends together. Make sure the ring is even in thickness.
- Prepare the Sesame Coating: In a shallow dish, spread the sesame seeds. If desired, you can mix in a little honey with water to create a sticky coating. Dip each ring into the honey-water mixture (or simply water), then roll it in the sesame seeds to fully coat.
- Second Rise: Place the coated rings on a baking sheet lined with parchment paper. Cover them again with a cloth and let them rise for another 30 minutes. This helps the Koulouri to puff up and become airy.
- Bake the Koulouri: Preheat your oven to 375°F (190°C). Bake the rings for about 20-25 minutes or until they’re golden brown. Keep an eye on them to prevent over-browning.
- Cool and Serve: Once baked, remove the Koulouri from the oven and let them cool on a wire rack. Serve them warm or at room temperature, paired with cheese, olives, or jam.
Extra Tips
For an even more authentic flavor, consider adding a pinch of ground mastic or anise seeds to the dough. These spices can elevate the overall taste of your Koulouri, giving them a unique Greek twist.
Additionally, if you want to experiment with toppings, try using different seeds like poppy or flax for a varied texture and flavor profile. Remember to store any leftovers in an airtight container to keep them fresh for days!