

When winter sets in, there’s nothing quite like the comfort of a warm, home-cooked meal. Greek cuisine is perfect for this season, with its rich flavors and comforting ingredients. Dishes like Avgolemono and Moussaka warm not just the body but also the soul. Let’s explore some cozy Greek recipes that are perfect for those chilly nights. Ready to turn your kitchen into a haven of delicious warmth?
Greek Lemon Chicken Soup (Avgolemono)
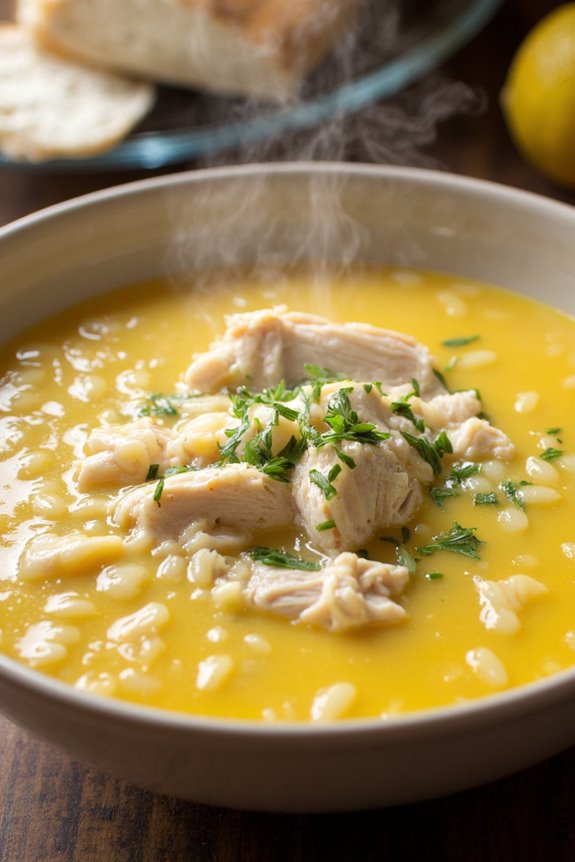
Greek Lemon Chicken Soup, known as Avgolemono, is a traditional dish that warms the heart and soul during the chilly winter months. This delightful soup combines tender chicken, a rich broth, and the unmistakable tang of fresh lemon, all enriched with a creamy egg mixture.
It’s not just a meal; it’s a comforting hug in a bowl, perfect for family gatherings or cozy nights in.
The beauty of Avgolemono lies in its simplicity and the balance of flavors. The delicate broth, infused with herbs, complements the chicken beautifully, while the lemon adds a revitalizing brightness.
Whether you’re feeling under the weather or just craving something soothing, this soup is sure to lift your spirits. Let’s plunge into the recipe and bring the warmth of Greece to your kitchen.
Ingredients (Serves 4-6):
- 1 whole chicken (about 3-4 pounds), cut into pieces
- 8 cups of water
- 2 medium onions, quartered
- 2 carrots, sliced
- 2 celery stalks, sliced
- 1 cup of long-grain rice
- 3 large eggs
- 1/2 cup of fresh lemon juice (about 2-3 lemons)
- Salt and pepper, to taste
- Fresh dill or parsley, for garnish
Cooking Instructions:
1. Prepare the Chicken Broth: In a large pot, add the chicken pieces, water, quartered onions, sliced carrots, and celery. Season with salt and bring the mixture to a boil over medium-high heat.
Once boiling, reduce the heat to low and let it simmer for about 1 hour, or until the chicken is fully cooked and tender.
2. Remove the Chicken: Carefully remove the chicken pieces from the pot and set them aside to cool slightly. Strain the broth through a fine-mesh sieve to remove the vegetables and any impurities, returning the clear broth to the pot.
3. Cook the Rice: Bring the strained broth back to a gentle boil. Add the long-grain rice and cook for about 15-20 minutes, or until the rice is tender. Stir occasionally to prevent sticking.
4. Shred the Chicken: While the rice is cooking, shred the cooked chicken into bite-sized pieces, discarding the skin and bones. Add the shredded chicken back into the pot once the rice is ready.
5. Make the Avgolemono Mixture: In a separate bowl, whisk together the eggs and lemon juice until smooth and frothy. This mixture will enrich the soup and give it a creamy texture.
6. Temper the Egg Mixture: To prevent the eggs from curdling, gradually add a ladle of the hot broth to the egg and lemon mixture, whisking constantly. This step will temper the eggs and prepare them to be added to the soup.
7. Combine and Serve: Slowly pour the tempered egg mixture back into the soup, stirring gently to combine. Heat the soup on low for a few minutes, but don’t let it boil. Taste and adjust seasoning with salt and pepper.
8. Garnish and Enjoy: Ladle the Avgolemono into bowls and garnish with fresh dill or parsley. Serve warm and enjoy the comforting flavors of this classic Greek dish.
Extra Tips:
For an extra layer of flavor, consider adding a bay leaf or some whole peppercorns to the broth while it simmers.
You can also customize the soup by adding other vegetables like spinach or peas. If you prefer a thicker soup, reduce the amount of broth slightly or increase the rice.
Always remember, the key to a silky Avgolemono is to temper the egg mixture properly to avoid curdling, so take your time with that step for the best results!
Moussaka

Moussaka is a beloved Greek dish that embodies the warmth and comfort of Mediterranean cuisine, making it perfect for chilly winter nights. This layered casserole features tender eggplant, spiced ground meat, and a creamy béchamel sauce, baked to golden perfection. The combination of flavors and textures in moussaka creates a satisfying meal that brings a taste of Greece to your home.
Traditionally served as a main course, it can easily feed a family or serve as a delightful dish for entertaining guests.
Preparing moussaka may require some time and effort, but the results are well worth it. Each layer is carefully crafted, from the sautéed meat filling to the roasted eggplant and decadent béchamel sauce. With a hint of cinnamon and nutmeg in the meat, and a touch of cheese in the creamy topping, every bite of this dish is a true celebration of flavor.
Get ready to impress your family and friends with this classic Greek winter recipe!
Ingredients (Serves 4-6):
- 2 large eggplants, sliced into 1/2 inch rounds
- 1 pound ground beef or lamb
- 1 large onion, chopped
- 2 cloves garlic, minced
- 1 can (14 ounces) crushed tomatoes
- 2 tablespoons tomato paste
- 1 teaspoon dried oregano
- 1 teaspoon ground cinnamon
- 1/2 teaspoon ground nutmeg
- Salt and pepper, to taste
- 1/4 cup olive oil
- 2 tablespoons butter
- 1/4 cup all-purpose flour
- 2 cups milk
- 1/2 cup grated Parmesan cheese
- 1 large egg, beaten
Cooking Instructions:
- Prepare the Eggplant:
- Sprinkle the sliced eggplant with salt and let it sit for about 30 minutes. This process helps to draw out excess moisture and bitterness. After 30 minutes, rinse the eggplant slices under cold water and pat them dry with a paper towel.
- Cook the Meat Filling:
- In a large skillet, heat the olive oil over medium heat. Add the chopped onion and garlic, cooking until they’re soft and fragrant. Then, add the ground meat and cook until browned. Stir in the crushed tomatoes, tomato paste, oregano, cinnamon, nutmeg, salt, and pepper. Simmer for about 20 minutes, allowing the flavors to meld together.
- Roast the Eggplant:
- Preheat your oven to 400°F (200°C). Arrange the dried eggplant slices on a baking sheet and drizzle with a little olive oil. Roast in the oven for about 20-25 minutes, until they’re tender and slightly golden. Remove from the oven and set aside.
- Prepare the Béchamel Sauce:
- In a saucepan, melt the butter over medium heat. Whisk in the flour and cook for about 2 minutes, stirring constantly. Gradually add the milk, whisking to avoid lumps. Continue to cook until the sauce thickens, about 5-7 minutes. Remove from heat and stir in the grated Parmesan cheese and beaten egg. Season with salt and pepper to taste.
- Assemble the Moussaka:
- In a greased baking dish, layer half of the roasted eggplant on the bottom. Spread the meat filling evenly over the eggplant, and then top with the remaining eggplant slices. Finally, pour the béchamel sauce over the top, spreading it evenly.
- Bake the Moussaka:
- Lower the oven temperature to 350°F (175°C) and bake the assembled moussaka for about 45-50 minutes, or until the top is golden brown and bubbling. Allow it to cool for about 15 minutes before serving to let the layers set.
Extra Tips:
For the best flavor, consider preparing the meat filling a day in advance and allowing it to rest in the refrigerator overnight. This enhances the taste as the spices meld together.
Additionally, you can substitute the ground meat with lentils or mushrooms for a vegetarian version. When serving, a sprinkle of fresh parsley or a dollop of yogurt can add a revitalizing finish to this rich dish.
Enjoy your homemade moussaka with a side of crusty bread and a crisp Greek salad for a complete meal!
Beef Stifado

Beef Stifado is a traditional Greek stew that’s perfect for winter, brimming with flavors and warmth. This hearty dish is typically made with tender chunks of beef, slow-cooked to perfection with aromatic spices, onions, and tomatoes. The rich sauce is often enhanced with red wine and vinegar, creating a delightful balance of savory and tangy notes. Served over rice or with crusty bread, Beef Stifado is sure to bring comfort on chilly evenings.
The origins of Stifado can be traced back to the Mediterranean, where the use of spices and slow cooking were essential to create depth in flavors. Each family has its own variation, but the essence remains the same: a satisfying meal that celebrates the simplicity of good ingredients.
As the stew simmers, the fragrant aromas fill your kitchen, inviting everyone to gather around the table for a cozy meal.
Ingredients (Serves 4-6):
- 2 pounds beef chuck, cut into 2-inch cubes
- 4 tablespoons olive oil
- 2 large onions, finely sliced
- 4 cloves garlic, minced
- 2 cups red wine
- 1 cup beef broth
- 1 can (14 oz) diced tomatoes
- 1/4 cup red wine vinegar
- 2 bay leaves
- 1 teaspoon cinnamon
- 1 teaspoon allspice
- 1 teaspoon dried oregano
- Salt and pepper to taste
- Fresh parsley for garnish
Cooking Instructions:
1. Sear the Beef: In a large Dutch oven or heavy pot, heat the olive oil over medium-high heat. Season the beef cubes with salt and pepper, then add them to the pot in batches, searing until browned on all sides. This process locks in the flavors and creates a rich base for the stew.
Once browned, remove the beef and set it aside.
2. Sauté the Onions and Garlic: In the same pot, add the sliced onions and cook for about 5-7 minutes until they’re soft and translucent. Stir in the minced garlic and cook for an additional minute, allowing the garlic to become fragrant but not burnt. This step adds sweetness and depth to the dish.
3. Deglaze the Pot: Pour in the red wine, scraping the bottom of the pot with a wooden spoon to loosen any browned bits. This adds a rich flavor to the stew. Allow the wine to simmer for about 3-4 minutes to reduce slightly.
4. Add Remaining Ingredients: Return the seared beef to the pot along with the beef broth, diced tomatoes (with their juice), red wine vinegar, bay leaves, cinnamon, allspice, and oregano. Stir to combine all ingredients well.
5. Simmer the Stew: Bring the mixture to a gentle boil, then reduce the heat to low. Cover the pot and let the stew simmer for 1.5 to 2 hours, or until the beef is tender and the flavors are well combined. Stir occasionally to prevent sticking.
6. Adjust Seasoning and Serve: Once the beef is tender, taste the stew and adjust the seasoning with additional salt and pepper if needed. Remove the bay leaves before serving. Garnish with fresh parsley for a pop of color and freshness.
Extra Tips:
For an even richer flavor, consider marinating the beef in red wine and herbs overnight before cooking. You can also add vegetables such as carrots or bell peppers during the simmering process for added nutrition and color.
Additionally, serving Beef Stifado with a side of crusty bread or over a bed of rice or mashed potatoes can enhance the dining experience and soak up the delicious sauce. Enjoy the warmth and comfort of this classic Greek dish!
Spanakopita (Spinach Pie)

Spanakopita, a traditional Greek dish, is a delightful and comforting pie made with flaky phyllo pastry filled with a rich mixture of spinach, feta cheese, and aromatic herbs. This savory treat is perfect for cozy winter evenings, bringing a taste of the Mediterranean right to your home.
Whether served as an appetizer or a main dish, spanakopita is beloved for its crispy exterior and flavorful filling, making it a favorite among families and guests alike.
Preparing spanakopita can be a wonderfully rewarding experience, as the combination of fresh ingredients and the delicate layers of phyllo pastry create a dish that’s both elegant and satisfying.
While it may seem intimidating to work with phyllo, with a little patience and practice, you’ll master the art of layering. This recipe will guide you through the steps to create a delicious spanakopita that serves 4-6 people.
Ingredients:
- 1 pound fresh spinach, chopped (or 1 package frozen spinach, thawed and drained)
- 1 medium onion, finely chopped
- 2 tablespoons olive oil
- 1 cup feta cheese, crumbled
- 2 large eggs, beaten
- 1/4 cup fresh dill, chopped (or 1 tablespoon dried dill)
- Salt and pepper, to taste
- 1 package (16 oz) phyllo pastry, thawed
- 1/2 cup unsalted butter, melted (for brushing)
Cooking Instructions:
1. Prepare the Spinach Filling: In a large skillet over medium heat, add the olive oil and sauté the chopped onion until it becomes translucent, approximately 5 minutes.
Add the chopped spinach and cook until wilted (if using fresh) or heated through (if using frozen), which should take about 4-5 minutes. Remove the skillet from heat and let the mixture cool slightly.
2. Mix the Filling Ingredients: In a large bowl, combine the sautéed spinach and onion with crumbled feta cheese, beaten eggs, fresh dill, and season with salt and pepper.
Mix everything together until well combined. This mixture will be the flavorful filling for your spanakopita.
3. Prepare the Phyllo Pastry: Preheat your oven to 375°F (190°C). On a clean, flat surface, lay out your thawed phyllo pastry.
Keep it covered with a damp kitchen towel to prevent it from drying out. Take one sheet of phyllo pastry and brush it lightly with melted butter. Layer another sheet on top and brush it again.
Repeat this process with 4-5 sheets, creating a sturdy base.
4. Fill and Fold: Once you have your layered phyllo base, spoon a portion of the spinach filling along one edge of the phyllo, leaving about an inch of space.
Carefully fold the edges over the filling and roll it up tightly to form a log shape. Place the rolled spanakopita seam-side down onto a baking sheet lined with parchment paper.
Repeat this process with the remaining phyllo and filling.
5. Bake the Spanakopita: Once all the spanakopita are assembled, brush the tops with any remaining melted butter.
Bake in the preheated oven for about 25-30 minutes, or until golden brown and crispy. Allow to cool slightly before slicing and serving.
Extra Tips: When working with phyllo pastry, it’s important to keep it covered with a damp cloth while you’re assembling the spanakopita to prevent it from drying out, which can make it brittle and difficult to work with.
Feel free to customize the filling by adding ingredients such as leeks, caramelized onions, or other herbs like parsley, depending on your taste preferences.
Spanakopita can also be made ahead of time—just assemble the pies and freeze them before baking; you can bake them directly from the freezer, adding a few extra minutes to the cooking time.
Enjoy your homemade spanakopita with a side of Greek yogurt or tzatziki for a revitalizing accompaniment!
Gigantes Plaki (Baked Giant Beans)

Gigantes Plaki is a traditional Greek dish that showcases the versatility and heartiness of giant white beans, known as “gigantes.” This comforting recipe is perfect for the winter months, as it combines the rich flavors of tomatoes, herbs, and olive oil, resulting in a dish that’s both warm and satisfying.
The beans are slow-baked until they’re tender and infused with aromatic flavors, making them an excellent choice for a cozy family dinner or a festive gathering.
This dish isn’t only delicious but also nutritious, as it’s packed with protein and fiber, making it a great vegetarian option. The combination of ingredients creates a delightful medley of textures and tastes, with the beans taking center stage.
Serve Gigantes Plaki with crusty bread for dipping or alongside a fresh Greek salad for a complete meal that will warm you from the inside out.
Ingredients (Serves 4-6):
- 1 cup dried gigante beans
- 1/4 cup olive oil
- 1 large onion, finely chopped
- 3 garlic cloves, minced
- 1 can (14 oz) crushed tomatoes
- 2 tablespoons tomato paste
- 1 teaspoon dried oregano
- 1 teaspoon dried dill
- 1/2 teaspoon salt
- 1/4 teaspoon black pepper
- 1/2 cup fresh parsley, chopped
- 1/2 cup feta cheese, crumbled (optional)
- 1 tablespoon lemon juice
Cooking Instructions:
- Soak the Beans: Start by rinsing the dried gigante beans under cold water. Place them in a large bowl and cover with water. Soak the beans overnight or for at least 8 hours to guarantee they soften and cook evenly.
- Preheat the Oven: Once the beans have soaked, preheat your oven to 350°F (175°C). This will guarantee that it reaches the right temperature while you prepare the rest of the ingredients.
- Cook the Beans: Drain the soaked beans and place them in a large pot. Cover them with fresh water, bring to a boil, then reduce the heat and let them simmer for about 30-40 minutes, or until they’re just tender but not fully cooked. Drain and set aside.
- Sauté the Aromatics: In a large skillet, heat the olive oil over medium heat. Add the chopped onion and sauté for about 5 minutes until it becomes translucent. Then, add the minced garlic and cook for an additional minute until fragrant.
- Create the Sauce: Stir in the crushed tomatoes, tomato paste, oregano, dill, salt, and black pepper. Let the mixture simmer for about 10 minutes, allowing the flavors to meld together.
- Combine and Bake: In a large baking dish, combine the partially cooked beans with the tomato sauce. Mix well, making sure the beans are evenly coated. Cover the dish with aluminum foil and place it in the preheated oven.
- Bake: Bake the beans for 45 minutes to 1 hour, or until the beans are tender and the sauce has thickened. Remove the foil in the last 15 minutes of baking to allow the top to caramelize slightly.
- Finish and Serve: Once baked, remove from the oven and stir in the lemon juice and chopped parsley. If desired, sprinkle with crumbled feta cheese for added flavor. Serve warm with crusty bread or alongside a fresh salad.
Extra Tips:
When preparing Gigantes Plaki, using high-quality olive oil can greatly enhance the flavor of the dish.
Additionally, if you prefer a smokier taste, you can add a pinch of smoked paprika to the sauce. For a more robust flavor, consider adding diced carrots or celery to the sautéed onions.
Ultimately, the dish can be made ahead of time and stored in the refrigerator, as the flavors continue to develop and deepen when reheated. Enjoy!
Kleftiko (Slow-Baked Lamb)

Kleftiko is a traditional Greek dish that boasts a rich history and a depth of flavor that warms the soul, making it a perfect addition to your cozy winter meals. The name “Kleftiko” translates to “stolen,” reflecting the way the dish was historically prepared by bandits who’d cook lamb in a sealed pot underground, allowing it to slow-cook to tender perfection. This method creates a delectable dish, infused with aromatic herbs and spices, all while keeping the lamb incredibly moist and flavorful.
The modern version of Kleftiko is typically made in a slow oven, where the lamb is wrapped in parchment paper or foil along with vegetables, herbs, and a splash of wine or lemon juice. The result is an irresistible meal that fills your home with mouthwatering aromas and provides a hearty feast for family and friends during the chilly winter months. Serve this dish with crusty bread or a side of roasted vegetables to soak up the delicious juices.
Ingredients (Serves 4-6):
- 2.5 to 3 pounds lamb shoulder, bone-in
- 4 cloves garlic, minced
- 2 tablespoons olive oil
- 2 tablespoons fresh lemon juice
- 2 teaspoons dried oregano
- 1 teaspoon dried thyme
- 1 teaspoon salt
- 1 teaspoon black pepper
- 1 large onion, sliced
- 2 large potatoes, peeled and cut into wedges
- 2 large carrots, peeled and cut into chunks
- 1 cup cherry tomatoes, halved
- 1 cup feta cheese, crumbled (optional)
- Fresh parsley for garnish (optional)
Cooking Instructions:
- Preheat the Oven: Start by preheating your oven to 325°F (160°C). A low and slow cooking temperature is crucial for achieving tender lamb that falls off the bone.
- Prepare the Marinade: In a large bowl, combine the minced garlic, olive oil, lemon juice, oregano, thyme, salt, and black pepper. Mix well to create a marinade that will infuse the lamb with flavor.
- Marinate the Lamb: Place the lamb shoulder in the bowl with the marinade, making certain that it’s evenly coated. Cover the bowl with plastic wrap and let it marinate in the refrigerator for at least 2 hours, or ideally overnight for maximum flavor.
- Layer the Vegetables: In a large roasting pan, arrange the sliced onions, potato wedges, carrot chunks, and cherry tomatoes in an even layer. These vegetables will soak up the delicious juices released by the lamb during cooking.
- Place the Lamb: Remove the lamb from the marinade and place it on top of the layered vegetables in the roasting pan. Pour any remaining marinade over the lamb.
- Seal the Dish: Cover the roasting pan tightly with aluminum foil or parchment paper to trap steam and ascertain that the lamb cooks evenly and stays moist.
- Bake: Place the covered roasting pan in the preheated oven and bake for about 3 to 4 hours, or until the lamb is fork-tender and the vegetables are soft. Check occasionally to ascertain the dish isn’t drying out, adding a splash of water if necessary.
- Serve: Once cooked, remove the pan from the oven and let it rest for about 10-15 minutes before uncovering. Garnish with crumbled feta cheese and fresh parsley, if desired, and serve warm with crusty bread or a side salad.
Extra Tips:
For an extra layer of flavor, consider adding a splash of white wine or chicken broth into the roasting pan before sealing it.
Additionally, feel free to customize the vegetables based on your preference; bell peppers, zucchini, or eggplant can also be great additions.
Remember to let the lamb rest after cooking, as this allows the juices to redistribute, making sure every bite is juicy and tender. Enjoy your Kleftiko with friends and family for a truly cozy winter dining experience!
Fasolada (Greek Bean Soup)

Fasolada, often referred to as the national dish of Greece, is a hearty and nutritious bean soup that perfectly embodies the cozy essence of Greek winter cuisine. This warm and comforting soup is rich in flavor, featuring a blend of vegetables and olive oil, making it not only satisfying but also healthy.
Traditionally, fasolada is made with simple ingredients that are staples in Greek households and is often enjoyed with crusty bread on the side. The beauty of fasolada lies in its versatility and the ability to customize it according to personal taste.
While the classic version uses white beans as the base, you can experiment with different types of beans or add extra vegetables to make it your own. This recipe is perfect for family gatherings or a cozy night in, as it serves 4-6 people, ensuring there’s plenty to go around.
Ingredients:
- 1 cup dried white beans (such as cannellini or navy beans)
- 1/4 cup extra virgin olive oil
- 1 large onion, chopped
- 2 carrots, diced
- 2 celery stalks, diced
- 3 cloves garlic, minced
- 1 can (14 ounces) crushed tomatoes
- 1 tablespoon tomato paste
- 1 teaspoon dried oregano
- 1 teaspoon dried thyme
- Salt and pepper to taste
- 6 cups vegetable broth or water
- Fresh parsley, chopped (for garnish)
- Lemon wedges (for serving)
Cooking Instructions:
- Prepare the Beans: Start by rinsing the dried white beans under cold water. Place them in a large pot, cover with plenty of water, and let them soak overnight. If you’re short on time, you can use the quick-soak method: bring the beans to a boil for 2 minutes, then remove from heat and let them sit for 1 hour.
- Cook the Beans: After soaking, drain the beans and return them to the pot. Cover them with fresh water and bring to a boil. Reduce the heat to low and simmer until the beans are tender, about 45 minutes to 1 hour. Drain and set aside.
- Sauté the Vegetables: In a large soup pot, heat the olive oil over medium heat. Add the chopped onion, carrots, and celery, and sauté for about 5-7 minutes until the vegetables are softened and the onion is translucent.
- Stir in the minced garlic and cook for an additional minute until fragrant.
- Add Tomatoes and Seasonings: Stir in the crushed tomatoes and tomato paste, followed by the dried oregano, thyme, salt, and pepper. Mix well to combine all ingredients and let it cook for about 5 minutes, allowing the flavors to meld.
- Combine with Broth and Beans: Pour in the vegetable broth (or water) and bring the mixture to a boil. Once boiling, reduce the heat to low and add the cooked beans.
- Simmer the soup for about 20-30 minutes, stirring occasionally. If the soup is too thick, add more broth or water to reach your desired consistency.
- Serve: Taste and adjust the seasoning if necessary. Ladle the fasolada into bowls and garnish with freshly chopped parsley. Serve with lemon wedges on the side for an extra burst of flavor.
Extra Tips:
For an extra depth of flavor, consider adding a bay leaf while simmering the soup, and remember to remove it before serving.
If you prefer a creamier texture, you can blend a portion of the soup using an immersion blender and then mix it back in. This dish can also be made ahead of time, as the flavors deepen and improve after a day in the fridge, making it a perfect candidate for meal prepping.
Enjoy your fasolada with a sprinkle of feta cheese on top for a delightful twist!
Souvlaki With Tzatziki

Souvlaki is one of Greece’s most beloved street foods, consisting of skewered and grilled meat that’s bursting with flavor. Traditionally made with pork, chicken, or lamb, this dish is perfect for cozy winter evenings, offering a delightful combination of smoky and savory notes.
Paired with invigorating tzatziki sauce, a yogurt-based dip with cucumbers and garlic, this meal isn’t only satisfying but also brings a taste of the Mediterranean to your home.
Cooking Souvlaki with Tzatziki is a straightforward process that can be enjoyed by both novice and experienced chefs. The marinade for the meat can be prepared ahead of time, allowing the flavors to meld beautifully. As you grill the skewers, the aroma will fill your kitchen, creating an inviting atmosphere.
Serve the dish with warm pita bread and a side of fresh salad for a complete meal that will warm your heart and soul during the winter months.
Ingredients (Serves 4-6):
- 1.5 lbs (680g) of boneless chicken thighs or pork loin, cut into 1-inch cubes
- 3 tablespoons olive oil
- 2 tablespoons red wine vinegar
- 2 teaspoons dried oregano
- 1 teaspoon salt
- 1 teaspoon black pepper
- 3 cloves garlic, minced
- 12 wooden or metal skewers (if using wooden skewers, soak in water for 30 minutes)
- 1 cup Greek yogurt
- 1 small cucumber, grated and drained
- 1 clove garlic, minced (for tzatziki)
- 1 tablespoon fresh dill, chopped (or 1 teaspoon dried dill)
- 1 tablespoon lemon juice
- Salt and pepper to taste
Cooking Instructions:
- Marinate the Meat: In a large mixing bowl, combine the olive oil, red wine vinegar, oregano, salt, pepper, and minced garlic. Add the cubed meat to the bowl and toss until well coated in the marinade. Cover and refrigerate for at least 1 hour, or ideally overnight, to allow the flavors to develop.
- Prepare the Tzatziki Sauce: In a separate bowl, mix the Greek yogurt, grated cucumber, minced garlic, dill, lemon juice, and a pinch of salt and pepper. Stir until well combined, then cover and refrigerate for at least 30 minutes to let the flavors meld.
- Preheat the Grill: Preheat your grill or grill pan over medium-high heat. If using an outdoor grill, verify that the grates are clean and lightly oiled to prevent sticking.
- Skewer the Meat: Thread the marinated meat onto the skewers, leaving a little space between each piece to allow for even cooking. If desired, you can add vegetables such as bell peppers or onions for additional flavor and nutrition.
- Grill the Souvlaki: Place the skewers on the preheated grill and cook for about 10-12 minutes, turning occasionally, until the meat is cooked through and has nice grill marks. The internal temperature should reach 165°F (75°C) for chicken or 145°F (63°C) for pork.
- Serve: Once cooked, remove the skewers from the grill and let them rest for a few minutes. Serve the souvlaki hot with a generous amount of tzatziki sauce on the side, along with warm pita bread and a fresh salad.
Extra Tips:
For the best flavor, make sure to marinate the meat for as long as possible—overnight is ideal.
You can also customize the skewers by adding vegetables or even swapping out the meat for tofu for a vegetarian option.
If you’re short on time, you can skip soaking the wooden skewers, but soaking helps prevent them from burning on the grill.
Finally, consider serving extra tzatziki on the side for dipping—it’s delicious with everything!
Choriatiki (Greek Village Salad)
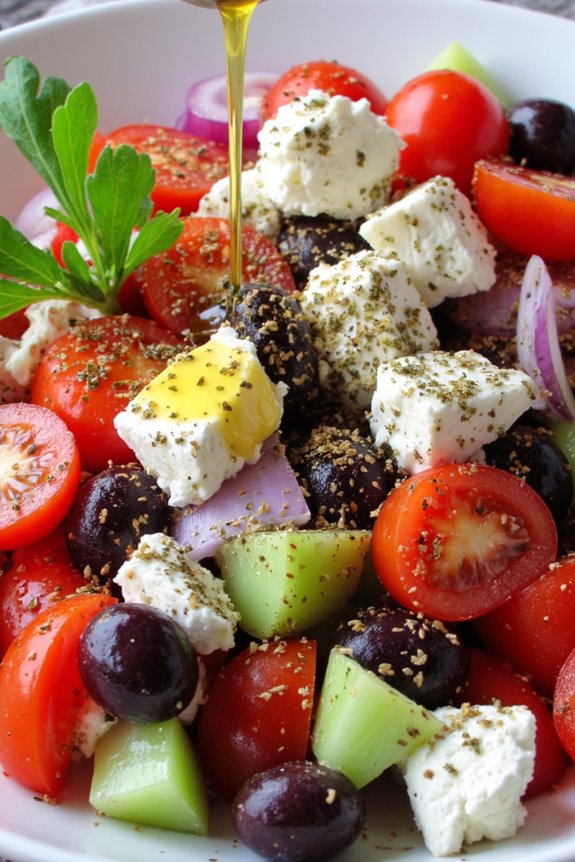
Choriatiki, or Greek Village Salad, is a vibrant and invigorating dish that captures the essence of traditional Greek cuisine. This salad isn’t only a feast for the eyes with its colorful ingredients, but it also embodies the rustic charm of Greek village life. Perfect for winter gatherings or as a light meal, Choriatiki combines the flavors of ripe tomatoes, crisp cucumbers, aromatic onions, and creamy feta cheese, all drizzled with rich extra virgin olive oil and a sprinkle of oregano.
It’s a dish that celebrates simplicity, using fresh, quality ingredients to create something truly delicious. In Greece, Choriatiki is often served as a side dish, but it can easily stand alone as a main course, especially when paired with crusty bread or grilled meats. It’s a dish that evokes a sense of warmth and nostalgia, reminding us of sunny days in the Mediterranean.
Whether you’re preparing for a cozy dinner at home or a festive gathering with friends, this salad is sure to impress with its bold flavors and delightful textures.
Ingredients (Serves 4-6)
- 4 medium ripe tomatoes, chopped
- 1 large cucumber, peeled and diced
- 1 medium red onion, thinly sliced
- 1 green bell pepper, chopped
- 200g feta cheese, crumbled or in blocks
- 100g Kalamata olives, pitted
- 4 tablespoons extra virgin olive oil
- 1 tablespoon red wine vinegar (optional)
- Salt and pepper, to taste
- 1 tablespoon dried oregano
- Fresh parsley, for garnish (optional)
Cooking Instructions
1. Prepare the Vegetables: Start by washing all your vegetables thoroughly. Chop the tomatoes into bite-sized pieces, making sure to remove any stems or hard parts. Peel the cucumber, slice it in half lengthwise, and then dice it into small pieces. Thinly slice the red onion and chop the green bell pepper into small pieces.
This variety of textures and colors will make your salad visually appealing and flavorful.
2. Combine Ingredients: In a large mixing bowl, add the chopped tomatoes, diced cucumber, sliced onions, and chopped bell pepper. Gently toss the vegetables together to mix them well. This will guarantee that every bite of the salad has a combination of the different flavors.
3. Add Olives and Feta: Next, add the Kalamata olives and the crumbled or block feta cheese to the bowl with the vegetables. If you use blocks of feta, you can break it into larger chunks to create a more rustic look. The olives add a briny flavor that complements the freshness of the vegetables.
4. Dress the Salad: In a small bowl, whisk together the extra virgin olive oil, red wine vinegar (if using), salt, pepper, and dried oregano. Drizzle this dressing over the salad, and gently toss everything together until the vegetables and feta are well coated with the dressing.
Be careful not to break the feta too much, as you want to retain some larger pieces for texture.
5. Serve and Garnish: Transfer the Choriatiki to a serving platter or bowl. If desired, sprinkle fresh parsley on top for added color and flavor. Serve immediately, or let it sit for a few minutes to allow the flavors to mingle before serving.
This salad can also be made ahead of time and stored in the refrigerator, allowing the flavors to blend even more.
Extra Tips
For the best flavor, use high-quality ingredients, especially the olive oil and feta cheese. If you can, seek out Greek feta for authenticity. Feel free to customize the salad by adding other ingredients such as capers or radishes, or by substituting the bell pepper with a different color for variety.
Choriatiki is versatile and can be served alongside grilled meats or as part of a mezze platter, making it a fantastic addition to any winter gathering. Enjoy the simplicity and freshness of this delightful Greek dish!
Karpatzopita (Greek Potato Pie)

Karpatzopita is a delightful and hearty Greek dish that showcases the comforting flavors of potatoes wrapped in layers of crispy phyllo dough. This traditional pie is especially popular during the colder months, providing warmth and nourishment to those who indulge in it. The combination of creamy potatoes, savory herbs, and flaky pastry creates a dish that isn’t only satisfying but also a true reflection of the rustic charm of Greek cuisine.
Preparing Karpatzopita may seem intimidating at first, but with a little patience and practice, you’ll find it to be an enjoyable endeavor. The key to this recipe lies in the perfect balance of textures—crispy on the outside, tender and fluffy on the inside. Serve it warm as a main course or as a side dish at your winter gatherings; it’s sure to impress your family and friends.
Ingredients (serving size: 4-6 people):
- 1 kg (2.2 lbs) potatoes, peeled and chopped
- 1 medium onion, finely chopped
- 3 tablespoons olive oil
- 1 teaspoon dried oregano
- Salt and pepper, to taste
- 200 g (7 oz) feta cheese, crumbled
- 1 packet (400 g) phyllo dough
- 100 g (3.5 oz) melted butter (for brushing)
- Fresh parsley, chopped (for garnish)
Cooking Instructions:
- Prepare the Potatoes: Begin by bringing a large pot of salted water to a boil. Add the peeled and chopped potatoes to the pot and cook until fork-tender, about 15-20 minutes. Once cooked, drain the potatoes and let them cool slightly before mashing them in a large mixing bowl.
- Sauté the Onions: In a skillet, heat 3 tablespoons of olive oil over medium heat. Add the finely chopped onion and sauté until translucent and fragrant, about 5 minutes. This step enhances the flavor of the pie, so make sure the onions are cooked well.
- Combine Ingredients: To the mashed potatoes, add the sautéed onions, dried oregano, salt, pepper, and crumbled feta cheese. Mix well until all ingredients are fully incorporated. Taste and adjust the seasoning if necessary.
- Prepare the Phyllo Dough: Preheat your oven to 180°C (350°F). Unroll the phyllo dough and lay it flat on a clean surface. Cover it with a damp cloth to prevent it from drying out. Take a large baking dish and brush it with melted butter.
- Layer the Phyllo: Place one sheet of phyllo dough in the baking dish and brush it with melted butter. Repeat this process with about 6-7 sheets, layering them on top of each other. Make sure that each sheet is well-buttered for best crispiness.
- Add the Filling: Spoon the potato mixture onto the layered phyllo, spreading it evenly across the surface.
- Top with Phyllo: Continue layering more sheets of phyllo on top of the filling, brushing each sheet with melted butter as you go. Use about 6-7 sheets again for the top layer, sealing in the filling.
- Bake: Once you have finished layering, tuck in the edges of the phyllo to seal the pie. Cut a few slits on top of the pie to allow steam to escape during baking. Place the dish in the preheated oven and bake for about 40-45 minutes or until the top is golden brown and crispy.
- Serve: Remove the Karpatzopita from the oven and let it cool for a few minutes before slicing. Garnish with chopped parsley before serving.
Extra Tips:
When making Karpatzopita, feel free to customize the filling by adding other ingredients such as spinach or herbs for additional flavor.
Make sure to handle the phyllo dough gently, as it can dry out quickly; keep it covered while working. If you’re short on time, you can also use store-bought potato filling to simplify the process.
Enjoy this comforting dish warm, and don’t hesitate to make a larger batch; it freezes well for future cozy meals!
Revani (Semolina Cake)

Revani is a delightful Greek dessert that captures the essence of winter warmth with its moist texture and aromatic flavors. Made primarily from semolina, this cake is soaked in a fragrant syrup, making it incredibly rich and satisfying. The combination of semolina and yogurt gives the cake a unique density that’s both light and indulgent, making it a perfect treat for cozy gatherings during the colder months.
This dessert is typically flavored with citrus, most often lemon or orange, adding a rejuvenating note that balances the sweetness of the syrup. Revani is often garnished with almonds or walnuts, giving it a lovely crunch that contrasts beautifully with its soft texture. So whether you’re looking to impress your guests or simply indulge in a sweet treat, Revani is sure to hit the spot.
Ingredients (Serves 4-6)
- 1 cup semolina
- 1 cup plain yogurt
- 1 cup sugar
- 1 cup milk
- 3 large eggs
- 1 teaspoon baking powder
- 1 teaspoon vanilla extract
- Zest of 1 lemon (or orange)
- 1/2 cup unsalted butter, melted
- 1/4 cup sliced almonds (for garnish)
Cooking Instructions
- Preheat the Oven: Begin by preheating your oven to 350°F (175°C). This guarantees that the cake will bake evenly and achieve the right texture as soon as it’s placed in the oven.
- Mix Dry Ingredients: In a large mixing bowl, combine the semolina, sugar, and baking powder. Mix well to guarantee the baking powder is evenly distributed throughout the semolina, which is vital for proper rising.
- Add Wet Ingredients: In another bowl, whisk together the eggs, yogurt, milk, melted butter, vanilla extract, and lemon zest. Gradually add this wet mixture into the dry ingredients, stirring gently until fully combined. Be careful not to overmix, as this can lead to a denser cake.
- Prepare Baking Dish: Grease a rectangular or square baking dish with butter or cooking spray. This will prevent the cake from sticking to the dish and make it easier to serve once baked.
- Pour and Bake: Pour the batter into the prepared baking dish, spreading it evenly. Place it in the preheated oven and bake for about 30-40 minutes, or until the top is golden brown and a toothpick inserted into the center comes out clean.
- Prepare Syrup: While the cake is baking, prepare the syrup. In a saucepan, combine 1 cup of sugar, 1 cup of water, and the juice of the lemon (or orange) zest. Bring to a boil, then reduce the heat and let it simmer for about 10 minutes until slightly thickened.
- Soak the Cake: Once the cake is done baking, remove it from the oven and immediately pour the hot syrup over the cake. Allow the syrup to soak in for at least 30 minutes before slicing, as this will enhance the flavor and moisture of the cake.
- Garnish and Serve: Once the cake has absorbed the syrup, cut it into squares or diamond shapes. Garnish with sliced almonds on top for added texture and flavor. Serve warm or at room temperature.
Extra Tips
When preparing Revani, it’s important to let the cake soak in the syrup for an adequate amount of time to achieve the desired moistness. If you prefer a richer flavor, consider adding a splash of orange blossom water or rosewater to the syrup for an aromatic twist.
Additionally, Revani can be stored in an airtight container at room temperature for several days, making it a perfect make-ahead dessert for festive occasions or cozy winter evenings. Enjoy your homemade Revani with a cup of hot tea or coffee for a truly comforting experience!
Baklava

Baklava is a delightful and indulgent dessert that has captured the hearts and taste buds of many around the world, especially during the colder months. This rich pastry, filled with layers of finely chopped nuts and sweetened with honey or syrup, embodies the essence of Greek winter comfort food. Traditionally enjoyed with family and friends, baklava not only satisfies your sweet tooth but also brings a touch of warmth to any gathering.
Making baklava at home may seem overwhelming, but with the right ingredients and a bit of patience, you can create a luscious dessert that rivals those found in the finest Greek bakeries. The flaky layers of phyllo dough, combined with a mixture of nuts and spices, create a symphony of textures and flavors. Once baked to a golden perfection and soaked in a fragrant syrup, this dessert is sure to become a staple in your winter cooking repertoire.
Ingredients (serving size: 4-6 people):
- 1 package of phyllo dough (16 oz), thawed
- 1 cup unsalted butter, melted
- 2 cups walnuts, finely chopped
- 1 cup almonds, finely chopped
- 1 teaspoon ground cinnamon
- 1 cup granulated sugar
- 1 cup water
- 1 cup honey
- 1 teaspoon vanilla extract
- 1 tablespoon lemon juice
Cooking Instructions:
- Preheat the Oven: Begin by preheating your oven to 350°F (175°C). This guarantees that the baklava will bake evenly and achieve that perfect golden-brown color.
- Prepare the Nut Filling: In a mixing bowl, combine the finely chopped walnuts and almonds with the ground cinnamon. Mix well until the nuts are evenly coated with the spice. Set aside the mixture for later use.
- Layer the Phyllo Dough: Take the thawed phyllo dough and carefully unroll it. Keep the dough covered with a damp cloth to prevent it from drying out. In a greased 9×13 inch baking dish, lay down the first sheet of phyllo, brushing it generously with melted butter. Repeat this process, layering about 8 sheets of phyllo, brushing each with butter.
- Add the Nut Mixture: Once you have the base layers of phyllo, sprinkle a thin layer of the nut mixture over the buttered phyllo. Spread it evenly across the surface.
- Continue Layering: Add another 4-5 sheets of phyllo on top of the nut layer, again brushing each sheet with melted butter. Follow this with another layer of the nut mixture. Repeat these steps, alternating layers of phyllo and nuts, until all the filling is used up, finishing with about 8 layers of phyllo on top.
- Cut the Baklava: Before baking, use a sharp knife to cut the baklava into diamond or square shapes. This will make it easier to serve after baking.
- Bake: Place the baklava in the preheated oven and bake for about 45-50 minutes, or until the top is golden brown and crisp.
- Prepare the Syrup: While the baklava is baking, combine the sugar, water, honey, vanilla extract, and lemon juice in a saucepan. Bring to a boil over medium heat, stirring until the sugar dissolves. Reduce the heat and let it simmer for about 10 minutes, then remove from heat and allow it to cool.
- Soak the Baklava: Once the baklava is done baking, immediately pour the cooled syrup over the hot pastry. Make sure to cover it evenly and let it soak for several hours or overnight for best flavor.
Extra Tips:
When preparing baklava, be sure to keep the phyllo dough covered while you work, as it can dry out quickly. Additionally, feel free to experiment with different nuts such as pistachios or hazelnuts, or adjust the sweetness of the syrup to your taste.
Letting the baklava sit overnight allows the flavors to meld beautifully, making it even more delicious when served the next day. Enjoy your homemade baklava with a cup of Greek coffee for a truly authentic experience!