

I’ve always been a fan of desserts that satisfy my sweet tooth without the guilt, and Greek yogurt is a game changer. Its creamy texture and rich flavor make it perfect for creating light treats that are both delicious and nutritious. From parfaits bursting with fresh berries to indulgent chocolate mousse, there’s something for every palate. Let’s explore some delightful recipes that will elevate your dessert game while keeping things healthy. You won’t want to miss these!
Greek Yogurt Parfait With Fresh Berries
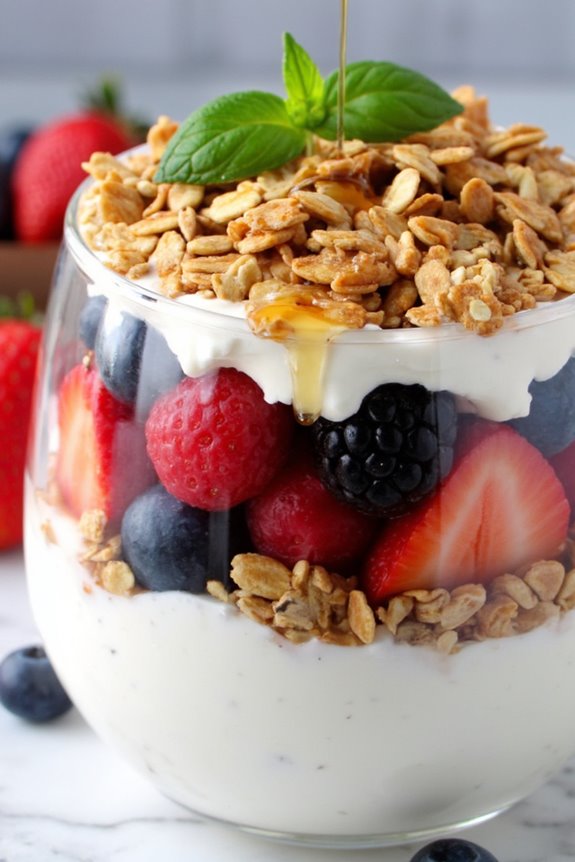
Greek Yogurt Parfait With Fresh Berries is a delicious and nutritious dessert that showcases the creamy texture of Greek yogurt combined with the sweetness of fresh fruits. This delightful treat is perfect for any occasion, whether you’re entertaining guests or simply indulging in a healthy snack.
The layers of yogurt, berries, and crunchy granola create a beautiful presentation that’s as pleasing to the eye as it’s to the palate. Not only is this dessert easy to prepare, but it also offers a wealth of nutritional benefits thanks to the high protein content of Greek yogurt and the antioxidants found in fresh berries.
You can customize your parfait by using different types of berries or even adding a drizzle of honey or maple syrup for extra sweetness. This recipe serves 4-6 people, making it ideal for sharing or enjoying throughout the week.
Ingredients:
- 4 cups Greek yogurt (plain or flavored)
- 2 cups mixed fresh berries (strawberries, blueberries, raspberries, blackberries)
- 1 cup granola
- 2 tablespoons honey (optional)
- Fresh mint leaves for garnish (optional)
Instructions:
- Prepare the Berries: Start by washing your mixed berries thoroughly under cold water. For strawberries, remove the green tops and slice them into smaller pieces to match the size of the other berries. Set the berries aside to dry on a paper towel.
- Choose Your Serving Glasses: Select clear glasses or bowls for serving, as this will allow the layers of the parfait to be visible. Depending on the size of your glasses, you may need to adjust the number of servings.
- Layer the Ingredients: Begin by adding a generous scoop of Greek yogurt to the bottom of each glass. Use a spoon to spread it evenly across the base. This will be the first layer of your parfait.
- Add the Berries: Next, add a layer of your mixed fresh berries on top of the yogurt. You can mix and match the berries as desired to create a colorful and vibrant layer.
- Sprinkle Granola: After the berries, sprinkle a layer of granola over the fruit. This will add a delightful crunch to your parfait, providing a contrast to the creamy yogurt and juicy berries.
- Repeat the Layers: Repeat the layering process by adding another scoop of yogurt, followed by more berries and granola, until the glasses are filled to your desired height. Aim for at least two layers to create a visually appealing parfait.
- Drizzle with Honey (Optional): If you prefer added sweetness, drizzle a small amount of honey over the top layer of your parfait. This step is optional, and you can adjust the sweetness to your liking.
- Garnish and Serve: Finish by garnishing your parfaits with fresh mint leaves for an added touch of color and flavor. Serve immediately, or refrigerate for up to an hour before serving to allow the flavors to meld.
Extra Tips: When preparing your Greek Yogurt Parfait, feel free to experiment with different toppings and flavors. You can add nuts, seeds, or even a sprinkle of cinnamon for added flavor.
If you want to prepare the parfait in advance, layer the yogurt and berries, but add the granola just before serving to maintain its crunchiness. This dessert is versatile and can be adapted to suit your taste preferences, making it a favorite for any occasion!
Chocolate Greek Yogurt Mousse
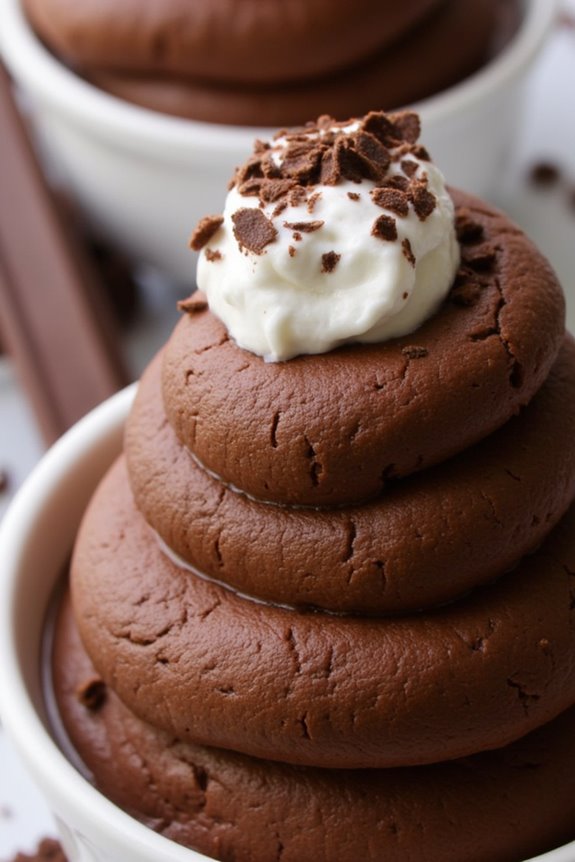
Indulging in a rich and creamy dessert doesn’t have to derail your healthy eating habits, and that’s where Chocolate Greek Yogurt Mousse comes in. This decadent treat combines the lusciousness of chocolate with the protein-packed goodness of Greek yogurt, making it a guilt-free option for chocolate lovers.
It’s perfect for a dinner party, a romantic evening, or simply when you want to satisfy your sweet tooth without compromising on health. Not only is this mousse incredibly simple to prepare, but it also requires minimal ingredients that you likely already have in your pantry.
With its smooth texture and rich flavor, this dessert will impress your guests and leave them guessing how it can be both delicious and nutritious. So, gather your ingredients and get ready to whip up this delightful Chocolate Greek Yogurt Mousse!
Ingredients (Serves 4-6):
- 2 cups plain Greek yogurt
- 1/2 cup unsweetened cocoa powder
- 1/2 cup honey or maple syrup
- 1 teaspoon vanilla extract
- 1/4 teaspoon salt
- 1/2 cup dark chocolate chips (melted)
- Whipped cream or chocolate shavings for garnish (optional)
Instructions:
- Melt the Chocolate: Start by melting the dark chocolate chips in a microwave-safe bowl. Heat them in the microwave in 30-second intervals, stirring in between, until the chocolate is fully melted and smooth. Allow it to cool slightly before using.
- Combine the Ingredients: In a large mixing bowl, combine the Greek yogurt, unsweetened cocoa powder, honey or maple syrup, vanilla extract, and salt. Use a whisk or a hand mixer to blend these ingredients until smooth and creamy. Make sure there are no lumps from the cocoa powder.
- Add the Melted Chocolate: Once the yogurt mixture is smooth, gently fold in the melted chocolate using a spatula. Be careful not to over-mix; you want to maintain the airiness of the yogurt while fully incorporating the chocolate flavor.
- Chill the Mousse: Transfer the mousse into serving dishes or ramekins. Cover them with plastic wrap or lids and refrigerate for at least 1-2 hours to allow the mousse to set and the flavors to meld together.
- Serve and Garnish: Once the mousse is chilled and set, remove it from the refrigerator. If desired, top each serving with a dollop of whipped cream or sprinkle with chocolate shavings for a beautiful presentation.
Extra Tips:
For an extra layer of flavor, consider adding a pinch of espresso powder to the mixture; it enhances the chocolate taste remarkably.
You can also experiment with different sweeteners according to your preference, such as agave syrup or stevia for a low-calorie option. This mousse can be stored in the refrigerator for up to three days, making it a great make-ahead dessert. Enjoy your deliciously healthy treat!
Lemon Greek Yogurt Tart
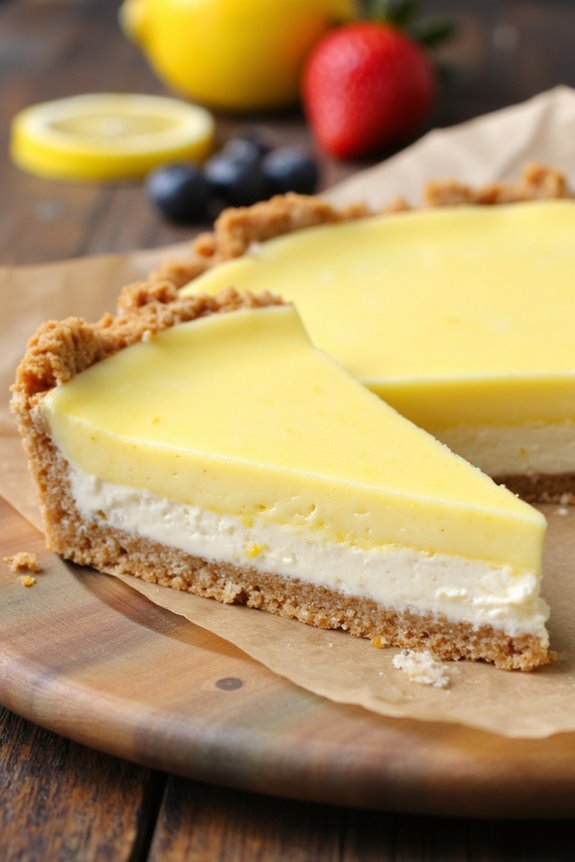
A Lemon Greek Yogurt Tart is a delightful dessert that combines the creamy richness of Greek yogurt with the invigorating zest of lemons. This tart is perfect for any occasion, whether it’s a summer gathering or a festive dinner party.
The combination of tangy lemon and the smooth texture of yogurt creates a light and invigorating dessert that’s sure to impress your guests. It’s also relatively simple to make, with a buttery crust that complements the filling beautifully.
The lightness of the Greek yogurt makes this tart less heavy than traditional cheesecakes, allowing the bright lemon flavor to shine through. This recipe isn’t only delicious but also a healthier alternative to many desserts, making it a favorite for those looking to indulge without the guilt.
Serve it chilled, garnished with fresh berries or a sprinkle of lemon zest for an extra touch of elegance.
Ingredients (serving size: 4-6 people)
- 1 ½ cups graham cracker crumbs
- ½ cup unsalted butter, melted
- ¼ cup granulated sugar
- 2 cups plain Greek yogurt
- 1 cup powdered sugar
- ¼ cup fresh lemon juice
- 2 tablespoons lemon zest
- 1 teaspoon vanilla extract
- 2 large eggs
Cooking Instructions
- Preheat the Oven: Begin by preheating your oven to 350°F (175°C). This allows the oven to reach the right temperature for baking the crust while you prepare the other components of the tart.
- Prepare the Crust: In a mixing bowl, combine the graham cracker crumbs, melted butter, and granulated sugar. Stir until the mixture resembles wet sand. Press this mixture firmly into the bottom and up the sides of a tart pan to form a crust. Make sure it’s evenly distributed to guarantee a consistent bake.
- Bake the Crust: Place the prepared crust in the preheated oven and bake for 8-10 minutes, or until it’s lightly golden. Remove from the oven and allow it to cool to room temperature. This step is essential for achieving a crisp crust that holds its shape when filled.
- Make the Filling: In a large mixing bowl, whisk together the Greek yogurt, powdered sugar, fresh lemon juice, lemon zest, vanilla extract, and eggs until smooth and well combined. This mixture will create a creamy filling with a perfect balance of sweetness and tartness.
- Fill the Crust: Once the crust has cooled, pour the lemon yogurt filling into the crust, spreading it evenly. Tap the pan gently on the counter to remove any air bubbles that may have formed.
- Bake the Tart: Return the tart to the oven and bake for 25-30 minutes, or until the filling is set and the top is slightly golden. The filling should have a slight jiggle in the center, which will firm up as it cools.
- Cool and Chill: Once baked, remove the tart from the oven and allow it to cool at room temperature for about 30 minutes. Then, refrigerate for at least 2 hours, or until fully chilled. This cooling step helps the flavors meld together beautifully and makes for an invigorating dessert.
Extra Tips
To enhance the flavor of your Lemon Greek Yogurt Tart, consider adding a layer of fresh fruit on top before serving, such as blueberries or strawberries, for an extra burst of color and taste.
If you prefer a more intense lemon flavor, you can increase the amount of lemon zest in the filling. Additionally, make sure to use fresh lemon juice for the best flavor; bottled juice can sometimes lack the brightness and freshness of freshly squeezed lemons.
Enjoy your tart with a dollop of whipped cream or a sprinkle of mint for an added touch!
Strawberry Banana Greek Yogurt Smoothie
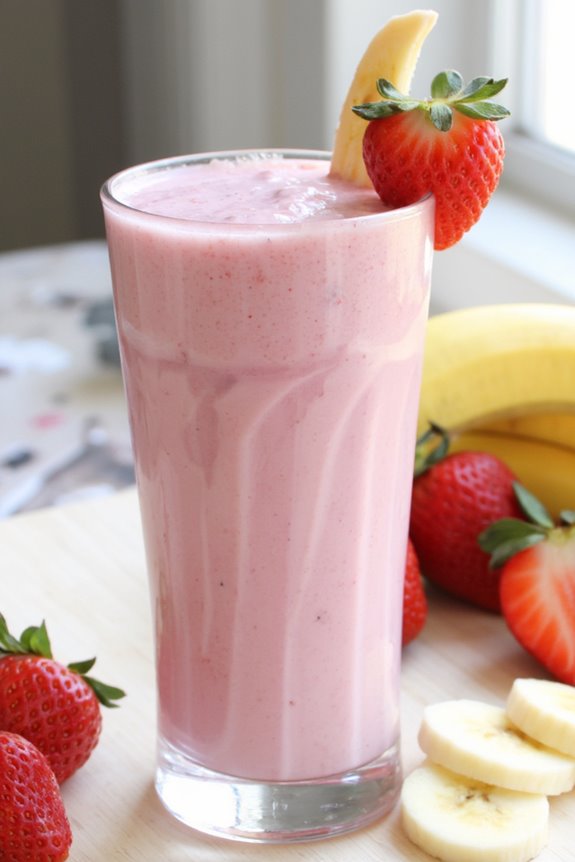
Indulging in a Strawberry Banana Greek Yogurt Smoothie is a delicious way to enjoy a healthy treat that’s both invigorating and satisfying. This creamy and fruity smoothie combines the natural sweetness of ripe strawberries and bananas with the rich, tangy flavor of Greek yogurt, making it an excellent option for breakfast, a snack, or even dessert.
Packed with protein, fiber, and essential nutrients, this smoothie isn’t only tasty but also nourishing, perfect for any time of the day.
Making this smoothie is incredibly quick and easy, requiring just a handful of ingredients that you likely already have in your kitchen. You can customize the recipe by adding your favorite mix-ins, such as spinach for an extra nutrient boost or honey for additional sweetness.
This recipe yields 4-6 servings, making it ideal for sharing with family and friends or for meal prepping throughout the week.
Ingredients
- 2 cups fresh strawberries, hulled and sliced
- 2 ripe bananas, peeled and sliced
- 2 cups Greek yogurt (plain or vanilla)
- 1 cup milk (dairy or non-dairy)
- 2 tablespoons honey or maple syrup (optional)
- 1 teaspoon vanilla extract (optional)
- Ice cubes (optional, for a thicker consistency)
Instructions
- Prepare the Ingredients: Begin by washing the strawberries thoroughly under running water. Remove the green tops (hulls) and slice them into smaller pieces to make blending easier. Peel the bananas and slice them as well. Having all your ingredients prepped will streamline the blending process.
- Combine Ingredients in Blender: In a blender, add the sliced strawberries, sliced bananas, Greek yogurt, and milk. If you prefer a sweeter smoothie, add honey or maple syrup according to your taste. For additional flavor, include the vanilla extract.
- Blend Until Smooth: Secure the lid on the blender and blend the mixture on high speed until smooth and creamy. This should take about 30-60 seconds. If you desire a thicker consistency, add a few ice cubes and blend again until the desired thickness is reached.
- Taste and Adjust: After blending, taste the smoothie to see if it meets your sweetness preference. If you’d like it sweeter, add more honey or maple syrup and blend for a few more seconds.
- Serve and Enjoy: Pour the smoothie into glasses and serve immediately. You can garnish with a slice of strawberry or banana on the rim of the glass for a decorative touch. Enjoy this invigorating and nutritious drink!
Extra Tips
For an added nutritional boost, consider incorporating a handful of spinach or kale into the smoothie; the flavors of the fruits will mask the taste of the greens.
Additionally, you can substitute the milk with almond milk, coconut milk, or any other non-dairy milk to cater to dietary preferences. This smoothie is versatile, so feel free to experiment with different fruits like blueberries or mangoes for a unique twist.
Greek Yogurt Cheesecake Cups
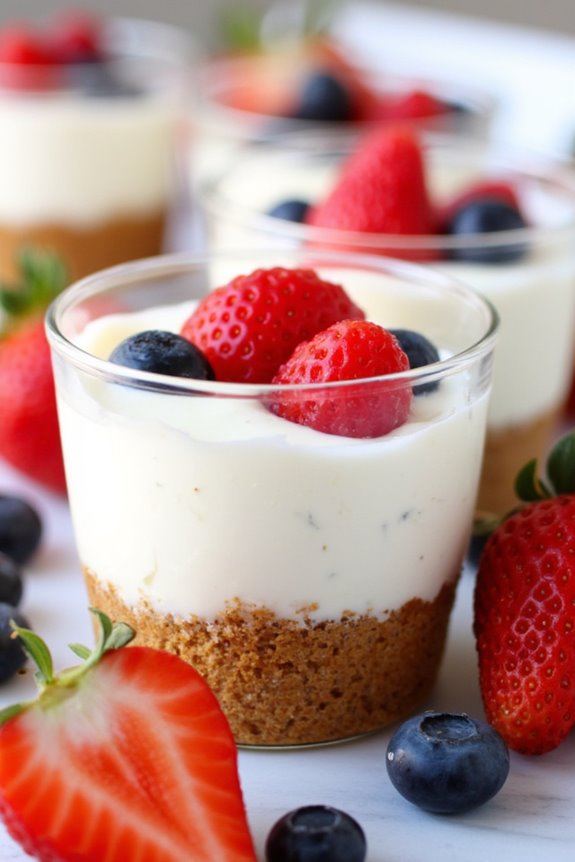
Indulging in a rich and creamy cheesecake is a delightful experience, but traditional recipes can often be heavy and high in calories. Enter Greek Yogurt Cheesecake Cups – a lighter and healthier twist on the classic dessert that retains all the flavor while packing in protein and probiotics.
These individual servings aren’t only easy to prepare, but they also make for an elegant presentation at any gathering. With a smooth, velvety texture and a hint of sweetness, these cheesecake cups are sure to impress your family and friends.
The best part about these Greek Yogurt Cheesecake Cups is their versatility. You can customize the flavors to your liking by adding different extracts, toppings, or even fruit purees. Whether you’re hosting a dinner party, celebrating a special occasion, or simply craving a sweet treat, these cups are the perfect solution.
They can be made ahead of time and stored in the fridge, allowing the flavors to meld beautifully. Let’s plunge into this delicious dessert recipe!
Ingredients (Serves 4-6):
- 2 cups Greek yogurt (plain, full-fat or low-fat)
- 8 oz cream cheese (softened)
- 1/2 cup granulated sugar
- 1 teaspoon vanilla extract
- 1 tablespoon lemon juice
- 1/4 cup heavy cream (optional for added richness)
- 1 cup graham cracker crumbs
- 1/4 cup unsalted butter (melted)
- Fresh fruit or fruit compote for topping (optional)
Instructions:
1. Prepare the Base: In a medium-sized bowl, combine the graham cracker crumbs and melted butter. Mix well until the crumbs are evenly coated. This mixture will form the base of your cheesecake cups.
Divide the crumb mixture evenly among your serving cups, pressing it down firmly to create a solid layer. Set aside.
2. Make the Cheesecake Filling****: In a large mixing bowl, beat the softened cream cheese until smooth using an electric mixer. Add the Greek yogurt, granulated sugar, vanilla extract, and lemon juice.
Mix until well combined and creamy. If you want a richer filling, you can also add the heavy cream at this stage, mixing until fully incorporated.
3. Assemble the Cups: Spoon the cheesecake filling over the graham cracker base in each cup. Use a spatula to smooth the tops for an even presentation.
You can fill the cups as high as you like, but leave a little space at the top for any toppings you may want to add later.
4. Chill the Cups: Cover the cups with plastic wrap or a lid and refrigerate for at least 2-4 hours, or overnight if possible.
Chilling allows the flavors to meld and the cheesecake to set properly, resulting in a firmer texture.
5. Serve with Toppings: When ready to serve, remove the cheesecake cups from the fridge. You can top them with fresh fruit, fruit compote, or even a drizzle of chocolate or caramel sauce for added flavor and decoration.
Enjoy your delicious Greek Yogurt Cheesecake Cups!
Extra Tips:
For an extra layer of flavor, consider adding a pinch of cinnamon or a splash of almond extract to the cheesecake filling.
If you prefer a no-bake version, feel free to skip the heavy cream. Additionally, these cups can be stored in the refrigerator for up to 3 days, making them an excellent make-ahead option for busy weeks or special occasions.
Just be sure to add any toppings right before serving to maintain their freshness. Enjoy your healthier dessert!
Honey Almond Greek Yogurt Bark
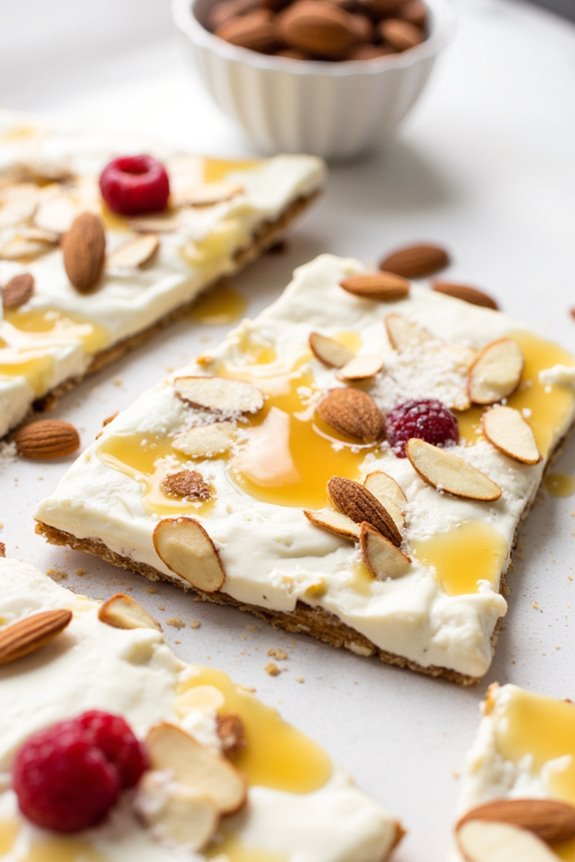
Honey Almond Greek Yogurt Bark is a delicious and healthy dessert option that combines the creamy texture of Greek yogurt with the natural sweetness of honey and the crunch of almonds. This easy-to-make bark isn’t only a treat for your taste buds but also packed with protein and beneficial nutrients.
Whether you’re looking for a light dessert after dinner or a wholesome snack during the day, this recipe will satisfy your cravings without the guilt.
The beauty of this Greek yogurt bark lies in its simplicity and versatility. You can customize it by adding other toppings such as berries, dried fruits, or seeds, making it a delightful choice for various occasions, from family gatherings to a quiet night in.
The combination of flavors and textures will leave everyone reaching for more, guaranteeing this dessert becomes a favorite in your home.
Ingredients (Serves 4-6):
- 2 cups plain Greek yogurt
- 3 tablespoons honey (plus more for drizzling)
- 1 teaspoon vanilla extract
- 1/2 cup sliced almonds
- Pinch of salt
- Optional toppings: fresh berries, shredded coconut, or dark chocolate chips
Cooking Instructions:
- Prepare the Yogurt Mixture: In a mixing bowl, combine the Greek yogurt, honey, vanilla extract, and a pinch of salt. Use a whisk or a spatula to mix until the ingredients are well combined and the mixture is smooth. This will create a sweet and creamy base for your bark.
- Line the Baking Sheet: Take a baking sheet and line it with parchment paper. This step is vital as it prevents the yogurt from sticking to the sheet, making it easy to remove once frozen.
- Spread the Mixture: Pour the yogurt mixture onto the prepared baking sheet. Use a spatula to spread it evenly into a rectangle or square shape, about 1/4 inch thick. Confirm the surface is smooth and uniform for even freezing.
- Add Toppings: Sprinkle the sliced almonds evenly over the surface of the yogurt mixture. If you’re using any optional toppings, add them at this stage. Press the toppings gently into the yogurt to help them adhere.
- Freeze: Place the baking sheet in the freezer and allow the yogurt bark to freeze for at least 4 hours, or until it’s completely solid. This step is critical for achieving the right texture.
- Break into Pieces: Once frozen, remove the baking sheet from the freezer. Lift the yogurt bark off the parchment paper and break it into pieces of your desired size. You can use your hands or a knife to achieve this.
- Drizzle with Honey (Optional): For an extra touch of sweetness, drizzle a little honey over the broken pieces before serving. This step adds a beautiful finish and enhances the flavor.
Extra Tips:
When making Honey Almond Greek Yogurt Bark, feel free to experiment with different toppings to suit your taste preferences. You can mix in some peanut butter or almond butter into the yogurt for an added flavor boost or even use flavored Greek yogurt for a fun twist.
Additionally, make sure to store any leftover bark in an airtight container in the freezer to maintain its texture and freshness. Enjoy your healthy and delicious treat!
Matcha Green Tea Greek Yogurt Pudding
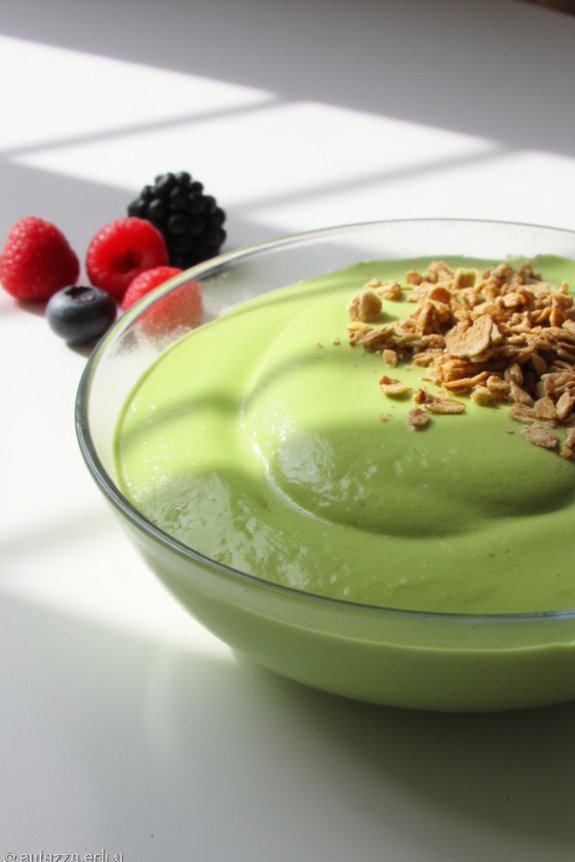
If you’re looking for a dessert that’s not only delicious but also packed with health benefits, Matcha Green Tea Greek Yogurt Pudding is the perfect choice. This dessert combines the creamy texture of Greek yogurt with the unique flavor of matcha green tea, making it both a treat for the taste buds and a nutritious option.
Matcha is known for its rich antioxidants and metabolism-boosting properties, and when combined with Greek yogurt, it creates a delightful pudding that’s both satisfying and guilt-free.
This pudding is incredibly easy to prepare and can be enjoyed as a snack or served as a fancy dessert at your next gathering. The vibrant green color of matcha adds an appealing aesthetic to the dish, and its subtle earthy flavor complements the creamy yogurt beautifully.
Whether you’re a matcha enthusiast or trying it for the first time, this recipe is sure to impress!
Ingredients (Serves 4-6):
- 2 cups plain Greek yogurt
- 1/4 cup honey or maple syrup
- 2 tablespoons matcha green tea powder
- 1 teaspoon vanilla extract
- 1/2 cup milk (dairy or non-dairy)
- A pinch of salt
- Optional toppings: fresh berries, granola, or nuts
Cooking Instructions:
- Combine the Yogurt and Sweetener: In a large mixing bowl, add the plain Greek yogurt and honey (or maple syrup). Use a whisk to blend them together until smooth and creamy. This will be the base of your pudding and will provide the sweetness needed to balance the matcha flavor.
- Incorporate the Matcha: Add the matcha green tea powder to the yogurt mixture. Using the whisk, mix well until the matcha is fully incorporated and there are no lumps. The vibrant green color should be uniform throughout the mixture.
- Add Vanilla and Milk: Pour in the vanilla extract and milk. Continue to whisk until everything is well combined. The milk helps to achieve a smoother, pudding-like consistency, so adjust the amount of milk as needed to reach your desired thickness.
- Season with Salt: Sprinkle in a pinch of salt to enhance the flavors. Stir the mixture again to verify the salt is evenly distributed.
- Chill the Pudding: Transfer the mixture into individual serving bowls or cups. Cover them with plastic wrap or lids and place them in the refrigerator to chill for at least 1-2 hours. This allows the flavors to meld and the pudding to firm up slightly.
- Serve with Toppings: Once chilled, remove the pudding from the refrigerator. Top each serving with your choice of fresh berries, granola, or nuts for added texture and flavor. Enjoy your Matcha Green Tea Greek Yogurt Pudding!
Extra Tips:
When preparing Matcha Green Tea Greek Yogurt Pudding, it’s crucial to use high-quality matcha to achieve the best flavor and health benefits.
You can adjust the sweetness according to your preference by adding more or less honey or maple syrup. For a creamier texture, consider using full-fat Greek yogurt.
Additionally, if you’re not a fan of matcha, feel free to experiment with other flavors, such as cocoa powder or fruit purees, to create your own unique pudding variations!
Peanut Butter Greek Yogurt Dip

Peanut Butter Greek Yogurt Dip is a delicious and healthy dessert option that combines the creamy texture of Greek yogurt with the rich flavor of peanut butter. This dip is perfect for fruit, crackers, or even drizzling over desserts like pancakes or waffles.
It’s simple to make and offers a delightful balance of protein and sweetness, making it an ideal treat for gatherings or a nutritious snack for yourself.
This dip isn’t only easy to prepare but also customizable. You can adjust the sweetness by varying the amount of honey or maple syrup you use, or even add in your favorite mix-ins such as chocolate chips or chopped nuts.
Whether you’re entertaining guests or simply indulging on your own, Peanut Butter Greek Yogurt Dip is sure to please!
Ingredients (Serves 4-6)
- 1 cup plain Greek yogurt
- 1/2 cup creamy peanut butter
- 1/4 cup honey or maple syrup
- 1 teaspoon vanilla extract
- A pinch of salt
- Fresh fruit (such as apple slices, banana, or strawberries) for dipping
Instructions
- Combine the Ingredients: In a medium-sized mixing bowl, add the plain Greek yogurt, creamy peanut butter, honey or maple syrup, vanilla extract, and a pinch of salt. Make sure to use a bowl that’s large enough to comfortably mix all the ingredients without spilling.
- Mix Well: Using a whisk or a hand mixer, blend the ingredients together until they’re fully incorporated and smooth. This should take about 2-3 minutes. Make sure there are no lumps of peanut butter or yogurt left in the mixture.
- Taste and Adjust: Once the dip is smooth, taste it to see if you’d like to adjust the sweetness. If you prefer a sweeter dip, you can add a bit more honey or maple syrup, mixing it in thoroughly.
- Chill (Optional): For an extra cool dip, cover the bowl with plastic wrap or a lid and refrigerate for about 30 minutes before serving. This allows the flavors to meld together and gives the dip a cooler texture.
- Serve: Transfer the dip to a serving bowl and arrange fresh fruits or other dipping options around it. Enjoy immediately, or keep it stored in the refrigerator for up to 3 days.
Extra Tips
When making Peanut Butter Greek Yogurt Dip, feel free to experiment with different nut butters for varied flavors, such as almond or cashew butter.
Additionally, consider adding toppings like granola, chocolate chips, or shredded coconut for extra texture and flavor. Always store any leftovers in an airtight container in the fridge to maintain freshness.
Raspberry Greek Yogurt Ice Cream
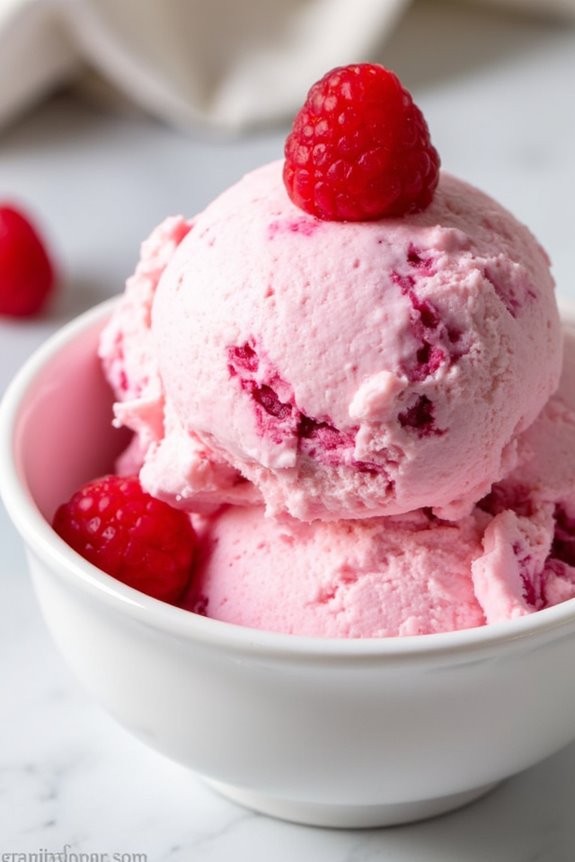
Indulge in a revitalizing and creamy treat with this delightful Raspberry Greek Yogurt Ice Cream. This recipe combines the tanginess of Greek yogurt with the sweetness of ripe raspberries, resulting in a delicious dessert that’s both satisfying and guilt-free. Perfect for warm summer days or as a light after-dinner option, this ice cream is easy to make and can be enjoyed by the whole family.
Plus, with the health benefits of Greek yogurt, you can feel good about treating yourself.
Making Raspberry Greek Yogurt Ice Cream is a straightforward process that requires minimal ingredients and equipment. You can whip this up in no time using a blender or food processor, and then simply freeze it until it reaches the perfect creamy consistency.
This ice cream isn’t only a fantastic way to use fresh raspberries, but it also provides a creamy texture that rivals traditional ice cream, all while being lower in fat and calories.
Ingredients (Serves 4-6):
- 2 cups of fresh raspberries
- 1 cup of plain Greek yogurt
- 1 cup of heavy cream
- 1/2 cup of honey or maple syrup (adjust based on sweetness preference)
- 1 teaspoon of vanilla extract
- A pinch of salt
Instructions:
- Prepare the Raspberries: Start by washing the fresh raspberries thoroughly under cool water. Once cleaned, gently pat them dry with a paper towel. Set aside a few raspberries for garnishing the ice cream later, if desired.
- Blend the Ingredients: In a blender or food processor, combine the fresh raspberries, Greek yogurt, heavy cream, honey (or maple syrup), vanilla extract, and a pinch of salt. Blend until the mixture is smooth and creamy. You can adjust the sweetness by adding more honey or maple syrup, depending on your taste.
- Strain (Optional): If you prefer a smoother ice cream without raspberry seeds, you can strain the blended mixture through a fine mesh sieve into a mixing bowl. Use a spatula to push the mixture through, discarding the seeds left behind.
- Chill the Mixture: Once blended and strained (if necessary), cover the bowl with plastic wrap and place it in the refrigerator for about 30 minutes. This step allows the flavors to meld together and guarantees a smoother texture.
- Churn the Ice Cream: After chilling, pour the mixture into an ice cream maker and churn according to the manufacturer’s instructions. This usually takes about 20-25 minutes. If you don’t have an ice cream maker, you can pour the mixture into a shallow container and freeze it, stirring every 30 minutes until it reaches the desired consistency.
- Freeze Until Firm: After churning, transfer the ice cream into an airtight container and smooth the top with a spatula. Cover the container and freeze for at least 2-3 hours, or until the ice cream is firm enough to scoop.
- Serve: Once the ice cream is fully set, scoop it into bowls or cones, and garnish with the reserved raspberries if desired. Enjoy your homemade Raspberry Greek Yogurt Ice Cream!
Extra Tips:
For a unique twist on this recipe, consider adding other fruits like strawberries or blueberries to the blend for a mixed berry flavor.
You can also mix in some dark chocolate chunks or nuts for added texture. If you find the ice cream too hard after freezing, let it sit at room temperature for a few minutes to soften before scooping. Enjoy this deliciously healthy treat any time of the year!
Coconut Lime Greek Yogurt Popsicles

Coconut Lime Greek Yogurt Popsicles are a revitalizing and healthy treat perfect for warm weather or any time you crave a delicious dessert. Combining the creamy texture of Greek yogurt with the tropical flavors of coconut and lime, these popsicles aren’t only easy to make but also packed with protein and beneficial probiotics. The tartness from the lime balances the sweetness of coconut, creating a delightful flavor that will leave you wanting more.
Making these popsicles is a simple process that requires minimal ingredients and effort. Just a bit of blending, pouring, and freezing, and you’ll have a delightful dessert to enjoy. These popsicles are a fantastic way to indulge in a frozen treat without the added sugars and preservatives often found in store-bought options.
Whether you’re looking to cool down on a hot day or just want a guilt-free dessert, Coconut Lime Greek Yogurt Popsicles are the perfect choice!
Ingredients (Serves 4-6):
- 2 cups plain Greek yogurt
- 1 cup coconut milk (canned or carton)
- 1/4 cup honey or maple syrup (adjust for sweetness)
- Zest of 2 limes
- Juice of 2 limes
- 1/2 teaspoon vanilla extract
- Pinch of salt
- Optional: shredded coconut for garnish
Cooking Instructions:
- Prepare the Base Mixture: In a mixing bowl, combine the plain Greek yogurt and coconut milk. Whisk them together until the mixture is smooth and well blended. This will form the creamy base for your popsicles.
- Add Flavorings: Next, add the honey or maple syrup, lime zest, lime juice, vanilla extract, and a pinch of salt to the yogurt and coconut mixture. Stir thoroughly to make sure that all the ingredients are evenly distributed. The lime zest will provide a fragrant aroma while the juice will give it a zesty kick.
- Taste and Adjust: Before pouring the mixture into molds, taste it to see if you’d like to adjust the sweetness or tartness. You can add more honey or lime juice according to your preference.
- Pour into Popsicle Molds: Carefully pour the mixture into popsicle molds, filling each one about three-quarters full. Leave a little space at the top to allow for expansion during freezing. If desired, sprinkle shredded coconut into each mold for added texture and flavor.
- Insert Sticks and Freeze: Once the molds are filled, insert the popsicle sticks. Place the molds in the freezer and let them freeze for at least 4-6 hours or until completely solid.
- Unmold and Serve: To remove the popsicles, run warm water over the outside of the molds for a few seconds to loosen them. Carefully pull the popsicles out of the molds and serve immediately. Enjoy your revitalizing treat!
Extra Tips:
For a fun twist, you can add fresh fruit chunks, such as diced mango or pineapple, to the popsicle mixture before freezing. This won’t only enhance the flavor but also add a beautiful visual appeal.
If you have any leftover mixture, consider using it in smoothies or as a topping for oatmeal. Remember to store any uneaten popsicles in an airtight container in the freezer to keep them fresh and prevent freezer burn. Enjoy your homemade Coconut Lime Greek Yogurt Popsicles!
Blueberry Chia Seed Greek Yogurt Bowl
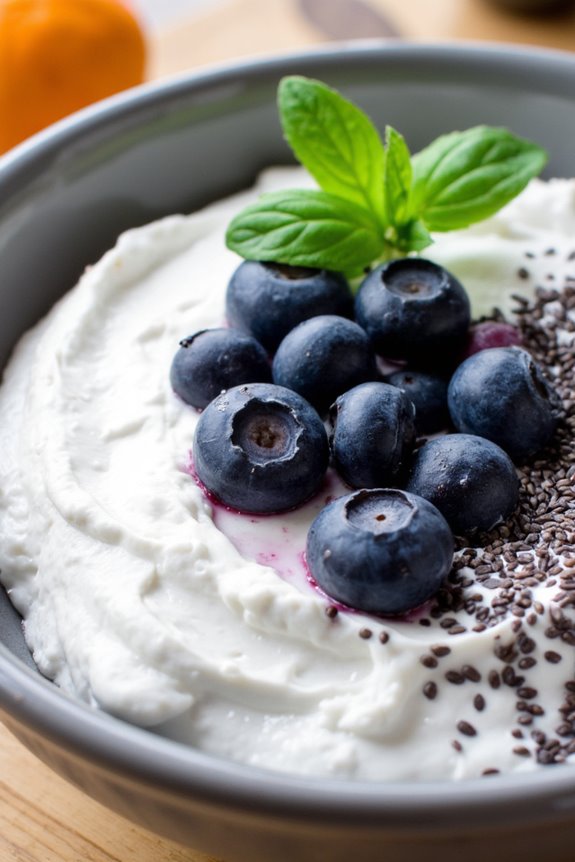
Indulging in a nutritious yet delicious dessert is made easy with the Blueberry Chia Seed Greek Yogurt Bowl. This delightful dish combines the creamy texture of Greek yogurt with the sweetness of fresh blueberries and the health benefits of chia seeds. Not only does it satisfy your sweet tooth, but it also provides a great source of protein, fiber, and antioxidants, making it a perfect option for breakfast, a snack, or a light dessert.
Preparing this dish is simple and requires minimal effort, perfect for a busy day or when hosting guests. The vibrant colors of the blueberries and the creamy yogurt create a visually appealing dish that’s sure to impress. Serve it in individual bowls or as a communal dish for everyone to enjoy. Let’s explore the ingredients and steps needed to create this delicious Blueberry Chia Seed Greek Yogurt Bowl for 4-6 people.
Ingredients:
- 4 cups Greek yogurt (plain or vanilla)
- 1 cup fresh blueberries (washed)
- 1/4 cup chia seeds
- 1 cup almond milk (or any preferred milk)
- 2 tablespoons honey or maple syrup (adjust to taste)
- 1 teaspoon vanilla extract
- 1/4 teaspoon cinnamon (optional)
- Fresh mint leaves for garnish (optional)
Instructions:
- Prepare the Chia Seed Mixture: In a medium bowl, combine the chia seeds and almond milk. Stir well to guarantee there are no clumps. Let this mixture sit for about 15 minutes, allowing the chia seeds to absorb the liquid and create a gel-like consistency. This step is essential for achieving the right texture in your yogurt bowl.
- Mix the Yogurt Base: In another large bowl, add the Greek yogurt, honey or maple syrup, vanilla extract, and cinnamon (if using). Whisk together until smooth and creamy. This mixture will serve as the base of your bowl and should be sweetened to your liking.
- Combine the Mixtures: Once the chia seed mixture has thickened, gently fold it into the yogurt base. This will add a delightful texture and boost the nutritional value. Be careful not to over-mix; you want to keep some of the chia seeds visible for presentation.
- Layer the Ingredients: In individual serving bowls, layer the yogurt-chia mixture and fresh blueberries. Start with a layer of the yogurt-chia mix, followed by a layer of blueberries, and repeat until the bowls are filled. This layering creates an appealing look and allows for a mix of flavors in each bite.
- Garnish and Serve: Top each bowl with additional blueberries and a sprig of fresh mint for garnish, if desired. This adds a pop of color and freshness to your Blueberry Chia Seed Greek Yogurt Bowl. Serve immediately or refrigerate for up to an hour before serving.
Extra Tips:
For a fun twist, consider adding other fruits like sliced bananas or strawberries to the mix. You can also customize the sweetness by adjusting the amount of honey or maple syrup based on your taste preference.
If you want a thicker consistency, opt for full-fat Greek yogurt, and for a lighter version, choose a low-fat or non-fat Greek yogurt. Enjoy your Blueberry Chia Seed Greek Yogurt Bowl as a versatile treat that’s as healthy as it’s satisfying!
Vanilla Greek Yogurt Fruit Salad
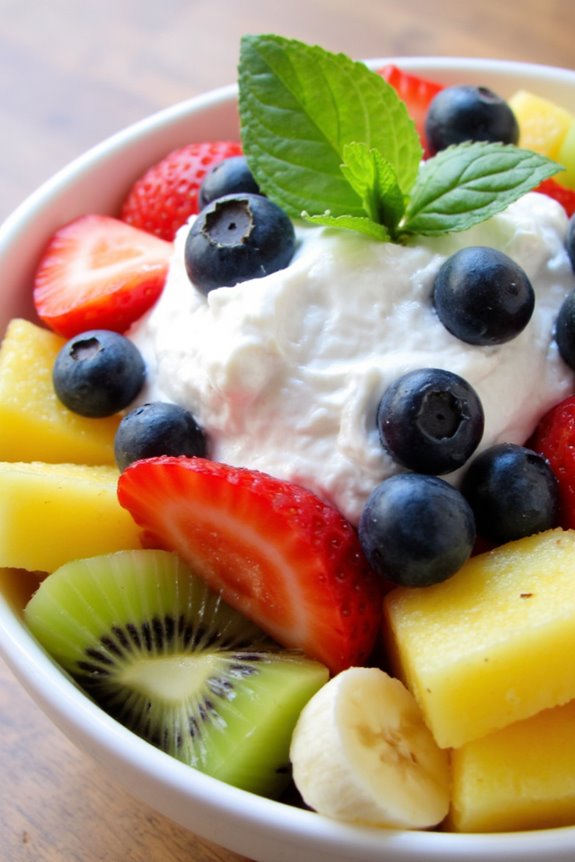
Indulging in a revitalizing Vanilla Greek Yogurt Fruit Salad is a delightful way to enjoy a healthy dessert while satisfying your sweet tooth. This recipe combines the creaminess of Greek yogurt with the vibrant flavors of fresh fruits, making it a perfect dish for warm weather or as a light snack. It’s not only delicious but also packed with nutrients, providing a great source of protein, vitamins, and minerals. The hint of vanilla adds a lovely aromatic touch, enhancing the overall flavor profile of this simple yet elegant dish.
This fruit salad is incredibly versatile; you can use a variety of fruits based on what’s in season or your personal preferences. Whether you choose berries, melons, or tropical fruits, this salad is sure to please everyone at the table. Serve it in individual bowls for a beautiful presentation, or mix it in a large bowl for a casual gathering. The contrast of creamy yogurt and juicy fruits will make this Vanilla Greek Yogurt Fruit Salad a hit at any occasion, from brunches to family dinners.
Ingredients (Serves 4-6):
- 2 cups Vanilla Greek yogurt
- 1 cup strawberries, hulled and sliced
- 1 cup blueberries
- 1 cup kiwi, peeled and sliced
- 1 cup pineapple, diced
- 1 banana, sliced
- 2 tablespoons honey (optional)
- 1 teaspoon fresh lemon juice
- Fresh mint leaves for garnish (optional)
Cooking Instructions:
- Prepare the Fruits: Begin by washing all the fruits thoroughly. Hull and slice the strawberries, peel and slice the kiwi, and dice the pineapple. For the banana, slice it just before serving to prevent browning. The variety of colors and textures will make your fruit salad visually appealing.
- Mix the Yogurt Base: In a large mixing bowl, add the Vanilla Greek yogurt. If you prefer a sweeter taste, drizzle in the honey and add the fresh lemon juice. The lemon juice not only enhances the flavor but also helps to preserve the freshness of the fruits.
- Combine the Fruits: Gently add the prepared strawberries, blueberries, kiwi, pineapple, and banana to the yogurt mixture. Use a spatula to gently fold the fruits into the yogurt, ensuring that they’re well coated without breaking them apart.
- Chill and Serve: Once combined, cover the bowl with plastic wrap or transfer the salad into individual serving bowls. Refrigerate for about 30 minutes to allow the flavors to meld together and to serve it cold. Just before serving, you can garnish with fresh mint leaves for an added touch of freshness.
- Enjoy: Serve the Vanilla Greek Yogurt Fruit Salad chilled. It can be enjoyed as a dessert, a healthy snack, or even as a breakfast option.
Extra Tips:
When preparing your Vanilla Greek Yogurt Fruit Salad, feel free to customize it according to your taste or dietary needs. You can add nuts or granola for some crunch, or substitute the honey with maple syrup or agave nectar for a different sweetness.
If you want to make it more decadent, consider adding a sprinkle of cinnamon or a dash of vanilla extract to the yogurt. Store any leftovers in an airtight container in the refrigerator for up to 2 days, but keep in mind that the fruits may soften over time.