

There’s something truly special about the bold flavors of Greek cuisine, and olives are the star of the show. From simple marinated dishes to zesty tapenades, these little fruits have a way of bringing any meal to life. If you’re ready to explore delicious Mediterranean recipes, you’re in the right place. Let’s explore how olives can add a touch of magic to your gatherings. Get ready to be inspired by these delightful homemade Greek olive recipes.
Marinated Greek Olives
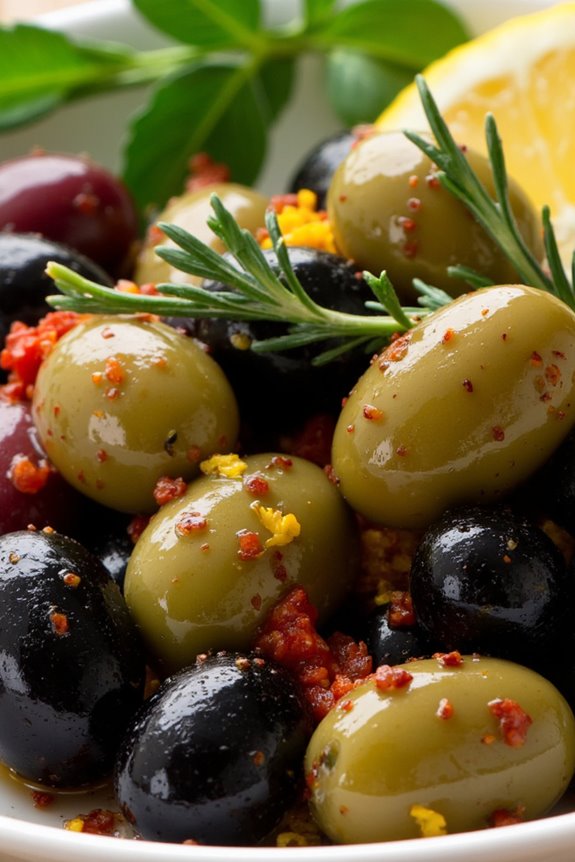
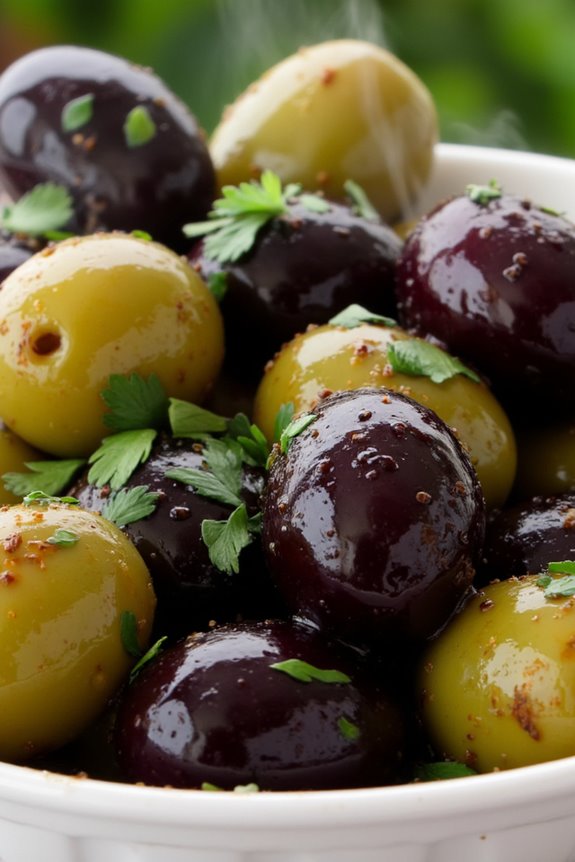
Marinated Greek olives are a delightful and versatile dish that adds a burst of flavor to any meal or gathering. This simple yet elegant recipe allows you to enjoy the robust flavors of olives enhanced by aromatic herbs and spices. Whether served as a meze, appetizer, or a snack, marinated olives are a fantastic addition to a cheese platter or Mediterranean-themed dinner.
The best part is that you can customize the marinade to suit your taste, making it easy to create a dish that reflects your personal culinary preferences.
To prepare marinated Greek olives, you’ll need a selection of olives, excellent olive oil, and a blend of aromatic herbs and spices. The marination process allows the olives to absorb the flavors of the marinade, resulting in a tasty treat that will impress your family and friends. This recipe isn’t only easy to make but also allows for flexibility depending on what you have on hand.
In just a few minutes, you can whip up a batch of these delicious marinated olives that are sure to please.
Ingredients (Serves 4-6):
- 2 cups mixed olives (Kalamata, green, and black)
- 1/2 cup extra virgin olive oil
- 2 cloves garlic, minced
- 1 teaspoon dried oregano
- 1 teaspoon dried thyme
- 1/2 teaspoon red pepper flakes (adjust to taste)
- Zest of 1 lemon
- 2 tablespoons fresh lemon juice
- 1 tablespoon red wine vinegar
- Fresh herbs for garnish (such as parsley or thyme)
Cooking Instructions:
- Prepare the Olives: Start by rinsing the mixed olives under cold water to remove excess brine. Drain them well and place them in a mixing bowl. This helps to reduce the saltiness and allows the marinade to penetrate better.
- Make the Marinade: In a separate bowl, whisk together the extra virgin olive oil, minced garlic, dried oregano, dried thyme, red pepper flakes, lemon zest, lemon juice, and red wine vinegar. This combination of ingredients will create a flavorful marinade that will coat the olives beautifully.
- Combine Olives and Marinade: Pour the marinade over the olives in the mixing bowl, ensuring that all the olives are well coated. Gently stir the olives to evenly distribute the flavors.
- Marinate: Cover the bowl with plastic wrap or transfer the olives and marinade to an airtight container. Let them marinate in the refrigerator for at least 2 hours, or preferably overnight. The longer the olives marinate, the more intense the flavor will be.
- Serve: Once marinated, take the olives out of the refrigerator and let them come to room temperature for about 15-20 minutes. Transfer the olives to a serving dish, drizzle with any remaining marinade, and garnish with fresh herbs for a pop of color and flavor.
Extra Tips:
When preparing marinated Greek olives, don’t hesitate to experiment with different herbs and spices according to your taste. You can add ingredients such as crushed coriander seeds, bay leaves, or even a splash of balsamic vinegar for a unique twist.
Additionally, consider using a combination of green and black olives for a beautiful color contrast. For a more intense flavor, allow the olives to marinate for several days before serving. Enjoy your marinated olives as a snack or alongside your favorite Mediterranean dishes!
Classic Greek Olive Tapenade
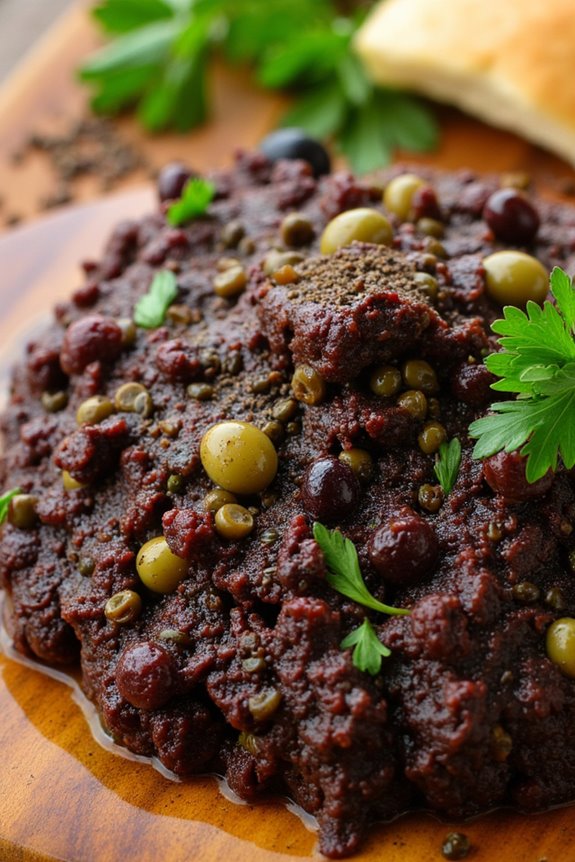
Classic Greek Olive Tapenade is a delectable and versatile spread that showcases the rich flavors of olives, capers, and herbs. This dish hails from the Mediterranean and is a staple in Greek cuisine, perfect for serving as an appetizer or a condiment with various dishes. Its bold and savory taste can elevate any meal, whether it’s slathered on crusty bread, served alongside grilled meats, or used as a flavorful topping for roasted vegetables.
Making tapenade is straightforward and requires minimal cooking, allowing the natural flavors of the ingredients to shine. With just a few simple components, you can create a delicious and authentic Greek dish that will impress your guests and bring a taste of Greece into your home. Gather your ingredients and get ready to blend, chop, and mix your way to a jar of this delightful tapenade.
Ingredients (serving size: 4-6 people)
- 1 cup pitted Kalamata olives
- 1/2 cup pitted green olives
- 2 tablespoons capers, rinsed
- 2 cloves garlic, minced
- 1/4 cup fresh parsley, chopped
- 1/4 cup olive oil
- 1 tablespoon red wine vinegar
- 1 teaspoon dried oregano
- Freshly ground black pepper to taste
Cooking Instructions
- Prepare the Olives: Start by rinsing both the Kalamata and green olives under cold water to remove any excess brine. This will help balance the flavors in your tapenade. Once rinsed, pat them dry with a paper towel to remove any lingering moisture.
- Combine Ingredients: In a food processor, add the prepared Kalamata olives, green olives, capers, minced garlic, and chopped parsley. This combination will create a robust flavor base for your tapenade.
- Add Seasonings: Pour in the olive oil, red wine vinegar, and sprinkle the dried oregano into the food processor. These ingredients won’t only enhance the taste but also help to achieve the desired consistency.
- Blend the Mixture: Pulse the mixture in the food processor until it reaches a coarse paste. You can adjust the blending time based on your texture preference—if you like a smoother tapenade, blend it longer, but be careful not to over-process into a puree.
- Season to Taste: After blending, taste the tapenade and add freshly ground black pepper as needed. You might also want to adjust the seasoning by adding more olive oil or vinegar based on your taste preferences.
- Chill and Serve: Transfer the tapenade to a serving bowl and cover it with plastic wrap. Allow it to chill in the refrigerator for at least 30 minutes to let the flavors meld together. Serve it with crusty bread, crackers, or as a topping for grilled meats.
Extra Tips
For a more personalized touch, feel free to experiment with additional ingredients such as sun-dried tomatoes, roasted red peppers, or even a splash of lemon juice for added brightness.
Tapenade can be stored in an airtight container in the refrigerator for up to a week, making it a great make-ahead option for gatherings. To enhance the flavor even further, consider serving it with a drizzle of high-quality olive oil on top just before serving. Enjoy your homemade Classic Greek Olive Tapenade!
Spicy Feta and Olive Spread

Spicy Feta and Olive Spread is a delightful Mediterranean dip that brings together the rich, tangy flavors of feta cheese and the briny goodness of olives. This spread is perfect for parties, gatherings, or simply as a delicious appetizer to enjoy with crusty bread or fresh vegetables.
The addition of spices and herbs gives it a zesty kick that elevates it beyond your typical dip, making it a standout dish on any table. Making this spread isn’t only simple but also customizable, allowing you to adjust the heat level according to your taste preferences.
Whether you’re hosting a dinner party or just looking for a quick snack, this Spicy Feta and Olive Spread is bound to impress your guests and tantalize your taste buds. With just a few fresh ingredients and a food processor, you can whip up this tasty treat in no time.
Ingredients (serving size: 4-6 people)
- 1 cup feta cheese, crumbled
- 1 cup pitted kalamata olives, drained
- 1 small red chili pepper, seeds removed and chopped (adjust based on heat preference)
- 1 clove garlic, minced
- 2 tablespoons olive oil
- 1 teaspoon red wine vinegar
- 1 teaspoon dried oregano
- Freshly ground black pepper, to taste
- Fresh parsley, for garnish (optional)
Cooking Instructions
1. Prepare the Ingredients: Begin by gathering all the ingredients. Make sure the feta cheese is crumbled and the olives are pitted and drained. This will save you time during the blending process.
Chop the red chili pepper, removing the seeds for less heat, and mince the garlic.
2. Combine Ingredients in a Food Processor: In a food processor, add the crumbled feta cheese, pitted olives, chopped red chili pepper, minced garlic, olive oil, red wine vinegar, oregano, and a dash of black pepper.
Confirm that the ingredients are evenly distributed in the bowl for a smoother blend.
3. Blend Until Smooth: Pulse the food processor a few times to break down the larger pieces. Then, blend on high until the mixture is smooth and creamy.
If the mixture is too thick, you can add a little bit more olive oil to reach your desired consistency.
4. Taste and Adjust Seasoning: After blending, taste the spread and adjust the seasoning as necessary. If you prefer it spicier, add more chopped chili pepper.
If it needs more acidity, add a splash more of red wine vinegar. Blend again if you make any adjustments.
5. Serve and Garnish: Transfer the Spicy Feta and Olive Spread to a serving bowl. If desired, garnish with fresh parsley for a pop of color and a hint of freshness.
Serve immediately with your choice of crusty bread, pita chips, or fresh vegetables.
Extra Tips
For an added depth of flavor, consider roasting the garlic before adding it to the spread; this will give a sweeter and more mellow taste.
You can also experiment with different types of olives or add herbs like fresh basil or dill for a unique twist. If you have any leftovers, store the spread in an airtight container in the refrigerator, where it will keep for about 3-4 days.
Enjoy this versatile dip as a spread on sandwiches or as a topping for grilled meats or fish!
Lemon Herb Olive Salad
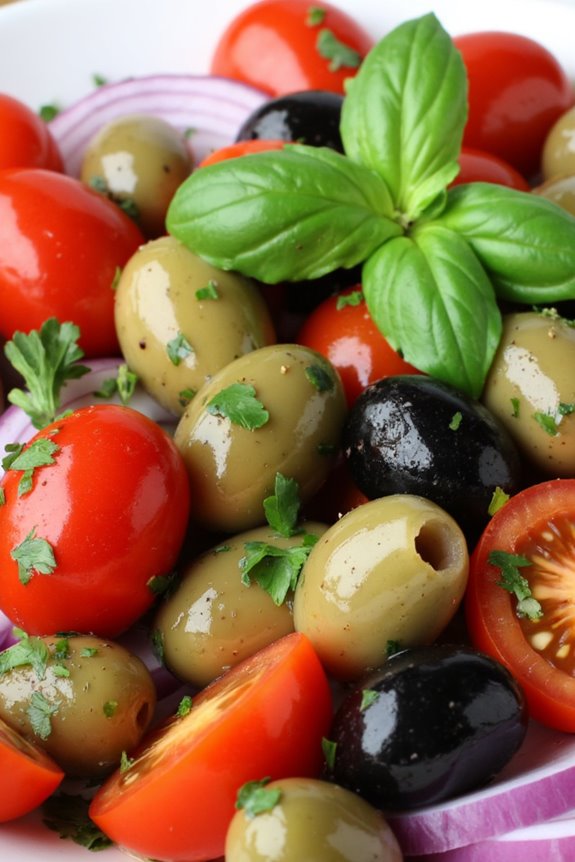
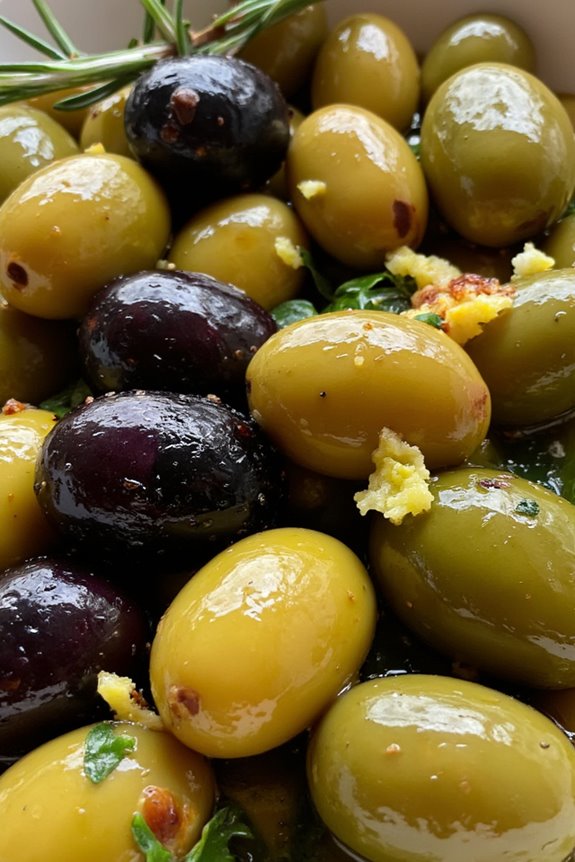
Lemon Herb Olive Salad is a vibrant and flavorful dish that showcases the rich taste of olives coupled with the crispness of herbs and the tanginess of lemon. This delightful salad is perfect for serving as an appetizer or as a side dish at your next gathering. Not only is it easy to prepare, but the combination of ingredients also makes it a nutritious option for those looking to add more Mediterranean flair to their meals.
This salad is incredibly versatile, allowing you to mix and match your favorite olives, herbs, and additional ingredients to create a unique flavor profile. The zesty lemon dressing enhances the natural brininess of the olives, while fresh herbs like parsley or basil bring brightness and depth to the dish. Whether you’re hosting a dinner party or enjoying a casual meal at home, this Lemon Herb Olive Salad is sure to impress your guests with its bold flavors and appealing presentation.
Ingredients (Serves 4-6):
- 2 cups mixed olives (green, black, Kalamata)
- 1 small red onion, thinly sliced
- 1 cup cherry tomatoes, halved
- 1/4 cup fresh parsley, chopped
- 1/4 cup fresh basil, chopped
- 1 lemon, juiced (about 3 tablespoons)
- 3 tablespoons olive oil
- 1 teaspoon dried oregano
- Salt and pepper to taste
Cooking Instructions:
- Prepare the Olives: Begin by rinsing the mixed olives under cold water to remove excess brine. This step helps to reduce the saltiness of the olives. After rinsing, pat them dry with a paper towel and place them in a large mixing bowl.
- Add the Vegetables: Next, slice the red onion thinly and cut the cherry tomatoes in half. Add both the sliced onion and halved tomatoes to the bowl with the olives. The tomatoes will contribute a juicy sweetness, while the onion adds a nice crunch and sharpness to the salad.
- Incorporate Fresh Herbs: Chop the fresh parsley and basil, then sprinkle them over the olive mixture. These herbs not only add color but also introduce fresh flavors that complement the olives beautifully. Toss everything gently to combine.
- Make the Dressing: In a small bowl, whisk together the freshly squeezed lemon juice, olive oil, dried oregano, salt, and pepper. This simple dressing will bring all the ingredients together, adding a bright and zesty taste to the salad.
- Combine and Marinate: Pour the dressing over the olive and herb mixture, then toss gently to guarantee everything is evenly coated. Allow the salad to sit for at least 15 minutes at room temperature. This resting period lets the flavors meld together, enhancing the overall taste of the salad.
- Serve: After marinating, give the salad a final toss and taste for seasoning. Adjust with more salt, pepper, or lemon juice as needed. Serve the Lemon Herb Olive Salad in a beautiful bowl, and enjoy it as a revitalizing side dish or appetizer.
Extra Tips:
For a delightful twist, consider adding feta cheese or roasted red peppers to your Lemon Herb Olive Salad for additional flavor and texture. If you prefer a spicier kick, a pinch of red pepper flakes can elevate the dish.
This salad can also be made ahead of time; just keep it covered in the refrigerator for up to a day. The flavors will only get better as it sits, making it a perfect make-ahead option for parties or gatherings. Enjoy experimenting with different types of olives and herbs to find your perfect combination!
Greek Stuffed Olives
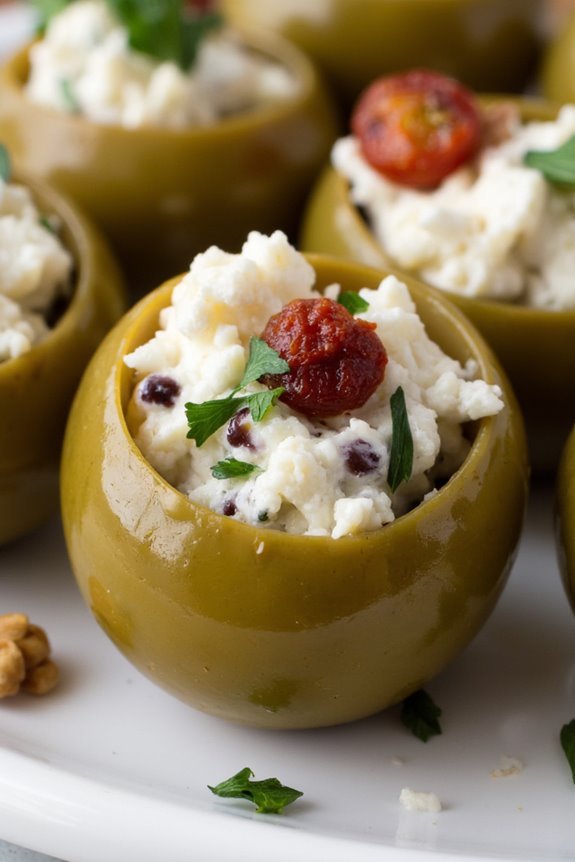
Greek stuffed olives are a delightful appetizer that brings the vibrant flavors of the Mediterranean right to your table. These olives are typically filled with a savory mixture that can vary from cheese and herbs to nuts and spices, making them a versatile and appealing dish for gatherings or cozy nights in. The briny taste of the olives pairs wonderfully with the creamy filling, creating a perfect balance that will leave your guests wanting more.
Preparing Greek stuffed olives at home is easier than you might think. With a few simple ingredients and some patience, you can create a dish that not only looks beautiful but also tastes incredible. Whether you’re serving these olives as part of a meze platter or enjoying them on their own, they’re sure to impress with their bold flavors and unique textures. Here’s how to make a batch for 4-6 people.
Ingredients
- 1 jar (about 12 oz) of pitted green olives
- 1 cup feta cheese, crumbled
- 1/2 cup cream cheese, softened
- 1/4 cup chopped sun-dried tomatoes
- 2 tablespoons fresh parsley, finely chopped
- 1 tablespoon fresh lemon juice
- 1 teaspoon dried oregano
- Salt and pepper to taste
- 1/4 cup chopped walnuts (optional)
Instructions
- Prepare the Olives: Begin by draining the jar of pitted green olives and rinsing them under cold water. Pat them dry with a paper towel. Make sure they’re completely dry to guarantee the filling adheres well later on.
- Make the Filling: In a mixing bowl, combine the crumbled feta cheese, softened cream cheese, chopped sun-dried tomatoes, parsley, lemon juice, dried oregano, salt, and pepper. If you wish to add a crunchy texture, fold in the chopped walnuts. Mix until well combined, and the mixture is creamy and smooth.
- Stuff the Olives: Using a small spoon or a piping bag, carefully fill each olive with the cheese mixture. If using a piping bag, cut a small hole in the tip to make filling easier. Be generous with the filling, but avoid overstuffing to ensure the olives remain intact.
- Chill Before Serving: Once all the olives are stuffed, place them in an airtight container and refrigerate for at least 1 hour to allow the flavors to meld and the filling to firm up slightly. This step is essential for enhancing the taste and texture of the dish.
- Serve: Remove the olives from the fridge and transfer them to a serving platter. You can drizzle a little olive oil over them and sprinkle some extra herbs if desired. Enjoy them as part of a meze platter, with crusty bread, or on their own.
Extra Tips
When preparing Greek stuffed olives, feel free to experiment with different fillings to suit your taste. You can incorporate ingredients like roasted red peppers, various herbs, or different types of cheese.
Additionally, for a bit of heat, consider adding some crushed red pepper flakes to the filling. Always taste the filling before stuffing, adjusting the seasoning as needed.
For an added touch, serve the olives with toothpicks for easy eating, and pair them with a glass of your favorite wine for a delightful appetizer experience.
Balsamic Glazed Olives
Balsamic Glazed Olives are a delightful and sophisticated appetizer that can elevate any gathering or meal. Their rich, tangy flavor profile, combined with the briny goodness of olives, makes them an irresistible treat. This recipe isn’t only simple but also allows for customization based on your favorite types of olives—whether you prefer Kalamata, green, or a mix of both. The sweet and sour balsamic glaze adds depth, making these olives a perfect addition to charcuterie boards or served alongside crusty bread.
Making Balsamic Glazed Olives is a quick process that requires minimal ingredients yet yields impressive results. The combination of olive oil, balsamic vinegar, garlic, and herbs creates a warm, aromatic dish that can be enjoyed hot or at room temperature. This recipe is perfect for serving 4-6 people, ensuring that everyone can enjoy this delectable treat.
Ingredients (Serves 4-6):
- 2 cups mixed olives (Kalamata, green, or black)
- 2 tablespoons olive oil
- 1/4 cup balsamic vinegar
- 2 cloves garlic, minced
- 1 teaspoon dried oregano
- 1 teaspoon dried thyme
- Salt and pepper to taste
- Fresh parsley for garnish (optional)
Cooking Instructions:
- Preheat the Oven: Start by preheating your oven to 400°F (200°C). This temperature will allow the olives to heat through and absorb the flavors of the balsamic glaze without overcooking.
- Prepare the Olives: In a mixing bowl, combine the mixed olives. If you have large olives, you can slice them in half to help them absorb more of the glaze. This step is essential for enhancing the flavor of the final dish.
- Make the Balsamic Glaze: In a small saucepan, heat the olive oil over medium heat. Once warm, add the minced garlic and sauté for about 1-2 minutes until fragrant but not browned. Then, carefully pour in the balsamic vinegar, stirring to combine.
- Season the Mixture: Add the dried oregano, dried thyme, salt, and pepper to the balsamic mixture. Allow it to simmer for 3-4 minutes, until it slightly thickens and the flavors meld together. Be attentive to prevent burning.
- Combine and Bake: Pour the balsamic glaze over the olives in the mixing bowl, ensuring they’re well coated. Transfer the mixture to a baking dish and spread it out evenly. Place the dish in the preheated oven and bake for about 15-20 minutes, or until the olives are heated through and the glaze is bubbling.
- Garnish and Serve: Once done, remove the baking dish from the oven and let it cool for a few minutes. If desired, sprinkle fresh parsley on top for a pop of color and freshness. Serve the balsamic glazed olives warm or at room temperature with toothpicks or as part of a larger appetizer spread.
Extra Tips:
For an added layer of flavor, consider incorporating a pinch of red pepper flakes for a little heat or adding citrus zest such as lemon or orange for a fresh twist.
If you have time, marinating the olives in the glaze for a few hours before baking can enhance the flavor even further. This dish can also be prepared ahead of time and warmed up just before serving, making it an ideal choice for entertaining.
Roasted Olives With Herbs
Roasted Olives With Herbs is a delightful Mediterranean appetizer that elevates the humble olive to new heights. This dish combines the rich, briny flavor of olives with the aromatic essence of fresh herbs, resulting in a warm and savory treat perfect for sharing. The roasting process enhances the olives’ natural flavors while introducing a crispy texture that’s simply irresistible.
Whether served at a dinner party or enjoyed as a simple snack, these roasted olives are bound to impress.
The beauty of this recipe lies in its versatility. You can use a variety of olives – green, black, or a mix – to create a colorful and flavorful dish. The addition of garlic, lemon zest, and you can also experiment with different herbs like rosemary, thyme, or oregano to suit your taste.
This dish isn’t only easy to prepare but also brings a Mediterranean vibe to your table, making it a perfect addition to any gathering.
Ingredients (serving size: 4-6 people)
- 2 cups mixed olives (green and black)
- 3 tablespoons olive oil
- 2 teaspoons fresh rosemary, chopped
- 2 teaspoons fresh thyme, chopped
- 2 cloves garlic, minced
- Zest of 1 lemon
- Salt and black pepper to taste
- Optional: 1 teaspoon red pepper flakes for heat
Cooking Instructions
- Preheat the oven: Begin by preheating your oven to 400°F (200°C). This guarantees that your olives will roast evenly and develop that delightful crispy exterior.
- Prepare the olives: In a medium bowl, combine the mixed olives. If using whole olives with pits, you can leave them as is or pit them for easier eating.
- Mix the seasonings: In a small bowl, whisk together the olive oil, chopped rosemary, chopped thyme, minced garlic, lemon zest, salt, and black pepper. If you like some heat, add the red pepper flakes at this stage.
- Coat the olives: Pour the olive oil mixture over the olives in the medium bowl. Toss everything together until the olives are well-coated with the herb mixture.
- Roast the olives: Spread the seasoned olives evenly on a baking sheet lined with parchment paper. Make sure they’re in a single layer to guarantee even roasting. Place the baking sheet in the preheated oven.
- Bake: Roast the olives for about 15-20 minutes, stirring halfway through. Keep an eye on them; you want them to be warm and slightly blistered, but not burnt.
- Serve: Once roasted, remove the olives from the oven and let them cool slightly. Transfer to a serving bowl and enjoy warm, either on their own or with crusty bread.
Extra Tips
For an added depth of flavor, consider marinating the olives in the olive oil and herb mixture for a few hours or overnight before roasting. This allows the flavors to meld beautifully.
Additionally, feel free to customize the herbs based on your preference or what you have on hand. Adding a splash of balsamic vinegar before serving can also enhance the taste, giving it a tangy kick that complements the richness of the olives. Enjoy experimenting with this simple yet delicious recipe!
Olive and Sun-Dried Tomato Bruschetta

Olive and Sun-Dried Tomato Bruschetta is a delightful appetizer that perfectly captures the essence of Mediterranean flavors. This dish combines the briny richness of olives with the sweet, concentrated flavor of sun-dried tomatoes, all atop a crunchy slice of toasted bread.
Whether you’re hosting a dinner party or just looking for a delicious snack, this bruschetta is sure to impress your guests and tantalize their taste buds.
Making this bruschetta is an easy process that involves minimal cooking, allowing the vibrant flavors to shine through. With just a few fresh ingredients, you can create a beautiful presentation that isn’t only appetizing but also visually appealing.
Serve it as part of a mezze platter or as a standalone hors d’oeuvre, and watch as it disappears from the table in no time!
Ingredients (Serves 4-6)
- 1 baguette or crusty Italian bread
- 1 cup pitted Kalamata olives, chopped
- 1 cup sun-dried tomatoes, chopped (preferably in oil)
- ¼ cup fresh basil, chopped
- 2 cloves garlic, minced
- 1 tablespoon balsamic vinegar
- 2 tablespoons extra virgin olive oil
- Salt and pepper to taste
- Optional: Grated Parmesan cheese for topping
Cooking Instructions
- Prepare the Bread: Preheat your oven to 400°F (200°C). Slice the baguette or Italian bread into ½-inch thick slices. Lay the slices on a baking sheet and brush both sides lightly with olive oil. Toast in the preheated oven for about 5-7 minutes or until golden brown and crispy.
- Make the Topping: While the bread is toasting, in a mixing bowl, combine the chopped Kalamata olives, sun-dried tomatoes, minced garlic, fresh basil, balsamic vinegar, and the remaining olive oil. Stir well to combine all the ingredients evenly.
- Season the Mixture: Taste the topping mixture and season with salt and pepper to your liking. Remember that olives can be quite salty, so adjust accordingly.
- Assemble the Bruschetta: Once the bread is toasted, remove it from the oven and let it cool for a minute. Spoon the olive and sun-dried tomato mixture generously onto each slice of toasted bread.
- Optional Topping: If desired, sprinkle some grated Parmesan cheese on top of each bruschetta for an extra layer of flavor.
- Serve: Arrange the bruschetta on a platter and serve immediately while the bread is still warm. Enjoy your delicious Olive and Sun-Dried Tomato Bruschetta!
Extra Tips
For an added depth of flavor, consider mixing in a little crumbled feta cheese with the olive and sun-dried tomato topping.
You can also experiment with different types of olives or add a hint of crushed red pepper for a spicy kick.
For presentation, garnish the platter with additional basil leaves or serve it with a drizzle of balsamic reduction for an elegant touch.
Finally, if you’re preparing ahead of time, keep the topping separate from the bread until just before serving to maintain the crispiness of the bruschetta.
Greek Olive and Cheese Platter
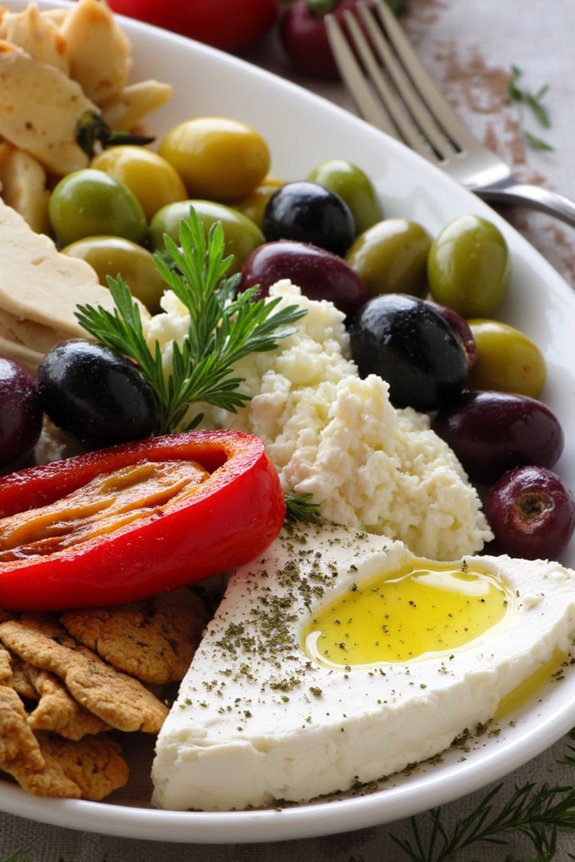
A Greek Olive and Cheese Platter is a delightful and visually appealing dish that showcases the rich flavors of olives paired with a variety of cheeses. This dish is perfect for gatherings or as an appetizer for a Mediterranean-themed dinner. The combination of briny olives, creamy and tangy cheeses, and fresh herbs creates a tantalizing experience for your taste buds.
Additionally, the platter can be customized to suit your preferences, making it a versatile choice for any occasion. Creating a Greek Olive and Cheese Platter is simple and requires minimal preparation. By selecting a mix of olives and cheeses, you can create a colorful and inviting display.
This dish not only highlights the unique flavors of each ingredient but also promotes sharing and conversation among guests. Serve it with some crusty bread or crackers, and you have a perfect starter that sets the mood for a delightful meal.
Ingredients (Serves 4-6)
- 1 cup Kalamata olives
- 1 cup green olives (such as Castelvetrano or Picholine)
- 8 ounces feta cheese, crumbled
- 8 ounces aged kasseri cheese, sliced or cubed
- 8 ounces goat cheese, sliced or crumbled
- 1/2 cup roasted red peppers, sliced
- 1/4 cup extra virgin olive oil
- 1 tablespoon dried oregano
- Fresh parsley or dill for garnish
- Crusty bread or crackers for serving
Cooking Instructions
- Prepare the Olives: Start by rinsing the Kalamata and green olives under cold water to remove excess brine. Pat them dry with a paper towel and set aside. This step guarantees that your olives aren’t overly salty and allows their natural flavors to shine through.
- Arrange the Cheeses: Take the feta cheese and crumble it into bite-sized pieces. For the kasseri and goat cheese, cut them into cubes or slices as you prefer. Arrange the cheeses on a large serving platter, ensuring they’re spaced out for visual appeal. This arrangement will make it easy for guests to pick their favorites.
- Add the Olives and Peppers: Scatter the prepared olives around the cheeses on the platter. Next, add the roasted red peppers in between the olives and cheeses. The vibrant colors of the olives and peppers will enhance the overall presentation of the dish.
- Drizzle with Olive Oil: Once everything is arranged, drizzle the extra virgin olive oil over the cheese and olives. This not only adds flavor but also gives the platter a lovely sheen, making it more inviting.
- Season with Oregano: Sprinkle the dried oregano evenly over the entire platter. This herb adds a classic Mediterranean touch and complements the flavors of the olives and cheeses beautifully.
- Garnish and Serve: Finish your platter by garnishing it with fresh parsley or dill for a pop of color. Serve the platter with crusty bread or crackers on the side, inviting guests to help themselves and enjoy!
Extra Tips
When preparing your Greek Olive and Cheese Platter, feel free to experiment with different types of olives and cheeses to find the combinations that suit your taste the best. You can also include additional items like marinated artichokes, nuts, or fresh vegetables to add more variety.
If you want to prepare the platter in advance, assemble everything except the olive oil and garnish, and store it in the refrigerator. Just drizzle the olive oil and add the garnish right before serving to keep everything fresh and appealing!
Olive Oil and Olive Dipping Sauce
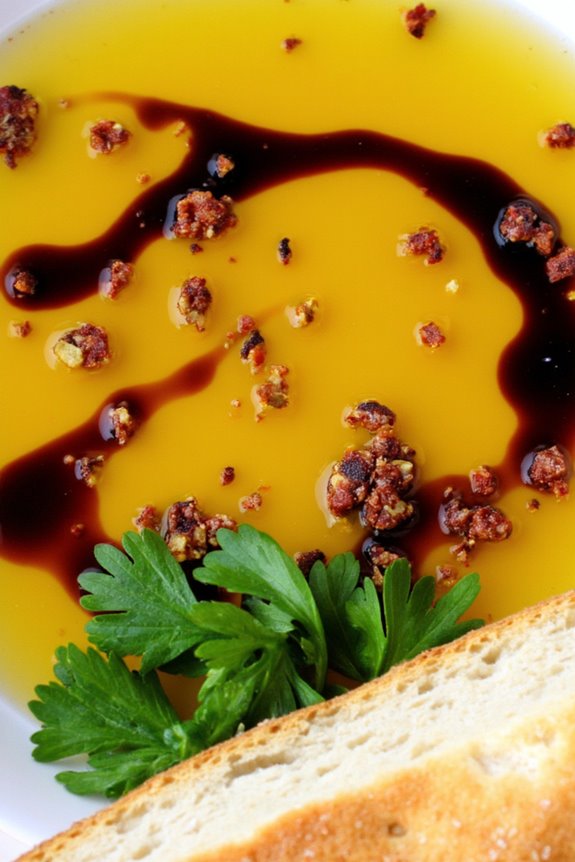
Olive oil and olive dipping sauce is a quintessential part of Greek cuisine, often served as an appetizer or a light snack. It pairs wonderfully with warm, crusty bread, fresh vegetables, or even as a topping for grilled meats. This simple yet flavorful sauce highlights the rich taste of high-quality olive oil, complemented by herbs and spices that evoke the essence of the Mediterranean.
Making your own dipping sauce at home allows you to control the ingredients, guaranteeing freshness and taste. By using a combination of olive oil, vinegar, and herbs, you can create a versatile sauce that enhances any meal. Plus, this recipe is incredibly easy to prepare, making it a perfect addition to your culinary repertoire whether you’re hosting a gathering or simply enjoying a quiet meal at home.
Ingredients (Serves 4-6)
- 1 cup high-quality extra virgin olive oil
- 2 tablespoons balsamic vinegar or red wine vinegar
- 1 teaspoon dried oregano
- 1 teaspoon dried thyme
- 1 clove garlic, minced
- 1/2 teaspoon red pepper flakes (optional)
- Salt and freshly ground black pepper, to taste
- Fresh parsley, chopped (for garnish)
- Crusty bread or fresh vegetables for serving
Cooking Instructions
- Prepare the Base: Start by selecting a bowl to mix your ingredients. A medium-sized mixing bowl will work perfectly. This will be where you combine all your ingredients for the dipping sauce.
- Combine Olive Oil and Vinegar: Pour the cup of extra virgin olive oil into the bowl. Add the two tablespoons of balsamic vinegar or red wine vinegar. The vinegar adds a tangy flavor that balances the richness of the olive oil.
- Add Herbs and Spices: Sprinkle in the teaspoon of dried oregano and thyme. If you enjoy a bit of heat, add the red pepper flakes. Finally, include the minced garlic, which will infuse the sauce with a robust flavor.
- Season: Season your mixture with salt and freshly ground black pepper to taste. Start with a pinch of salt and a few cracks of black pepper, and adjust according to your preference.
- Mix Thoroughly: Using a whisk or a fork, vigorously mix all the ingredients together until well combined. Verify that the olive oil and vinegar emulsify somewhat to create a cohesive sauce.
- Taste and Adjust: Take a moment to taste your dipping sauce. This is your chance to adjust any ingredients – you might want to add a little more vinegar for acidity or more herbs for additional flavor.
- Garnish and Serve: Once you’re satisfied with the flavor, transfer the dipping sauce to a serving dish. Garnish with freshly chopped parsley for a pop of color. Serve alongside crusty bread or fresh vegetables for dipping.
Extra Tips
When making your olive oil and olive dipping sauce, always opt for high-quality extra virgin olive oil, as it greatly influences the flavor of the sauce.
Feel free to experiment with different herbs or spices based on your preference—rosemary, basil, or even a hint of lemon zest can add a unique twist.
Additionally, let your dipping sauce sit for at least 30 minutes before serving to allow the flavors to meld together beautifully.