

I’ve been exploring the vibrant world of Modern Greek cuisine, and I’m thrilled to share some delicious recipes that bring a contemporary twist to traditional dishes. From zesty Greek Lemon Chicken with Orzo to comforting layers of Modern Moussaka, each recipe is a celebration of flavor. You’ll discover creative ways to enjoy classic favorites, perfect for elevating your next dinner gathering. Get ready to be inspired by these inventive dishes that highlight the best of Greek culinary traditions with a modern flair. Can’t wait for you to try them!
Greek Lemon Chicken With Orzo

Greek Lemon Chicken with Orzo is a vibrant and flavorful dish that brings the essence of Mediterranean cooking right to your dinner table. The combination of tender chicken, zesty lemon, and aromatic herbs infuses the orzo pasta with a delightful taste that’s both invigorating and satisfying. This dish is perfect for family gatherings or a cozy weeknight dinner, and it’s sure to impress your guests with its delicious flavors and beautiful presentation.
The recipe isn’t only easy to prepare but also offers a wholesome balance of protein and carbohydrates, making it a complete meal in one pot. The bright lemony flavor pairs wonderfully with the savory chicken and the nutty orzo, while fresh herbs add a touch of authenticity. Whether you’re a seasoned cook or a beginner in the kitchen, this Greek-inspired dish is a must-try for anyone looking to add a little Mediterranean flair to their dining experience.
Ingredients (Serves 4-6)
- 4 boneless, skinless chicken breasts
- 1 tablespoon olive oil
- 1 medium onion, diced
- 3 cloves garlic, minced
- 1 cup orzo pasta
- 4 cups chicken broth
- 1 lemon, zested and juiced
- 1 teaspoon dried oregano
- 1 teaspoon salt
- ½ teaspoon black pepper
- ¼ cup fresh parsley, chopped (for garnish)
- Lemon wedges (for serving)
Cooking Instructions
- Prepare the Chicken: Season the chicken breasts with salt, pepper, and dried oregano. This step enhances the flavor of the chicken and guarantees it’s well-seasoned throughout the cooking process.
- Sauté the Chicken: In a large skillet, heat the olive oil over medium-high heat. Add the seasoned chicken breasts and cook for about 5-7 minutes on each side, or until the chicken is golden brown and cooked through. This step locks in the juices and provides a nice sear, adding depth to the flavor.
- Sauté the Aromatics: Once the chicken is cooked, remove it from the skillet and set aside. In the same skillet, add the diced onions and sauté until they become translucent, about 3-4 minutes. Then, add the minced garlic and sauté for an additional minute until fragrant. This step builds the flavor base for the dish.
- Cook the Orzo: Add the orzo pasta to the skillet and stir to combine with the onions and garlic. Pour in the chicken broth, lemon zest, and lemon juice. Bring the mixture to a boil, then reduce the heat to a simmer. Cover and cook for about 10-12 minutes or until the orzo is tender and has absorbed most of the liquid. Stir occasionally to prevent sticking.
- Combine and Serve: Once the orzo is cooked, return the chicken to the skillet, nestling it among the pasta. Allow it to heat through for about 2-3 minutes. Garnish with fresh parsley and serve with lemon wedges on the side. This final step allows the chicken to absorb some of the orzo flavor while guaranteeing everything is hot and ready to serve.
Extra Tips
For an extra burst of flavor, consider marinating the chicken in lemon juice, olive oil, and oregano for a few hours before cooking. This not only enhances the taste but also helps to tenderize the meat.
Additionally, feel free to add vegetables such as spinach or cherry tomatoes to the orzo while it cooks for added nutrition and color. This dish pairs beautifully with a side salad or some crusty bread to soak up any leftover juices. Enjoy your culinary journey through Greece with this delicious meal!
Spinach and Feta Stuffed Peppers
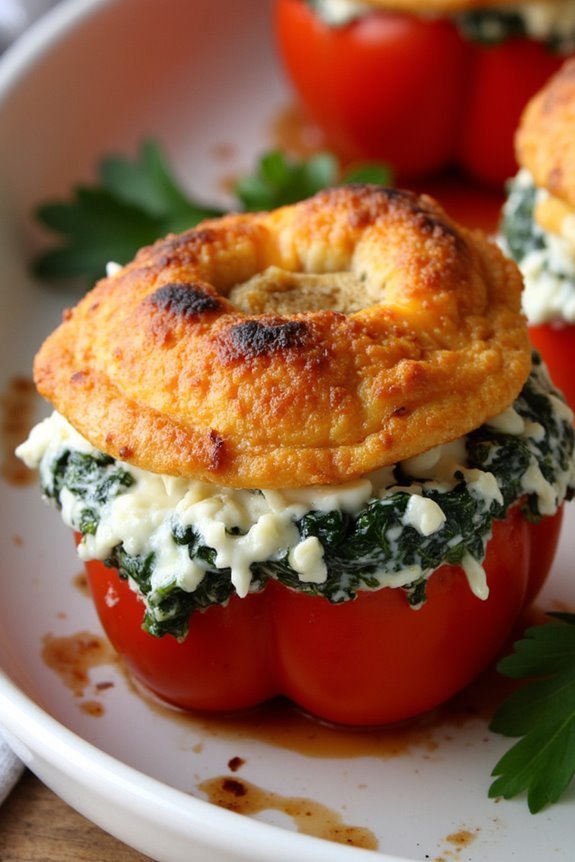
If you’re aiming to impress your family or guests with a delicious Greek-inspired dish, search no more than Spinach and Feta Stuffed Peppers. This vibrant dish combines the earthiness of spinach with the tangy creaminess of feta cheese, all nestled inside sweet bell peppers. Not only is it visually appealing, but it’s also packed with nutrients and flavor, making it a perfect weeknight dinner or a festive occasion meal.
The combination of herbs and spices brings a Mediterranean flair that will transport you straight to the sun-soaked shores of Greece.
To prepare these stuffed peppers, you’ll need to select firm and colorful bell peppers to serve as the base. The filling is a blend of sautéed spinach, crumbled feta, and aromatic herbs, creating a delightful mixture that complements the natural sweetness of the peppers. Once baked, the peppers become tender, while the filling remains creamy and delicious. Serve them with a side of tzatziki or a fresh Greek salad for a complete meal that everyone will love.
Ingredients (Serves 4-6):
- 4 large bell peppers (any color)
- 2 cups fresh spinach, chopped
- 1 cup feta cheese, crumbled
- 1 cup cooked quinoa or rice
- 1 small onion, finely chopped
- 2 cloves garlic, minced
- 1 teaspoon dried oregano
- 1 teaspoon dried dill
- 1 tablespoon olive oil
- Salt and pepper to taste
- Fresh parsley, chopped (for garnish)
Cooking Instructions:
- Preheat the Oven: Begin by preheating your oven to 375°F (190°C). This guarantees that your stuffed peppers will cook evenly and thoroughly.
- Prepare the Bell Peppers: While the oven is heating, wash the bell peppers, slice off the tops, and remove the seeds and membranes. Set the hollowed-out peppers aside. You can also lightly brush the outside of the peppers with olive oil for added flavor.
- Sauté the Vegetables: In a large skillet, heat 1 tablespoon of olive oil over medium heat. Add the chopped onion and minced garlic. Sauté for about 3-4 minutes until the onion becomes translucent and fragrant.
- Add Spinach and Cook: Once the onions are ready, add the chopped spinach to the skillet. Cook for an additional 2-3 minutes until the spinach is wilted and tender. Remove the skillet from heat.
- Mix the Filling: In a large bowl, combine the sautéed spinach and onion mixture with the crumbled feta cheese, cooked quinoa or rice, dried oregano, dried dill, salt, and pepper. Stir until everything is well mixed and the filling is cohesive.
- Stuff the Peppers: Take the prepared bell peppers and carefully fill them with the spinach and feta mixture, packing it down gently. Make sure to fill each pepper to the top.
- Bake the Stuffed Peppers: Place the stuffed peppers upright in a baking dish. If you have leftover filling, you can place it around the peppers in the dish. Cover the dish with aluminum foil and bake in the preheated oven for 25-30 minutes. Remove the foil and bake for an additional 10-15 minutes for a slightly charred top.
- Garnish and Serve: Once the peppers are tender and the filling is heated through, remove them from the oven. Allow them to cool for a few minutes, then garnish with chopped fresh parsley before serving.
Extra Tips:
For a variation on this dish, feel free to add other ingredients to the filling, such as olives, sun-dried tomatoes, or cooked ground meat for added protein.
You can also experiment with different types of cheese, such as goat cheese or mozzarella, to customize the flavor profile. To save time, you can prepare the filling ahead of time and store it in the refrigerator until you’re ready to stuff the peppers. Enjoy your delicious Greek-inspired meal!
Modern Moussaka With Eggplant and Zucchini
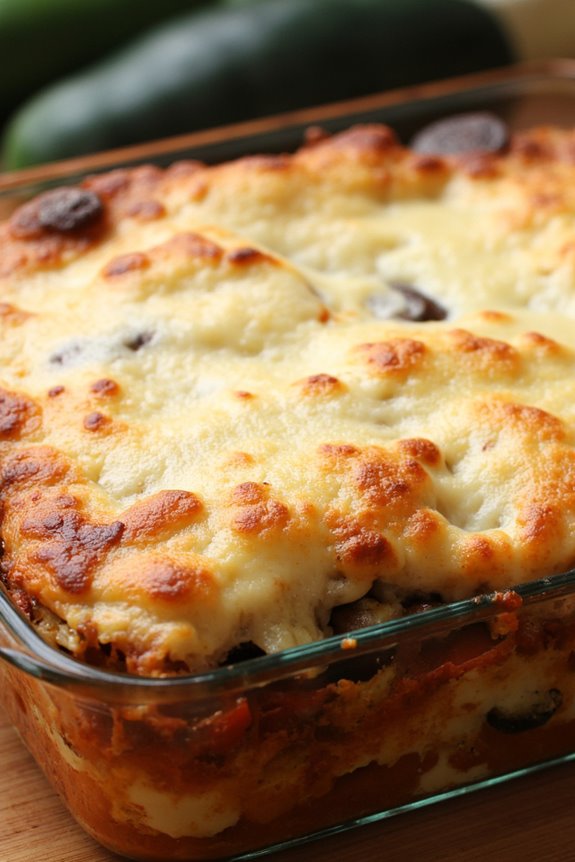
Moussaka is a classic Greek dish that has evolved over the years, incorporating a variety of ingredients and flavors. The modern version often features layers of roasted vegetables, a rich meat sauce, and creamy béchamel, making it not only delicious but also a well-rounded meal.
This recipe highlights the use of eggplant and zucchini, which add a fresh and hearty touch to this beloved dish, while still honoring the traditional flavors of Greek cuisine.
Preparing Modern Moussaka With Eggplant and Zucchini takes a bit of time, but the end result is worth every minute. The dish is perfect for family gatherings or dinner parties, and it can easily serve 4-6 people. With its layers of savory goodness, it’s bound to impress your guests and become a favorite in your home.
Ingredients (serves 4-6):
- 2 medium eggplants
- 2 medium zucchinis
- 1 pound ground beef (or lamb)
- 1 medium onion, diced
- 3 cloves garlic, minced
- 1 can (14 ounces) crushed tomatoes
- 2 tablespoons tomato paste
- 1 teaspoon dried oregano
- 1 teaspoon ground cinnamon
- Salt and pepper, to taste
- 1 cup grated Parmesan cheese
- 1 cup milk
- 2 tablespoons butter
- 2 tablespoons all-purpose flour
- 2 large eggs
- 1/4 teaspoon nutmeg
- Olive oil, for drizzling
Cooking Instructions:
1. Prepare the Vegetables: Slice the eggplants and zucchinis into 1/4-inch thick rounds. Sprinkle them with salt and let them sit for about 30 minutes. This process helps to draw out excess moisture and bitterness from the eggplants.
After 30 minutes, rinse the slices under cold water and pat them dry with a paper towel.
2. Roast the Vegetables: Preheat your oven to 400°F (200°C). Arrange the eggplant and zucchini slices in a single layer on baking sheets. Drizzle them lightly with olive oil and roast in the preheated oven for about 20-25 minutes, or until they’re tender and slightly browned.
Set aside to cool.
3. Cook the Meat Sauce: In a large skillet, heat a tablespoon of olive oil over medium heat. Add the diced onion and sauté until translucent, about 5 minutes. Stir in the minced garlic and cook for another minute.
Add the ground beef (or lamb) to the skillet and cook until browned. Drain excess fat if necessary.
4. Add Tomatoes and Seasoning: Once the meat is browned, stir in the crushed tomatoes, tomato paste, oregano, cinnamon, salt, and pepper. Simmer for about 15 minutes, allowing the flavors to meld together.
Remove from heat and let it cool slightly.
5. Make the Béchamel Sauce: In a saucepan, melt the butter over medium heat. Whisk in the flour and cook for about 2 minutes to form a roux. Gradually add the milk while continuously whisking to avoid lumps.
Cook until the sauce thickens, about 5-7 minutes. Remove from heat and let it cool for a few minutes before whisking in the eggs and nutmeg.
6. Assemble the Moussaka: In a greased baking dish, layer half of the roasted eggplant and zucchini at the bottom. Spread half of the meat sauce over the vegetables, followed by a sprinkling of Parmesan cheese.
Repeat the layering with the remaining vegetables, meat sauce, and finish with the béchamel sauce on top. Sprinkle additional Parmesan cheese over the béchamel.
7. Bake: Preheat the oven to 350°F (175°C) and Bake the assembled moussaka for about 45-50 minutes, or until the top is golden and bubbly.
Allow it to cool for at least 15 minutes before slicing and serving.
Extra Tips:
For a lighter version, you can substitute the ground beef with ground turkey or use a mix of lentils and mushrooms for a vegetarian option.
Additionally, if you prefer a creamier béchamel, you can add more cheese to the sauce. Leftovers can be stored in the refrigerator and taste even better the next day, as the flavors have more time to meld.
Enjoy your delicious Modern Moussaka With Eggplant and Zucchini!
Grilled Lamb Chops With Tzatziki Sauce
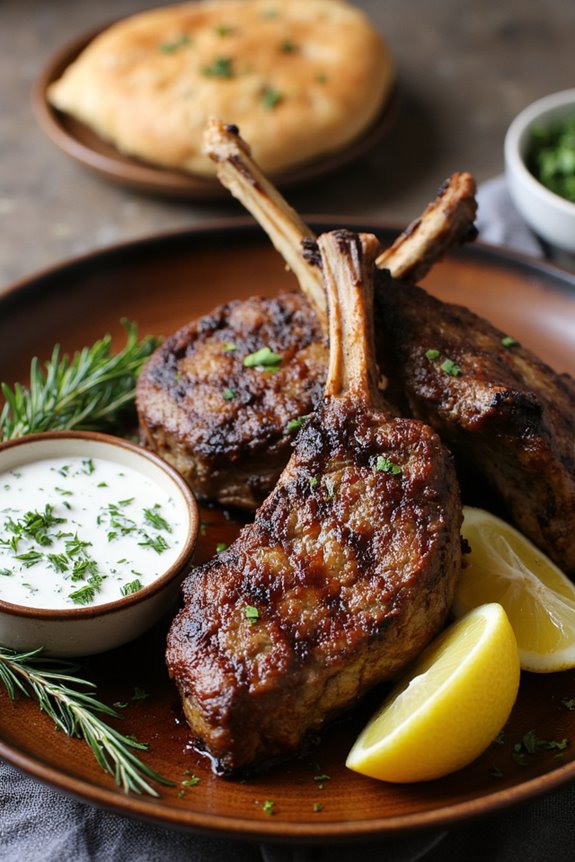
Grilled Lamb Chops with Tzatziki Sauce is a sumptuous dish that embodies the rich flavors of Greek cuisine. The lamb chops are marinated to perfection, enhancing their natural flavors while the tzatziki sauce serves as a revitalizing, creamy contrast. This dish is perfect for a family dinner or a special occasion, and it brings the essence of the Mediterranean right to your table.
The combination of succulent lamb and cool yogurt sauce isn’t only delicious but also a vibrant representation of Greek culinary traditions.
The key to achieving perfectly grilled lamb chops lies in the marinade. A blend of olive oil, garlic, lemon juice, and fresh herbs infuses the meat with flavors that are both aromatic and savory. The tzatziki sauce, made from Greek yogurt, cucumbers, garlic, and dill, complements the lamb chops beautifully, providing a cool and tangy element that balances the dish.
Serve these grilled lamb chops with tzatziki alongside a Greek salad or warm pita bread for a complete meal.
Ingredients (Serves 4-6):
- 2 pounds lamb chops (rib or loin)
- 1/4 cup olive oil
- 4 cloves garlic, minced
- 2 tablespoons fresh rosemary, chopped
- 2 tablespoons fresh thyme, chopped
- Juice of 1 lemon
- Salt and pepper, to taste
For the Tzatziki Sauce:
- 2 cups Greek yogurt
- 1 cucumber, grated and drained
- 2 cloves garlic, minced
- 1 tablespoon fresh dill, chopped
- 1 tablespoon lemon juice
- Salt, to taste
Cooking Instructions:
- Marinate the Lamb Chops: In a large bowl, combine olive oil, minced garlic, chopped rosemary, chopped thyme, lemon juice, salt, and pepper. Add the lamb chops to the bowl, guaranteeing they’re well-coated in the marinade. Cover the bowl with plastic wrap and refrigerate for at least 1 hour or overnight for maximum flavor.
- Prepare the Tzatziki Sauce: While the lamb is marinating, prepare the tzatziki sauce. In a mixing bowl, combine Greek yogurt, grated cucumber (squeezed to remove excess moisture), minced garlic, chopped dill, lemon juice, and salt. Stir well until all ingredients are blended. Cover and refrigerate until ready to serve.
- Preheat the Grill: Preheat your grill to medium-high heat. If using a charcoal grill, guarantee the coals are hot and ashed over. This will secure a nice sear on the lamb chops.
- Grill the Lamb Chops: Remove the lamb chops from the marinade and allow any excess marinade to drip off. Place them on the hot grill. Grill the lamb chops for about 4-5 minutes on each side for medium-rare, or until they reach your desired doneness. Use a meat thermometer to check for an internal temperature of 145°F for medium-rare.
- Rest the Meat: Once cooked, remove the lamb chops from the grill and let them rest on a plate for about 5 minutes. This allows the juices to redistribute throughout the meat, guaranteeing tenderness and flavor.
- Serve: Serve the grilled lamb chops hot with the tzatziki sauce on the side. You can garnish with additional fresh herbs or lemon wedges if desired.
Extra Tips:
When making Grilled Lamb Chops with Tzatziki Sauce, consider using bone-in lamb chops for added flavor and juiciness. If you’re short on time, a 30-minute marinade will still yield tasty results, but marinating overnight will enhance the flavors considerably.
Additionally, feel free to customize the tzatziki by adding ingredients such as mint or additional spices for a unique twist. Always remember to let the meat rest after grilling to achieve the best texture and juiciness. Enjoy your authentic Greek-inspired meal!
Quinoa Greek Salad With Chickpeas
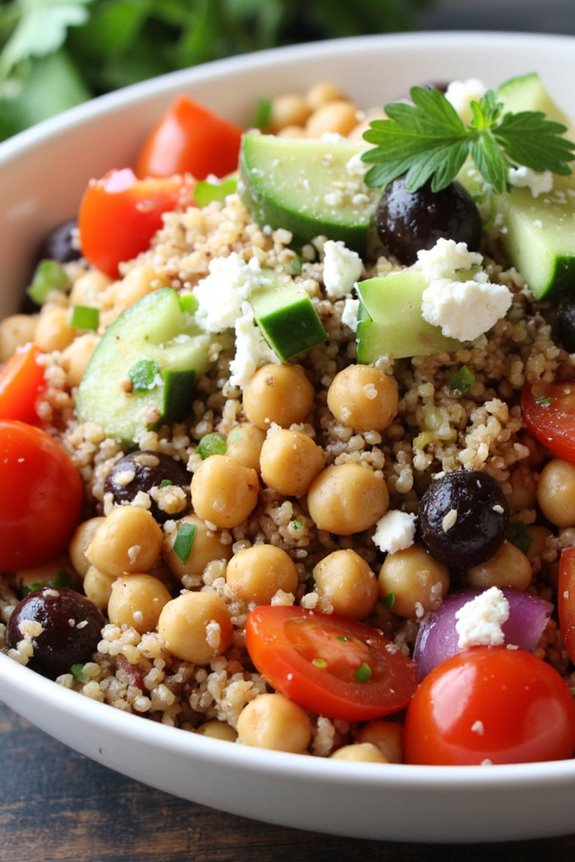
Quinoa Greek Salad with Chickpeas is a vibrant and nutritious dish that combines the wholesome goodness of quinoa with the invigorating flavors of traditional Greek salad ingredients. This salad is perfect for a light dinner or a filling lunch, offering a delightful mix of textures and tastes. The protein-packed chickpeas and protein-rich quinoa make this dish not only satisfying but also nourishing, ensuring you stay energized throughout the day.
This dish is incredibly versatile and can easily be customized to suit your taste preferences. Add more veggies, toss in some olives or feta cheese, or adjust the herbs and seasonings to create your perfect version of this classic Mediterranean delight. The fresh ingredients and zesty dressing come together beautifully, making it a great choice for meal prep or served at gatherings. Enjoy this salad chilled or at room temperature for a deliciously invigorating experience.
Ingredients (Serves 4-6)
- 1 cup quinoa
- 2 cups water or vegetable broth
- 1 can (15 oz) chickpeas, drained and rinsed
- 1 cup cherry tomatoes, halved
- 1 cucumber, diced
- 1 bell pepper, diced (any color)
- 1/2 red onion, finely chopped
- 1/2 cup Kalamata olives, pitted and halved
- 1/2 cup feta cheese, crumbled (optional)
- 1/4 cup fresh parsley, chopped
- 1/4 cup fresh lemon juice
- 1/4 cup olive oil
- 1 teaspoon dried oregano
- Salt and pepper to taste
Cooking Instructions
- Cook the Quinoa: Rinse the quinoa under cold water in a fine mesh strainer to remove any bitterness. In a medium-sized pot, combine the rinsed quinoa and water (or vegetable broth). Bring to a boil over medium-high heat, then reduce heat to low, cover, and simmer for about 15 minutes or until the quinoa is fluffy and the liquid has been absorbed. Remove from heat and let it sit for 5 minutes before fluffing it with a fork.
- Prepare the Vegetables: While the quinoa is cooking, chop the vegetables. Halve the cherry tomatoes, dice the cucumber and bell pepper, and finely chop the red onion. Place all the chopped vegetables into a large mixing bowl.
- Combine Ingredients: Add the drained chickpeas, Kalamata olives, and crumbled feta cheese (if using) to the bowl with the vegetables. Then, add the cooked quinoa to the bowl, ensuring it cools slightly before mixing to prevent wilting the veggies.
- Make the Dressing: In a small bowl or jar, whisk together the fresh lemon juice, olive oil, dried oregano, salt, and pepper. Taste and adjust seasoning as desired.
- Dress the Salad: Pour the dressing over the quinoa and vegetable mixture. Gently toss everything together until the ingredients are well combined and evenly coated with the dressing.
- Garnish and Serve: Add the chopped fresh parsley on top for garnish. Serve the salad immediately or refrigerate it for at least 30 minutes to allow the flavors to meld. Enjoy chilled or at room temperature.
Extra Tips
For added flavor, consider marinating the chickpeas in some lemon juice and olive oil for a few hours before adding them to the salad. You can also experiment with different herbs, such as dill or mint, to give the salad a unique twist.
If you prefer a heartier salad, feel free to add grilled chicken or shrimp for extra protein. Additionally, this quinoa salad can be stored in the refrigerator for up to three days, making it perfect for meal prep or making ahead for busy weekdays.
Baked Feta With Honey and Thyme

Baked Feta with Honey and Thyme is a delicious and simple Greek-inspired dish that brings together the rich creaminess of feta cheese with the sweet, floral notes of honey and the aromatic essence of fresh thyme. This dish not only serves as a fantastic appetizer but can also be a delightful addition to your main course.
With minimal ingredients and straightforward preparation, you can impress your guests with this flavorful offering that beautifully embodies the Mediterranean spirit. This recipe highlights the combination of savory and sweet, making it an excellent choice for those who appreciate the versatility of cheese.
The feta melts slightly in the oven, creating a luscious texture that pairs wonderfully with crusty bread or fresh vegetables. Perfect for gatherings or cozy family dinners, Baked Feta with Honey and Thyme is sure to become a favorite on your table.
Ingredients (Serves 4-6):
- 1 block (about 8 ounces) of feta cheese
- 1/4 cup honey
- 2 tablespoons olive oil
- 2 teaspoons fresh thyme leaves (or 1 teaspoon dried thyme)
- 1/4 teaspoon black pepper
- Optional: crusty bread or pita for serving
Cooking Instructions:
- Preheat the Oven: Begin by preheating your oven to 400°F (200°C). This guarantees that your feta will bake evenly and achieve that perfect creamy consistency.
- Prepare the Feta: Take the block of feta cheese and place it in a small baking dish or an oven-safe skillet. You want to confirm that the dish is just large enough to hold the feta snugly without too much extra space.
- Add Olive Oil, Honey, and Thyme: Drizzle the olive oil over the feta, followed by the honey. Make sure to cover the top of the cheese evenly. Sprinkle the fresh thyme leaves and black pepper over the honey and oil. This will infuse the feta with wonderful flavors as it bakes.
- Bake the Feta: Place the baking dish or skillet in the preheated oven and bake for about 30 minutes. You want the feta to become soft and slightly golden, and the honey to bubble around the edges.
- Serve Warm: Once baked, remove the dish from the oven and let it cool for a few minutes. Serve the warm feta with crusty bread or pita, allowing everyone to scoop up the creamy cheese with the sweet, aromatic honey and thyme mixture.
Extra Tips:
To elevate the flavors of your Baked Feta with Honey and Thyme, consider adding a sprinkle of crushed red pepper flakes for a hint of spice, or serving with a side of olives and marinated vegetables for a more complete Mediterranean experience.
You can also experiment with different herbs like rosemary or oregano to suit your taste. Enjoy the dish fresh out of the oven for the best taste and texture!
Mediterranean Shrimp Souvlaki

Mediterranean Shrimp Souvlaki is a delightful dish that captures the essence of Greek cuisine with its vibrant flavors and fresh ingredients. This recipe features succulent shrimp marinated in a blend of aromatic herbs and spices, then skewered and grilled to perfection. Served with a side of tzatziki sauce and warm pita bread, it’s a fantastic option for a casual dinner or a festive gathering. The marinade infuses the shrimp with a burst of flavor, making each bite a delicious experience that transports you straight to the sun-drenched shores of the Mediterranean.
Preparing Shrimp Souvlaki is an enjoyable process that can be shared with family or friends. The marination step allows the shrimp to soak in the Mediterranean flavors, while grilling brings out their natural sweetness. Pair this dish with a revitalizing Greek salad or roasted vegetables for a complete meal that’s both healthy and satisfying. Whether you’re hosting a dinner party or simply treating yourself to a flavorful meal, this Mediterranean Shrimp Souvlaki will surely impress.
Ingredients (Serves 4-6)
- 1.5 lbs large shrimp, peeled and deveined
- 1/4 cup olive oil
- 3 tablespoons fresh lemon juice
- 3 cloves garlic, minced
- 2 teaspoons dried oregano
- 1 teaspoon smoked paprika
- 1/2 teaspoon salt
- 1/4 teaspoon black pepper
- 1/4 teaspoon red pepper flakes (optional)
- 8-10 skewers (if using wooden skewers, soak in water for 30 minutes)
- Fresh parsley, chopped (for garnish)
- Tzatziki sauce (for serving)
- Warm pita bread (for serving)
Cooking Instructions
- Prepare the Marinade: In a medium bowl, combine the olive oil, lemon juice, minced garlic, dried oregano, smoked paprika, salt, black pepper, and red pepper flakes (if using). Whisk the ingredients together until well blended, creating a flavorful marinade.
- Marinate the Shrimp: Add the peeled and deveined shrimp to the bowl with the marinade. Toss the shrimp gently to confirm they’re evenly coated. Cover the bowl with plastic wrap and refrigerate for at least 30 minutes, allowing the flavors to meld and penetrate the shrimp.
- Preheat the Grill: While the shrimp is marinating, prepare your grill by preheating it to medium-high heat. If using a grill pan, heat it over medium-high heat on the stove.
- Skewer the Shrimp: Once the shrimp has marinated, thread them onto the skewers, making sure to leave a little space between each shrimp for even cooking. Depending on the size of your skewers, you may use 2-3 shrimp per skewer.
- Grill the Shrimp: Place the skewered shrimp on the preheated grill. Grill for about 2-3 minutes on each side or until the shrimp are pink and opaque. Be careful not to overcook the shrimp, as they can become tough.
- Serve: Once cooked, remove the skewers from the grill. Garnish with freshly chopped parsley and serve immediately with tzatziki sauce and warm pita bread on the side.
Extra Tips
For the best results, choose fresh, high-quality shrimp that are still in their shells, as they tend to be more flavorful. You can also customize the marinade by adding other herbs like thyme or dill to suit your taste.
If you prefer a smoky flavor, consider adding a few minutes of cooking time over indirect heat. Finally, feel free to experiment with different dipping sauces; a simple lemon garlic sauce or a spicy harissa could also complement the shrimp beautifully. Enjoy your Mediterranean feast!
Roasted Vegetable and Halloumi Skewers
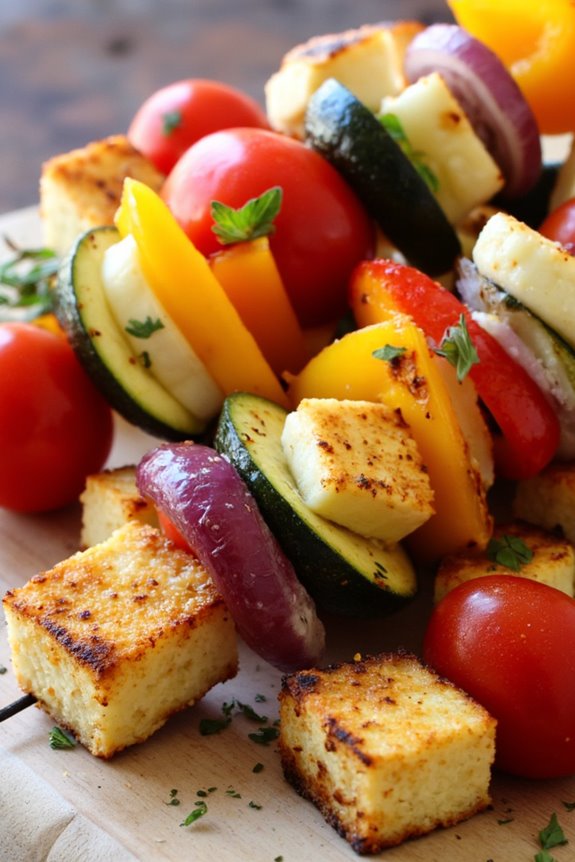
Roasted Vegetable and Halloumi Skewers are a delightful and colorful dish that brings the flavors of Greece right to your dinner table. The combination of vibrant vegetables and the salty richness of halloumi cheese creates a medley of tastes that isn’t only delicious but also visually appealing.
These skewers are perfect for a summer barbecue or as a tasty appetizer for a Mediterranean-themed dinner. Whether you’re a vegetarian or simply looking to add more vegetables to your diet, this dish is bound to impress.
The beauty of Roasted Vegetable and Halloumi Skewers lies in their versatility. You can use a variety of seasonal vegetables and customize the skewers to your liking. The halloumi cheese, known for its firm texture and ability to hold its shape when grilled, adds a wonderful contrast to the soft, roasted vegetables.
Serve these skewers with a side of tzatziki sauce or a fresh salad for a complete meal that captures the essence of Greek cuisine.
Ingredients (Serves 4-6):
- 1 block (250g) halloumi cheese, cut into 1-inch cubes
- 1 red bell pepper, cut into 1-inch pieces
- 1 yellow bell pepper, cut into 1-inch pieces
- 1 zucchini, sliced into thick rounds
- 1 red onion, cut into wedges
- 1 cup cherry tomatoes
- 4 tablespoons olive oil
- 2 teaspoons dried oregano
- Salt and pepper, to taste
- Skewers (wooden or metal)
Cooking Instructions:
- Preheat the Oven: Preheat your oven to 400°F (200°C). This temperature is ideal for roasting the vegetables evenly and allowing them to caramelize, which enhances their natural sweetness.
- Prepare the Skewers: If you’re using wooden skewers, soak them in water for about 30 minutes. This prevents them from burning in the oven. For metal skewers, you can skip this step.
- Chop the Vegetables: In a large bowl, combine the chopped bell peppers, zucchini, red onion, and cherry tomatoes. Verify all the pieces are roughly the same size for even cooking.
- Season the Vegetables: Drizzle the olive oil over the vegetables and sprinkle with dried oregano, salt, and pepper. Toss everything together until the vegetables are well coated in the oil and seasoning.
- Assemble the Skewers: Thread the seasoned vegetables and halloumi cheese cubes onto the skewers, alternating between the cheese and vegetables to create a colorful pattern. Leave a small gap between each piece to allow for even roasting.
- Roast the Skewers: Place the skewers on a baking sheet lined with parchment paper. Roast in the preheated oven for 20-25 minutes, turning halfway through, until the vegetables are tender and slightly charred, and the halloumi is golden brown.
- Serve: Once cooked, remove the skewers from the oven and let them cool slightly. Serve warm, garnished with fresh herbs if desired, and enjoy with tzatziki sauce or a fresh salad on the side.
Extra Tips:
To elevate the flavors of your Roasted Vegetable and Halloumi Skewers, consider marinating the halloumi and vegetables in olive oil, lemon juice, and garlic for a few hours before assembling. This will infuse the skewers with a zesty flavor.
Additionally, feel free to experiment with different vegetables or herbs based on what’s in season or available. Grilling these skewers on an outdoor grill can also add a smoky flavor that enhances the overall dish. Enjoying these skewers fresh off the grill with a squeeze of lemon juice can truly highlight the Mediterranean essence of this recipe.
Spicy Greek Chicken Gyros
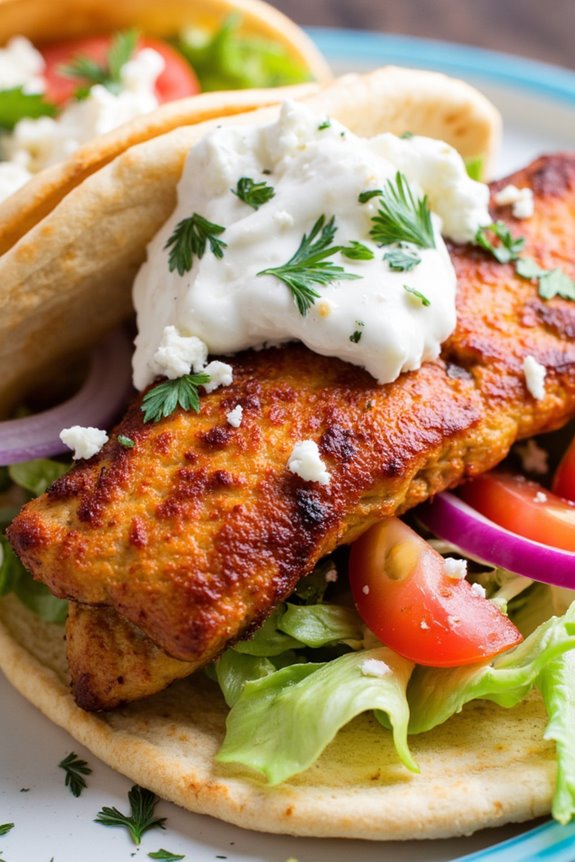
If you’re looking to bring the vibrant flavors of Greece to your dinner table, Spicy Greek Chicken Gyros are the perfect choice. This dish combines tender marinated chicken with fresh vegetables and creamy tzatziki sauce, all wrapped in warm pita bread. The spices and herbs used in the marinade infuse the chicken with a delightful and bold flavor, while the fresh toppings provide a revitalizing crunch that balances the dish perfectly.
Making gyros at home can be a fun and rewarding experience, allowing you to customize each wrap to your liking. You can adjust the level of spiciness in the chicken and add your favorite toppings, such as feta cheese or olives. Serve these gyros with a side of Greek salad or crispy fries for a complete meal that transports you straight to the sun-drenched shores of the Mediterranean.
Ingredients (serving size: 4-6 people):
- 1.5 lbs boneless, skinless chicken thighs
- 3 tablespoons olive oil
- 3 cloves garlic, minced
- 2 teaspoons smoked paprika
- 1 teaspoon ground cumin
- 1 teaspoon dried oregano
- ½ teaspoon cayenne pepper (adjust for spice preference)
- Salt and pepper, to taste
- 4-6 pita breads
- 1 cup diced tomatoes
- 1 cup shredded lettuce
- ½ cup red onion, thinly sliced
- 1 cup tzatziki sauce (store-bought or homemade)
- Fresh parsley, for garnish (optional)
Cooking Instructions:
- Prepare the Marinade: In a large mixing bowl, combine olive oil, minced garlic, smoked paprika, ground cumin, dried oregano, cayenne pepper, salt, and pepper. Whisk the ingredients together until well blended. This marinade won’t only add flavor but also help tenderize the chicken.
- Marinate the Chicken: Add the chicken thighs to the marinade, making sure they’re fully coated. Cover the bowl with plastic wrap or transfer the chicken to a resealable plastic bag. Refrigerate for at least 1 hour, preferably overnight, to allow the flavors to penetrate the meat.
- Cook the Chicken: Preheat a grill or grill pan over medium-high heat. Remove the chicken from the marinade and shake off any excess. Place the chicken on the grill and cook for about 6-7 minutes per side, or until the internal temperature reaches 165°F and the chicken is nicely charred. Once cooked, transfer the chicken to a cutting board and let it rest for a few minutes.
- Slice the Chicken: After resting, slice the grilled chicken into thin strips. This will make it easier to eat when assembled in the gyros.
- Assemble the Gyros: Warm the pita breads on the grill or in a skillet for a few seconds on each side. Lay a pita flat and add a generous portion of sliced chicken, followed by diced tomatoes, shredded lettuce, and red onion. Top with a dollop of tzatziki sauce and garnish with fresh parsley, if desired.
- Serve: Roll the pita to enclose the filling and serve immediately while warm. Enjoy your homemade Spicy Greek Chicken Gyros with your favorite sides!
Extra Tips: To enhance the flavor and presentation of your gyros, consider making your own tzatziki sauce using Greek yogurt, grated cucumber, lemon juice, garlic, and fresh dill. For added texture, you can also include sliced olives or crumbled feta in your gyros. If you’re short on time, prepare the marinade and chicken a day ahead to streamline the cooking process, allowing you to enjoy a delicious meal in no time!
Zucchini Noodles With Pesto and Feta
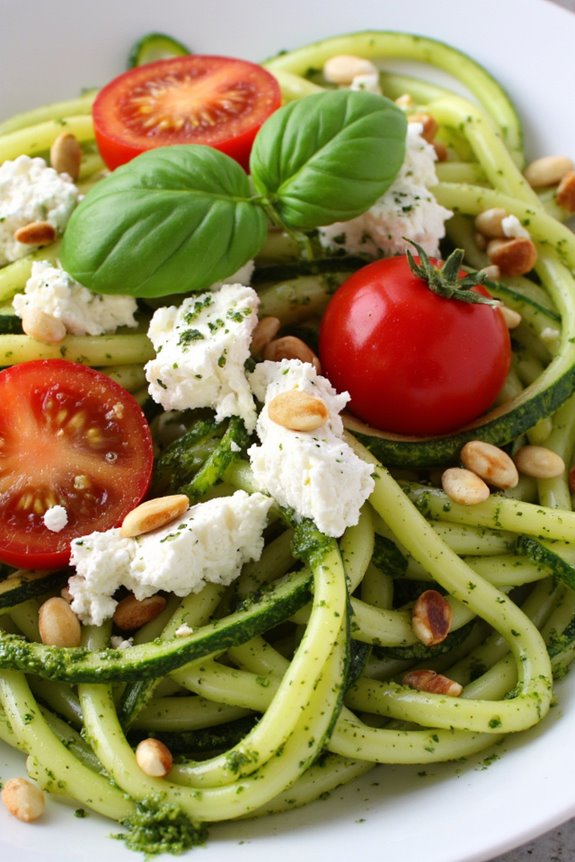
Zucchini Noodles with Pesto and Feta is a revitalizing and vibrant dish that captures the essence of Mediterranean cuisine. This light yet flavorful meal is perfect for those who are looking for a healthy alternative to traditional pasta. The combination of fresh zucchini, homemade or store-bought pesto, and salty feta cheese creates a delightful symphony of flavors and textures.
Plus, it’s quick to prepare, making it an ideal weeknight dinner option. This dish isn’t only nutritious but also visually appealing, with the bright green zucchini spirals and the rich, green pesto. The feta adds a creamy tang that beautifully complements the freshness of the zucchini noodles.
You can easily customize this dish by adding in your favorite vegetables or proteins, making it versatile enough to suit any taste preference.
Ingredients (Serves 4-6):
- 4 medium zucchinis
- 1 cup fresh basil pesto (store-bought or homemade)
- 1 cup crumbled feta cheese
- 1 cup cherry tomatoes, halved
- ¼ cup pine nuts (optional)
- 2 tablespoons olive oil
- Salt and pepper to taste
- Fresh basil leaves for garnish (optional)
Cooking Instructions:
1. Prepare the Zucchini Noodles: Start by washing the zucchinis thoroughly. Using a spiralizer, julienne peeler, or mandoline, create long strands of zucchini to resemble noodles. If you don’t have these tools, you can also thinly slice the zucchini into ribbons.
Once you have your zucchini noodles, place them in a colander, sprinkle lightly with salt, and let them sit for about 10-15 minutes. This will help draw out excess moisture, preventing your dish from becoming watery.
2. Cook the Zucchini Noodles: In a large skillet, heat the olive oil over medium heat. Once hot, add the zucchini noodles to the skillet. Sauté the noodles for about 3-5 minutes until they’re slightly tender but still have a bit of crunch.
Avoid overcooking as you want to maintain the freshness of the zucchini. After cooking, remove from heat and set aside.
3. Mix in the Pesto: Add the pesto to the cooked zucchini noodles in the skillet. Toss gently to combine, ensuring that all the noodles are evenly coated with the pesto. This step is essential as it adds a burst of flavor to the dish.
4. Add Feta and Tomatoes: Gently fold in the crumbled feta cheese and halved cherry tomatoes into the zucchini noodles. The heat from the noodles will slightly warm the tomatoes and melt the feta, making them even more flavorful.
Season with salt and pepper to taste, adjusting according to your preference.
5. Serve and Garnish: Transfer the zucchini noodles to a serving dish or individual bowls. If desired, sprinkle with toasted pine nuts for added crunch and garnish with fresh basil leaves.
Serve immediately while the dish is warm.
Extra Tips:
For an extra layer of flavor, consider adding grilled chicken, shrimp, or chickpeas for protein. If you prefer a creamier sauce, you can mix in a splash of cream or Greek yogurt after adding the pesto.
Additionally, to enhance the flavor of your pesto, you can add a squeeze of lemon juice or some red pepper flakes for a little heat. Enjoy your Zucchini Noodles with Pesto and Feta as a light meal or as a revitalizing side dish at your next gathering!
Olive Oil Cake With Citrus Glaze

Olive oil cake is a delightful dessert that embodies the essence of Mediterranean cooking, featuring the rich flavors of olive oil combined with the zesty brightness of citrus. This cake isn’t only moist and tender but also incredibly simple to prepare, making it an ideal choice for both casual gatherings and special occasions.
The olive oil provides a unique depth of flavor, while the citrus glaze adds a sweet and tangy finish that elevates the cake to a new level of deliciousness. As you begin making this Olive Oil Cake with Citrus Glaze, you’ll appreciate how the ingredients come together harmoniously.
It’s a wonderful way to showcase the quality of your olive oil and citrus fruits, so choose the best you can find. Once baked, this cake can be enjoyed on its own or paired with fresh fruit and a dollop of whipped cream, making it versatile enough for any dessert table.
Ingredients (Serves 4-6):
- 1 cup extra virgin olive oil
- 1 cup granulated sugar
- 3 large eggs
- 1 teaspoon vanilla extract
- 2 cups all-purpose flour
- 2 teaspoons baking powder
- 1/2 teaspoon salt
- 1/2 cup whole milk
- Zest of 1 orange
- Zest of 1 lemon
For the Citrus Glaze:
- 1 cup powdered sugar
- 2 tablespoons fresh orange juice
- 2 tablespoons fresh lemon juice
- Zest of 1 orange (for garnish)
- Zest of 1 lemon (for garnish)
Cooking Instructions:
- Preheat the Oven: Begin by preheating your oven to 350°F (175°C). This guarantees that the cake bakes evenly and rises properly.
- Prepare the Cake Pan: Grease a 9-inch round cake pan with olive oil and line the bottom with parchment paper. This will prevent the cake from sticking and make it easier to remove after baking.
- Mix Wet Ingredients: In a large mixing bowl, whisk together the olive oil, granulated sugar, eggs, and vanilla extract until well combined and slightly frothy. This step helps to incorporate air, giving the cake a light texture.
- Combine Dry Ingredients: In a separate bowl, sift together the flour, baking powder, and salt. This not only removes any lumps but also helps evenly distribute the baking powder throughout the flour.
- Combine Wet and Dry Mixtures: Gradually add the dry ingredients to the wet mixture, alternating with the whole milk. Start and end with the flour mixture, mixing gently until just combined. Be careful not to overmix, as this can lead to a dense cake.
- Add Citrus Zest: Fold in the orange and lemon zest gently into the batter. The zest will infuse the cake with fresh citrus flavor, enhancing its overall taste.
- Bake the Cake: Pour the batter into the prepared cake pan and smooth the top. Bake in the preheated oven for 30-35 minutes, or until a toothpick inserted into the center comes out clean. Keep an eye on it to avoid over-baking, which can dry out the cake.
- Cool the Cake: Once baked, remove the cake from the oven and allow it to cool in the pan for about 10 minutes. Then, turn it out onto a wire rack to cool completely.
- Prepare the Citrus Glaze: While the cake is cooling, whisk together the powdered sugar, fresh orange juice, and fresh lemon juice in a small bowl until smooth. The glaze should be pourable but not too runny.
- Glaze the Cake: Once the cake is completely cool, drizzle the citrus glaze over the top, allowing it to drip down the sides. For an added touch, sprinkle with extra citrus zest for garnish.
Extra Tips:
When making this Olive Oil Cake with Citrus Glaze, consider using high-quality extra virgin olive oil for the best flavor. If you prefer a more pronounced citrus flavor, you can adjust the amount of zest in the cake and glaze.
Additionally, feel free to experiment with different citrus fruits, such as grapefruit or lime, to create variations of this delightful dessert. The cake can be stored in an airtight container at room temperature for up to three days, making it perfect for making ahead of time for gatherings.