

When I think of Greek desserts, the rich aromas and delightful textures come to mind. Each treat tells a story of tradition and love, from the layered baklava to the creamy galaktoboureko. These 12 rustic recipes are perfect for when you want to indulge in something special yet simple. Let’s explore these mouthwatering delights that can bring a taste of Greece right into your kitchen.
Baklava
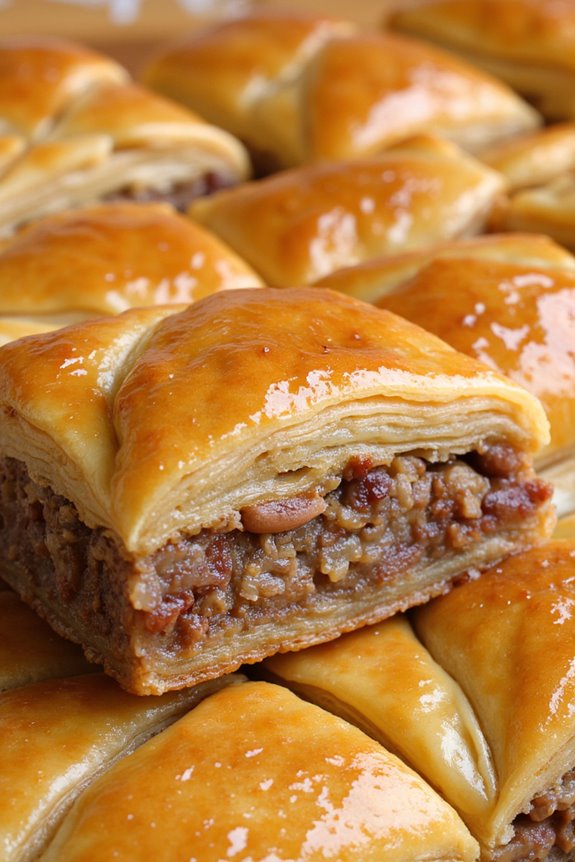
Baklava is a quintessential Greek dessert that embodies the rich flavors and textures of the Mediterranean region. This delightful pastry consists of layers of thin phyllo dough, filled with a mixture of finely chopped nuts and sweetened with a honey syrup. The contrast of the crispy layers and the sticky, sweet filling creates a treat that’s simply irresistible.
Traditionally served in diamond or square-shaped pieces, baklava isn’t only a popular dessert for special occasions but also a beloved everyday indulgence in Greek households.
Making baklava can seem intimidating due to the delicate nature of phyllo dough, but with patience and practice, anyone can master this classic recipe. Each layer of phyllo is brushed with melted butter to guarantee a golden-brown finish, and the nut filling is typically made from a combination of walnuts, pistachios, and almonds.
Once baked, the baklava is drenched in a fragrant syrup made from honey, sugar, and lemon juice, enhancing its flavor and adding a beautiful shine to the top.
Ingredients (Serves 4-6)
- 1 package of phyllo dough (16 oz), thawed
- 1 cup unsalted butter, melted
- 2 cups walnuts, finely chopped
- 1 cup pistachios, finely chopped
- 1 cup almonds, finely chopped
- 1 teaspoon ground cinnamon
- 1 cup sugar
- 1 cup water
- 1 cup honey
- 1 teaspoon vanilla extract
- 1 tablespoon lemon juice
Cooking Instructions
1. Prepare the Nut Filling: In a large bowl, combine the finely chopped walnuts, pistachios, almonds, and ground cinnamon. Mix thoroughly to guarantee the spices are evenly distributed throughout the nut mixture.
2. Prepare the Phyllo Dough: Preheat your oven to 350°F (175°C). Unroll the phyllo dough and cover it with a damp kitchen towel to prevent it from drying out. Take one sheet of phyllo and place it in a greased 9×13 inch baking dish. Brush the sheet with melted butter using a pastry brush.
Repeat this process, layering 8-10 sheets of phyllo, each brushed with butter.
3. Add the Nut Filling: Spread a thin layer of the nut mixture over the phyllo sheets in the baking dish. Then, continue layering more sheets of phyllo, again brushing each with melted butter. Repeat the process until you have used half of the phyllo dough and half of the nut mixture.
4. Layer and Finish: After adding the second layer of nut filling, continue to layer the remaining phyllo dough on top, using the same technique of brushing each sheet with butter. Once all layers are complete, use a sharp knife to cut the baklava into diamond or square shapes.
5. Bake the Baklava: Bake the baklava in the preheated oven for about 50 minutes, or until the top is golden brown and crisp. Keep an eye on it to avoid over-baking.
6. Prepare the Syrup: While the baklava is baking, combine sugar, water, honey, vanilla extract, and lemon juice in a saucepan over medium heat. Stir until the sugar dissolves. Bring to a boil and allow it to simmer for about 10 minutes. Remove from heat and let it cool.
7. Soak the Baklava: Once the baklava is finished baking, remove it from the oven and immediately pour the cooled syrup evenly over the hot baklava. Allow it to soak for several hours, or ideally overnight, so the syrup can infuse the layers.
Extra Tips
When making baklava, it’s essential to keep the phyllo dough covered to prevent it from drying out while you work. If you’re new to handling phyllo, take your time and be gentle, as it can be fragile.
Experiment with the nut mixture by adding other nuts or adjusting the ratios to suit your taste. For a unique twist, you can flavor the syrup with rose or orange blossom water for added depth.
Finally, remember that baklava tastes even better the next day, as the flavors meld together beautifully, making it a perfect make-ahead dessert.
Galaktoboureko
Galaktoboureko is a traditional Greek dessert that combines the rich flavors of semolina custard with crispy phyllo pastry, all soaked in a fragrant syrup. This delightful treat has its roots in the Byzantine era and has become a beloved staple in Greek households, especially during festive occasions.
The layers of thin, flaky pastry contrast beautifully with the creamy filling, creating a dessert that’s both indulgent and comforting.
Making Galaktoboureko may seem intimidating at first, but with a little patience and practice, you can master this classic recipe. The key to its success lies in the preparation of the custard and the careful layering of the phyllo dough.
Once baked and soaked in syrup, the dessert transforms into a heavenly fusion of textures and flavors that will leave everyone craving more.
Ingredients (Serves 4-6):
- 1 cup semolina
- 1 cup sugar
- 4 cups milk
- 4 large eggs
- 1 teaspoon vanilla extract
- 1 cup unsalted butter, melted
- 1 package (16 oz) phyllo pastry
- 1 cup water
- 1 cup sugar (for syrup)
- 1/2 cup lemon juice
- 1 teaspoon cinnamon (optional)
Cooking Instructions:
1. Prepare the Syrup: In a saucepan, combine 1 cup of sugar and 1 cup of water over medium heat. Stir until the sugar dissolves, then bring to a boil. Once boiling, reduce the heat and add 1/2 cup of lemon juice. Let the syrup simmer for about 10 minutes, then remove it from heat and allow it to cool.
2. Make the Custard: In a large saucepan, heat 4 cups of milk over medium heat. In a separate bowl, whisk together 1 cup of sugar and 1 cup of semolina. Gradually add this mixture to the heated milk while continuously whisking to prevent lumps.
Cook the mixture, stirring constantly, until it thickens (about 10-15 minutes). Once thickened, remove from heat and stir in 4 large eggs and 1 teaspoon of vanilla extract until fully incorporated. Allow the custard to cool slightly.
3. Prepare the Phyllo: Preheat your oven to 350°F (175°C). Take the package of phyllo pastry out of the fridge and lay it out on a clean surface. Cover the phyllo sheets with a damp cloth to prevent them from drying out.
Brush a 9×13 inch baking dish with melted butter.
4. Layer the Phyllo: Place one sheet of phyllo in the baking dish and brush it lightly with melted butter. Repeat this process, layering and buttering 8-10 sheets of phyllo.
Once layered, pour half of the custard mixture over the phyllo base. Continue layering another 8-10 sheets of phyllo, brushing each one with butter. Pour the remaining custard over this layer, then finish with another 8-10 layers of phyllo, again brushing each with melted butter.
5. Bake the Galaktoboureko: With a sharp knife, cut the assembled Galaktoboureko into diamond or square shapes. Bake in the preheated oven for about 40-45 minutes, or until the top is golden brown and crispy.
6. Soak in Syrup: Once baked, remove the Galaktoboureko from the oven and immediately pour the cooled syrup evenly over the hot dessert. Allow it to soak for at least 30 minutes before serving, which will help the flavors meld together.
Extra Tips:
To achieve the best results with your Galaktoboureko, make sure to keep the phyllo sheets covered while you work, as they can dry out quickly.
Also, feel free to experiment with flavors in the syrup by adding a dash of cinnamon or a splash of orange blossom water for an aromatic twist.
For an added touch, serve the Galaktoboureko with a dollop of whipped cream or a scoop of vanilla ice cream to enhance the dessert experience. Enjoy your delightful creation!
Kourabiedes
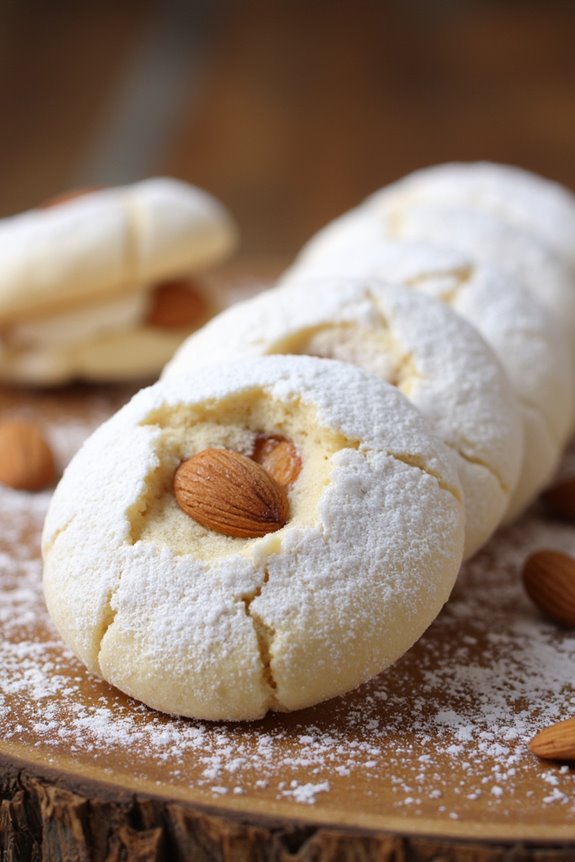
Kourabiedes are traditional Greek almond shortbread cookies that are often enjoyed during festive occasions, particularly during Christmas and weddings. These delightful treats are characterized by their buttery richness and a light dusting of powdered sugar, giving them a snowy appearance. The unique blend of flavors from toasted almonds and a hint of vanilla makes them irresistible, and they’ve become a beloved dessert not only in Greece but also among Greek communities around the world.
Making Kourabiedes is a simple yet rewarding process that allows you to indulge in the authentic flavors of Greek pastry. The dough comes together quickly, and after a short baking time, these cookies fill your kitchen with a warm, inviting aroma. Once baked and coated in powdered sugar, they’re perfect for sharing with family and friends or enjoying with a cup of coffee or tea.
Ingredients (Serves 4-6)
- 1 cup unsalted butter, softened
- ½ cup powdered sugar, plus more for dusting
- 1 teaspoon vanilla extract
- 2 cups all-purpose flour
- 1 cup finely chopped almonds (toasted)
- 1 teaspoon baking powder
- A pinch of salt
- Optional: 1 tablespoon brandy or ouzo for added flavor
Cooking Instructions
- Prepare the Almonds: Begin by toasting your chopped almonds. Spread them out on a baking sheet and place them in a preheated oven at 350°F (175°C) for about 10 minutes, or until they’re golden brown and fragrant. Keep an eye on them to prevent burning. Once toasted, remove from the oven and let them cool.
- Cream the Butter and Sugar: In a large mixing bowl, combine the softened butter and ½ cup of powdered sugar. Using an electric mixer, beat them together on medium speed until the mixture is light and fluffy, about 3-5 minutes. This step is essential for achieving the desired texture of the cookies.
- Add Flavors: Add the vanilla extract (and optional brandy or ouzo if using) to the butter and sugar mixture. Beat until combined to incorporate the flavors into the dough.
- Combine Dry Ingredients: In a separate bowl, whisk together the all-purpose flour, baking powder, and salt. Gradually add this dry mixture to the butter and sugar mixture, mixing on low speed until just combined. Be careful not to overmix, as this can affect the texture of the cookies.
- Fold in the Almonds: Gently fold the toasted almonds into the dough using a spatula. Make sure they’re evenly distributed throughout the mixture.
- Shape the Cookies: Preheat your oven to 350°F (175°C) if you haven’t done so already. Take small portions of the dough (about a tablespoon) and roll them into balls or shape them into crescent forms. Place them on a baking sheet lined with parchment paper, leaving some space between each cookie.
- Bake: Bake the cookies in the preheated oven for approximately 15-20 minutes, or until they’re lightly golden on the bottom and firm to the touch. Be careful not to overbake as they should remain soft inside.
- Dust with Sugar: Allow the cookies to cool slightly on the baking sheet for 5 minutes before transferring them to a wire rack. Once they’re completely cool, generously dust them with powdered sugar.
Extra Tips
When making Kourabiedes, be sure not to skip the toasting of the almonds as it enhances their flavor considerably. Additionally, if you want to create a more festive touch, consider adding a sprinkle of cinnamon to the powdered sugar for dusting.
Store the cookies in an airtight container to maintain their freshness, and they can also be frozen for longer storage. Enjoy these delightful treats with family and friends, and don’t forget to make a double batch; they tend to disappear quickly!
Loukoum
Loukoum, often referred to as Turkish delight, is a classic confection that has roots in Greece and many Mediterranean countries. This sweet treat isn’t only famous for its chewy texture but also its delightful flavors infused with various essences. Traditionally, it’s made with sugar, cornstarch, and water, creating a delicate, jelly-like candy that can be flavored with rosewater, lemon, or mastic.
Loukoum is often dusted with powdered sugar or desiccated coconut, making it a beautiful addition to any dessert table or a charming gift for friends and family.
Making Loukoum at home might seem intimidating, but with a little patience and the right ingredients, you can create this delightful dessert. The process involves boiling a sugar mixture and then allowing it to set, resulting in a soft, sweet treat that can be enjoyed on its own or paired with nuts or dried fruits. This recipe yields approximately 4-6 servings, perfect for sharing or indulging in as a personal treat.
Ingredients (Serves 4-6):
- 2 cups granulated sugar
- 1 cup water
- 1 cup cornstarch
- 1/4 cup lemon juice
- 1 tablespoon rosewater (or any preferred flavoring)
- 1 teaspoon citric acid
- 1/2 cup powdered sugar (for dusting)
- 1/2 cup desiccated coconut (optional, for dusting)
Instructions:
- Prepare the Pan: Start by greasing a square or rectangular baking dish (approximately 8×8 inches) with a light coating of oil. This will prevent the loukoum from sticking once it sets.
- Combine Ingredients: In a medium saucepan, combine the sugar, water, and lemon juice. Stir the mixture over medium heat until the sugar dissolves completely.
- Thicken the Mixture: In a separate bowl, mix the cornstarch with 1 cup of cold water until it forms a smooth slurry. Gradually pour this mixture into the saucepan while stirring continuously. This will help thicken the mixture as it heats.
- Cook the Mixture: Continue to cook the mixture over medium heat, stirring constantly, until it reaches a thick, gel-like consistency. This usually takes about 10-15 minutes. Be careful not to let it burn.
- Add Flavoring: Once the mixture has thickened, remove it from heat and stir in the rosewater and citric acid. Mix well to guarantee the flavors are evenly distributed.
- Set the Loukoum: Pour the thick mixture into the prepared baking dish, smoothing the top with a spatula. Allow it to cool at room temperature for about 4-6 hours or until it has completely set.
- Cut and Dust: Once set, dust a clean surface with powdered sugar and coconut (if using). Carefully remove the loukoum from the baking dish and cut it into small squares. Roll each piece in the powdered sugar to prevent sticking.
- Serve or Store: Enjoy your homemade loukoum immediately or store it in an airtight container for up to a week.
Extra Tips:
When making loukoum, it’s vital to keep the mixture moving while it cooks to prevent it from burning at the bottom.
If you prefer different flavors, feel free to experiment with other extracts such as vanilla or lemon, and consider adding nuts like pistachios or almonds for added texture.
Remember that the cooling time is critical; allowing it to set fully will guarantee the perfect chewy consistency. Enjoy your delightful homemade treat!
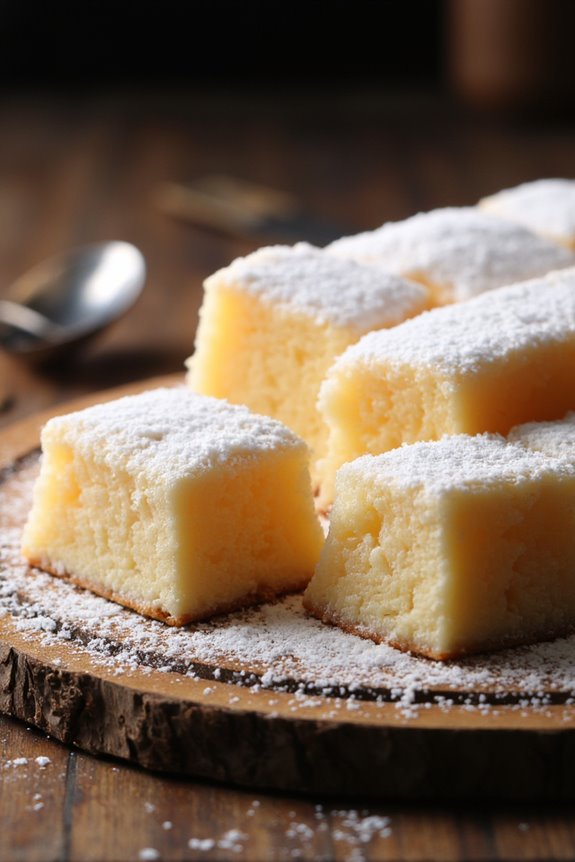
Revani
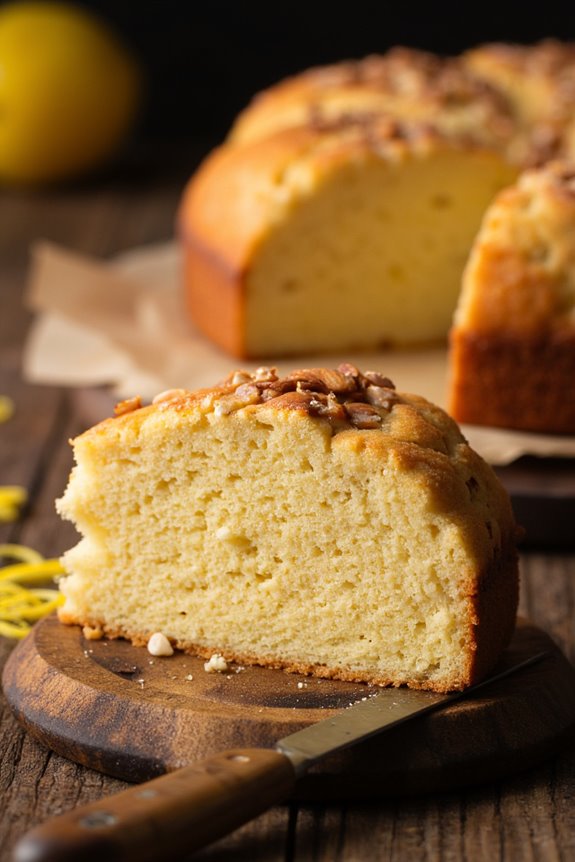
Revani is a traditional Greek dessert that embodies the essence of rustic sweetness and simplicity. This semolina cake is known for its moist texture and delightful flavor, often infused with a hint of citrus and soaked in a fragrant syrup.
Originating from the Mediterranean, Revani is a popular treat at celebrations and family gatherings, making it a cherished part of Greek culinary heritage. Its golden crust and tender crumb make it not only a feast for the palate but also a beautiful addition to any dessert table.
Preparing Revani is a rewarding experience, as the cake is relatively easy to make and requires minimal ingredients. The key to achieving the perfect Revani lies in the balance of flavors and the syrup that soaks into the cake, enhancing its taste and moistness. This recipe serves 4-6 people, ideal for sharing with friends and family.
Ingredients:
- 1 cup fine semolina
- 1 cup granulated sugar
- 1 cup plain yogurt
- 1/2 cup vegetable oil
- 3 large eggs
- 1 teaspoon baking powder
- 1 teaspoon vanilla extract
- Zest of 1 lemon (or orange)
- Pinch of salt
For the syrup:
- 1 cup water
- 1 cup granulated sugar
- Juice of 1 lemon (or orange)
- 1 teaspoon vanilla extract
Cooking Instructions:
- Prepare the syrup: In a saucepan, combine 1 cup of water and 1 cup of sugar. Bring the mixture to a boil over medium heat, stirring until the sugar is dissolved.
- Once boiling, reduce the heat and add the lemon juice and vanilla extract. Let it simmer for about 10 minutes, then remove from heat and allow to cool.
- Preheat the oven: While the syrup is cooling, preheat your oven to 350°F (175°C). Grease a 9-inch square baking dish or a similar-sized pan to prevent the cake from sticking.
- Mix the wet ingredients: In a large mixing bowl, whisk together the eggs, yogurt, vegetable oil, and vanilla extract until the mixture is smooth and well combined.
- Combine dry ingredients: In a separate bowl, combine the semolina, sugar, baking powder, lemon zest, and a pinch of salt. Stir to guarantee the dry ingredients are evenly mixed.
- Combine wet and dry mixtures: Gradually add the dry ingredients to the wet mixture, stirring gently until just combined. Don’t over-mix; the batter should be thick but smooth.
- Bake the cake: Pour the batter into the prepared baking dish and spread it evenly. Bake in the preheated oven for about 30-35 minutes, or until the top is golden brown and a toothpick inserted into the center comes out clean.
- Soak with syrup: Once the cake is done baking, remove it from the oven and immediately pour the cooled syrup over the hot cake. Allow it to soak in for at least 15 minutes before cutting into squares and serving.
- Serve: Revani can be served warm or at room temperature, often garnished with additional lemon zest or slivered almonds for an extra touch.
Extra Tips:
For the best flavor, allow the Revani to sit for a few hours or even overnight after soaking in the syrup; this will enhance its sweetness and texture.
You can also experiment with the flavor of the syrup by adding a splash of orange blossom water or a cinnamon stick as it simmers. This cake pairs beautifully with a dollop of whipped cream or a scoop of vanilla ice cream for an indulgent dessert experience. Enjoy your homemade Revani with family and friends!
Halva
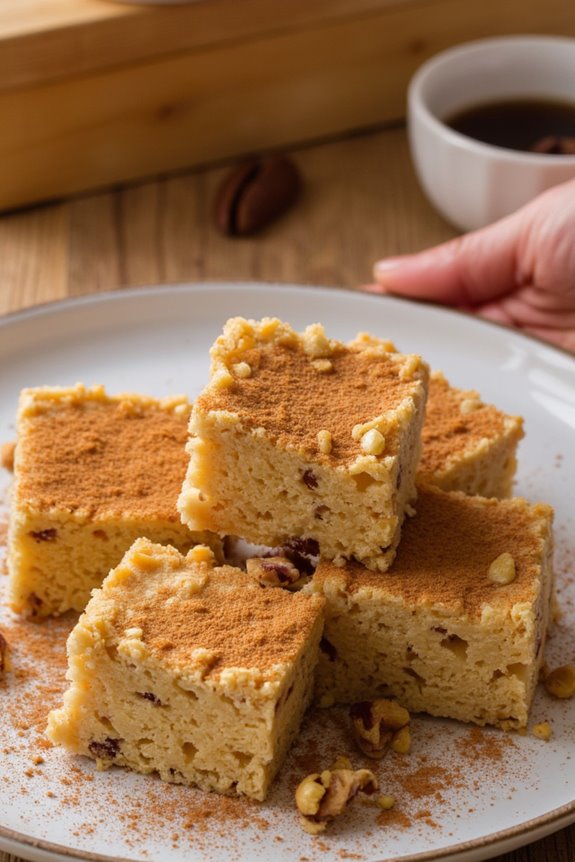
Halva is a popular sweet treat in Greece, known for its rich, nutty flavor and crumbly texture. This delightful dessert is made from semolina, sugar, and various flavorings that make it a beloved staple among Greek households.
It’s often enjoyed at festive occasions, family gatherings, or simply as a comforting snack with a cup of coffee or tea. The beauty of halva lies in its versatility; it can be made with different nuts, spices, and even chocolate, showcasing the creativity and diversity of Greek cuisine.
Making halva at home is an enjoyable process that allows you to capture the essence of rustic Greek sweets. The warm aroma of toasted semolina and the sweetness of sugar syrup combine to create a dish that’s both satisfying and nourishing.
This recipe will guide you through the steps to create a delicious halva that serves 4-6 people, perfect for sharing with family and friends.
Ingredients (Serves 4-6)
- 1 cup semolina
- 1 cup granulated sugar
- 2 cups water
- 1/2 cup olive oil (or melted butter)
- 1/2 cup chopped nuts (e.g., almonds, walnuts, or pistachios)
- 1 teaspoon vanilla extract
- 1/2 teaspoon ground cinnamon
- A pinch of salt
Cooking Instructions
- Prepare the Syrup: In a saucepan, combine the water, sugar, and a pinch of salt. Bring the mixture to a boil over medium heat, stirring occasionally until the sugar has completely dissolved. Once boiling, reduce the heat and let it simmer for about 5 minutes. Remove from heat and set aside.
- Toast the Semolina: In a separate large skillet or saucepan, heat the olive oil (or melted butter) over medium heat. Add the semolina and stir constantly for 5-7 minutes, or until it turns a golden brown color and releases a nutty aroma. Be careful not to let it burn; adjusting the heat as necessary.
- Combine Ingredients: Once the semolina is toasted, carefully pour the sugar syrup into the skillet with the semolina. Be cautious, as the mixture will bubble up. Stir continuously to combine the semolina with the syrup, making sure there are no lumps.
- Add Flavorings: Stir in the vanilla extract, ground cinnamon, and chopped nuts into the semolina mixture. Mix well until all ingredients are fully incorporated.
- Set the Halva: Remove the skillet from the heat and transfer the mixture into a greased dish or mold. Press it down firmly to make sure it holds its shape as it cools. Allow it to cool at room temperature for about 1-2 hours, or until it has set.
- Serve: Once the halva has cooled and solidified, cut it into squares or wedges. You may garnish it with additional chopped nuts or a dusting of cinnamon if desired.
Extra Tips
When making halva, it’s crucial to keep stirring the semolina while toasting to avoid burning and achieve the perfect texture.
Feel free to experiment with different nuts and spices to customize your halva to your taste. Additionally, storing halva in an airtight container will help maintain its freshness for up to a week. Enjoy this traditional Greek sweet as a delightful treat or a unique dessert at your next gathering!
Portokalopita

Portokalopita, a delightful rustic Greek dessert, is a traditional orange phyllo pie that captures the essence of Greek cuisine with its fragrant citrus notes. This sweet pastry is made from layers of crispy phyllo dough, soaked in a luscious orange syrup, and filled with a mixture of eggs and yogurt, creating a rich and moist texture.
The origin of Portokalopita can be traced back to the sunny orchards of Greece, where the abundance of oranges inspired this delectable treat. It’s often enjoyed during festive occasions, but its comforting flavors make it a favorite year-round.
Making Portokalopita isn’t just about indulging in a sweet treat; it’s also a celebration of the flavors and ingredients that define Greek cooking. The contrast of the crunchy phyllo and syrup-soaked filling, combined with the aromatic zest of fresh oranges, makes this dessert a standout.
Whether served warm or at room temperature, Portokalopita is perfect for gatherings or as a comforting end to a meal. Get ready to bring a taste of Greece into your kitchen with this delightful recipe!
Ingredients (Serves 4-6):
- 500g phyllo dough (thawed)
- 4 large eggs
- 200g Greek yogurt
- 150g granulated sugar
- Zest of 2 oranges
- 200ml fresh orange juice
- 100ml olive oil
- 1 teaspoon vanilla extract
- 1 teaspoon baking powder
- A pinch of salt
- Powdered sugar (for dusting)
Cooking Instructions:
- Prepare the Syrup: In a saucepan, combine the granulated sugar, fresh orange juice, and a splash of water. Heat over medium heat until the sugar dissolves, then bring to a boil. Let it simmer for about 5-7 minutes until it thickens slightly. Remove from heat and allow to cool.
- Preheat the Oven: Set your oven to preheat at 180°C (350°F). This guarantees that the Portokalopita bakes evenly and gets that perfect golden color.
- Mix the Filling: In a large mixing bowl, whisk together the eggs, Greek yogurt, olive oil, orange zest, vanilla extract, baking powder, and a pinch of salt until smooth and well combined.
- Layer the Phyllo Dough: On a clean surface, carefully unroll the phyllo dough. Take one sheet and brush it lightly with olive oil. Repeat this process with about 5-6 sheets, layering them on top of each other in a greased baking dish. Allow the edges of the phyllo to hang over the sides.
- Add the Filling: Pour the yogurt and egg mixture over the layered phyllo, spreading it evenly. Fold the overhanging edges of the phyllo over the filling, and then layer more sheets of phyllo on top, brushing with olive oil between each layer, until you use up the dough, folding the edges inwards to seal the pie.
- Bake the Pie: Place the baking dish in the preheated oven and bake for about 45-50 minutes, or until the top is golden brown and crispy.
- Soak in Syrup: Once out of the oven, immediately pour the cooled orange syrup over the hot Portokalopita, allowing it to soak in. Let it rest for at least an hour before serving to absorb the syrup fully.
- Serve: Dust with powdered sugar before slicing into squares or triangles. Serve warm or at room temperature, and enjoy!
Extra Tips:
When making Portokalopita, be sure to keep the phyllo dough covered with a damp cloth while you work to prevent it from drying out.
If you want to enhance the flavor, consider adding a drop of orange blossom water to the syrup for a floral note. Additionally, you can experiment with the filling by incorporating chopped nuts, such as almonds or walnuts, for added texture and depth.
Enjoy this sweet treat with a cup of Greek coffee for a truly authentic experience!
Ekmek Kataifi

Ekmek Kataifi is a traditional Greek dessert that captures the essence of rustic sweetness with its unique layered texture and delightful flavors. This exquisite dish combines shredded phyllo dough, a creamy custard, and a fragrant syrup, making it a favorite among dessert lovers.
The contrast between the crunchy kataifi and the velvety cream, topped with a nutty finish, creates a symphony of taste that’s sure to impress your guests and satisfy your sweet tooth.
Preparing Ekmek Kataifi might seem like an intricate process, but with a bit of patience and the right ingredients, you can create this heavenly dessert right in your own kitchen. Ideal for family gatherings or special occasions, this dish isn’t only delicious but also visually appealing.
Serve it chilled and watch as your friends and family indulge in this delightful Greek treat.
Ingredients (Serves 4-6)
- 250g kataifi pastry (shredded phyllo dough)
- 100g unsalted butter, melted
- 1 cup heavy cream
- 1 cup milk
- 1/2 cup granulated sugar
- 1/4 cup cornstarch
- 3 large eggs
- 1 teaspoon vanilla extract
- 1/2 cup chopped walnuts or pistachios (for garnish)
For the Syrup:
- 1 cup water
- 1 cup granulated sugar
- 1 tablespoon lemon juice
- 1 cinnamon stick
Cooking Instructions:
1. Prepare the Kataifi: Preheat your oven to 180°C (350°F). In a large mixing bowl, separate the kataifi pastry strands with your fingers to make sure they’re loose and fluffy. Drizzle the melted butter over the kataifi, making sure to coat it evenly.
Spread the buttered kataifi in a greased baking dish and bake for 30-35 minutes, or until golden brown and crispy.
2. Make the Syrup: While the kataifi is baking, prepare the syrup. In a saucepan, combine the water, sugar, lemon juice, and cinnamon stick. Bring the mixture to a boil, then reduce the heat and let it simmer for about 10 minutes until it thickens slightly.
Remove from heat and set aside to cool.
3. Prepare the Cream Custard: In a medium saucepan, combine the milk, heavy cream, sugar, and cornstarch. Whisk together until there are no lumps. Heat the mixture over medium heat, stirring constantly until it begins to thicken.
In a separate bowl, whisk the eggs and vanilla extract together. Gradually add a small amount of the hot milk mixture to the eggs to temper them, then slowly pour the egg mixture back into the saucepan. Continue to cook, stirring until it reaches a custard-like consistency.
4. Assemble the Ekmek Kataifi: Once the kataifi is baked and golden, remove it from the oven and immediately pour half of the cooled syrup over the hot kataifi, allowing it to absorb.
After a few minutes, pour the creamy custard over the kataifi, spreading it evenly. Allow it to cool slightly, then pour the remaining syrup over the top.
5. Chill and Serve: Let the Ekmek Kataifi cool at room temperature before placing it in the refrigerator to chill for at least 2 hours. Before serving, garnish with chopped walnuts or pistachios to add a delightful crunch.
Extra Tips:
When making Ekmek Kataifi, make sure that the kataifi is well separated before baking for the best texture.
You can also experiment with the syrup by adding a splash of orange blossom water or rose water for an extra layer of flavor. If you prefer a lighter version, substitute some of the heavy cream with more milk.
Finally, serve the dessert chilled for the best taste experience, allowing the flavors to meld beautifully together. Enjoy your homemade Ekmek Kataifi!
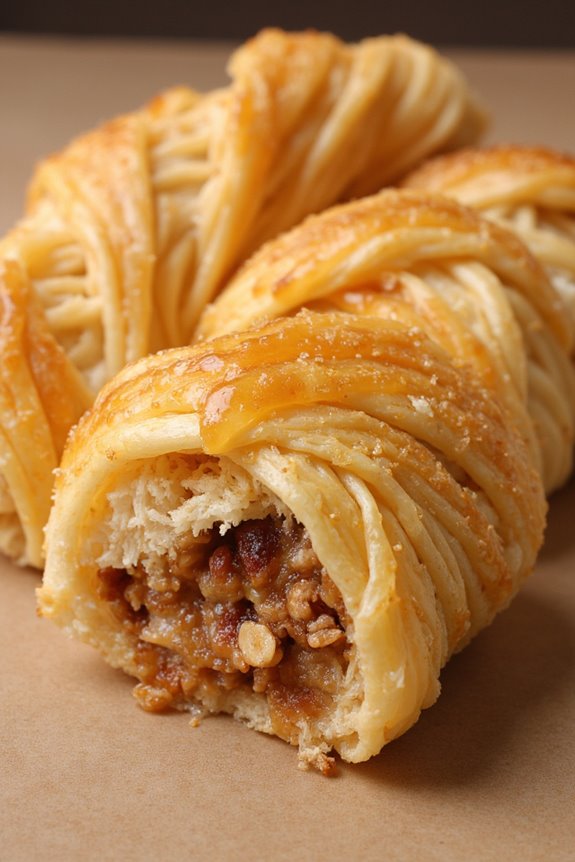
Baklava Rolls
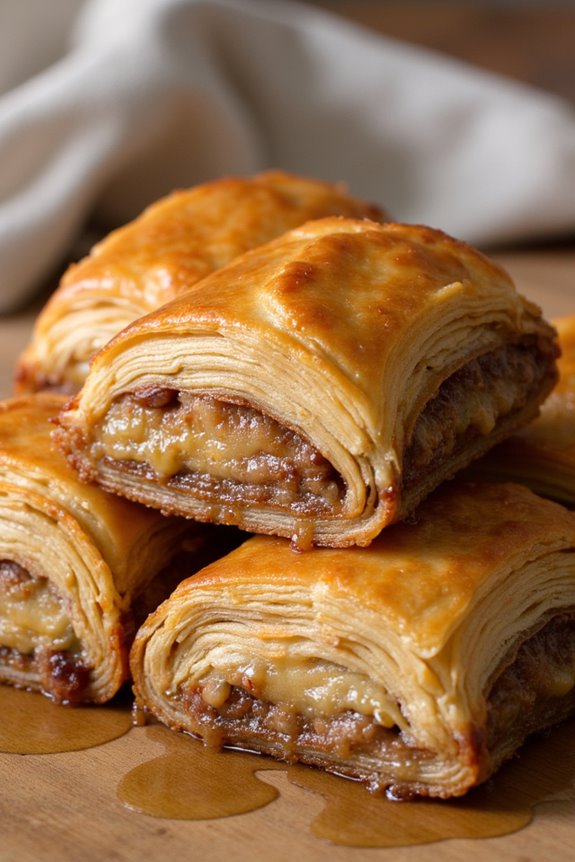
Baklava Rolls are a delightful twist on the classic Greek dessert, combining layers of flaky phyllo pastry with a rich, spiced nut filling, all drizzled with a sweet syrup. This beloved sweet treat is perfect for any occasion, from family gatherings to festive celebrations.
The roll format not only makes them easier to serve but also offers a unique presentation that’s sure to impress your guests.
Preparing Baklava Rolls may seem intimidating at first, but with a little patience and attention to detail, you can create this scrumptious dessert right in your kitchen. The layers of pastry are lovingly brushed with melted butter, filled with a fragrant mixture of nuts, and rolled up tightly to guarantee each bite is packed with flavor.
Once baked to perfection, the rolls are soaked in a sweet syrup made with honey and lemon, giving them that signature moist and sticky texture that makes baklava irresistible.
Ingredients (Serves 4-6)
- 1 package (16 oz) phyllo dough, thawed
- 1 cup unsalted butter, melted
- 1 ½ cups finely chopped walnuts or pistachios
- ¾ cup granulated sugar
- 1 teaspoon ground cinnamon
- ½ teaspoon ground cloves
- 1 cup honey
- ½ cup water
- 1 tablespoon lemon juice
- 1 teaspoon vanilla extract
Cooking Instructions
- Prepare the Filling: In a mixing bowl, combine the finely chopped nuts, granulated sugar, ground cinnamon, and ground cloves. Mix well until all ingredients are evenly distributed. This nut mixture will provide the flavorful filling for your baklava rolls.
- Preheat the Oven: Preheat your oven to 350°F (175°C). This step is essential as it guarantees the pastry cooks evenly and achieves the perfect golden brown color.
- Prepare the Phyllo Dough: Unroll the phyllo dough and cover it with a damp cloth to prevent it from drying out. Take one sheet of phyllo dough and place it on a clean, flat surface. Brush the entire sheet lightly with melted butter using a pastry brush.
- Layer the Phyllo Dough: Place a second sheet of phyllo on top of the first and brush it again with melted butter. Repeat this process for a total of 4-5 layers, making sure that each layer is generously brushed with butter. This creates a rich, flaky texture that’s characteristic of baklava.
- Add the Filling and Roll: After layering, sprinkle about 1/4 cup of the nut mixture along one edge of the phyllo. Starting from that edge, carefully roll the phyllo dough over the filling to form a tight log. Tuck in the sides as you roll to keep the filling contained. Place the rolled baklava seam-side down on a greased baking sheet.
- Cut the Rolls: Using a sharp knife, cut the rolled baklava into 1-inch pieces. This will allow the syrup to penetrate the rolls more effectively once baked.
- Bake: Bake the baklava rolls in the preheated oven for 25-30 minutes or until they’re golden brown and crispy. Keep an eye on them to avoid over-baking.
- Prepare the Syrup: While the rolls are baking, combine honey, water, lemon juice, and vanilla extract in a saucepan. Bring the mixture to a boil over medium heat, then reduce to a simmer for about 10 minutes. Once the syrup has thickened slightly, remove it from heat and let it cool.
- Soak the Baklava Rolls: Once the baklava rolls are out of the oven, immediately pour the cooled syrup over them, making sure that each piece is well coated. Allow the baklava to soak in the syrup for at least 2 hours before serving, allowing the flavors to meld.
Extra Tips
For the best results, make certain that the phyllo dough remains covered with a damp cloth while you work, as it dries out quickly.
Additionally, feel free to experiment with different nuts, such as almonds or hazelnuts, to create your unique version of Baklava Rolls.
Finally, if you wish to make them ahead of time, you can prepare the rolls and freeze them before baking; just add a few extra minutes to the baking time when you’re ready to serve them.
Enjoy this delicious Greek treat!
Millefeuille
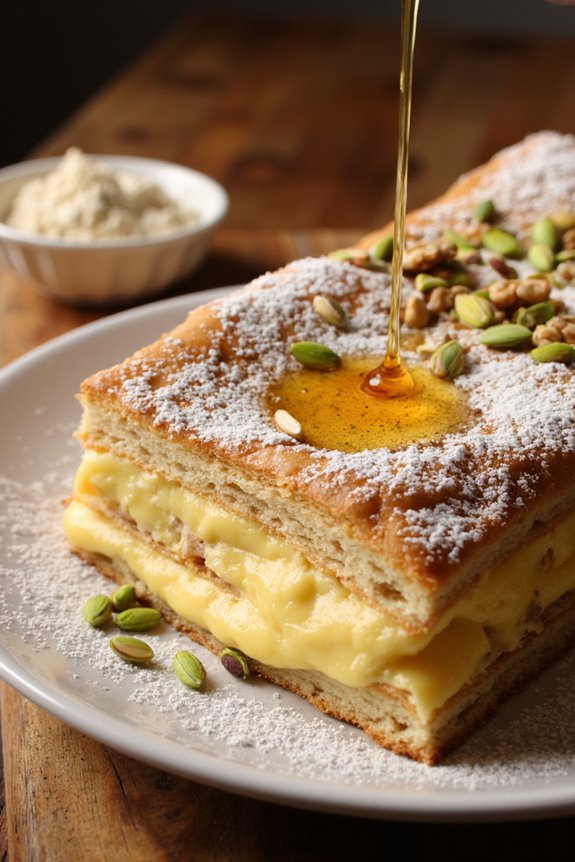
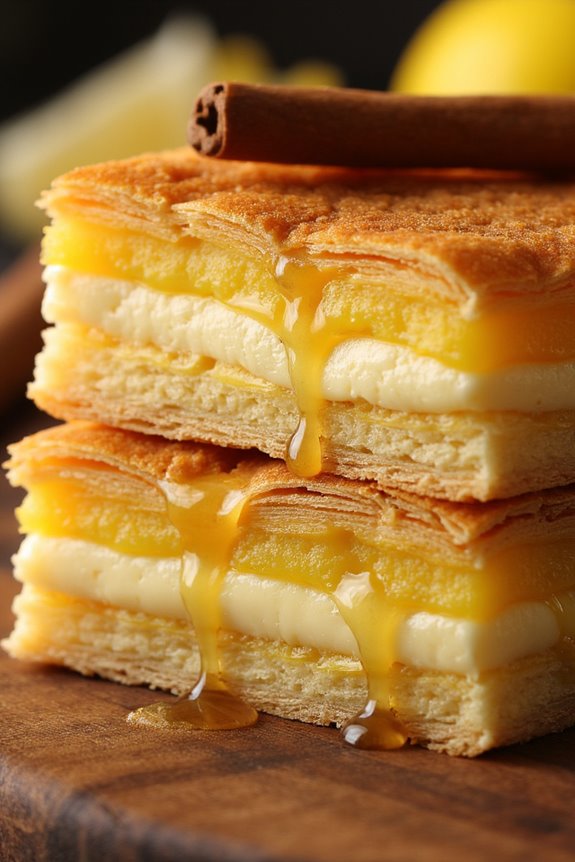
Millefeuille, also known as Napoleon, is a classic French pastry that has been embraced by various cultures, including Greece, where it takes on a rustic twist. This delectable dessert features layers of flaky pastry, rich custard, and a dusting of powdered sugar, making it a beloved sweet treat for gatherings and special occasions.
The name “millefeuille” translates to “a thousand leaves,” which beautifully describes its multiple layers that create a delightful texture in every bite.
In Greek cuisine, this dessert often incorporates local ingredients such as honey and nuts, adding a unique flavor profile that sets it apart from its traditional counterparts. Whether enjoyed at a festive celebration or as an everyday indulgence, Rustic Greek Millefeuille is a comforting dessert that brings warmth and sweetness to the table.
Ingredients (Serves 4-6):
- 1 package of puff pastry (2 sheets)
- 2 cups whole milk
- 3/4 cup granulated sugar
- 1/4 cup cornstarch
- 4 large egg yolks
- 1 teaspoon vanilla extract
- 1/2 cup unsalted butter, cubed
- 1/4 cup honey
- 1 teaspoon ground cinnamon
- Powdered sugar for dusting
- Chopped nuts (such as pistachios or walnuts) for garnish (optional)
Cooking Instructions:
1. Prepare the Puff Pastry: Preheat your oven to 400°F (200°C). Roll out the puff pastry sheets on a lightly floured surface to guarantee they’re evenly thin.
Transfer the sheets to a baking sheet lined with parchment paper. Using a fork, prick holes throughout the pastry to prevent it from puffing too much during baking. Bake for 15-20 minutes until golden brown and crisp. Once baked, remove from the oven and let cool.
2. Make the Custard: In a medium saucepan over medium heat, combine the whole milk, granulated sugar, and vanilla extract. Stir occasionally until the mixture is hot but not boiling.
In a separate bowl, whisk together the cornstarch and egg yolks until smooth. Gradually add a small amount of the hot milk mixture to the egg mixture to temper it, then return everything to the saucepan. Cook, stirring continuously, until the mixture thickens (about 5-7 minutes). Remove from heat and stir in the cubed butter until fully melted and incorporated. Let the custard cool slightly.
3. Assemble the Millefeuille: Once the puff pastry and custard are cool, begin layering your millefeuille. Place one sheet of puff pastry on a serving platter as the base.
Spread a layer of custard over the pastry, smoothing it out evenly. Drizzle with honey and sprinkle a little cinnamon for added flavor. Repeat the layering process with another sheet of pastry, more custard, honey, and cinnamon until all layers are used, finishing with a final layer of pastry on top.
4. Garnish and Serve: Dust the top layer of puff pastry with powdered sugar and garnish with chopped nuts if desired.
For best results, refrigerate the assembled millefeuille for at least 1 hour to allow the layers to set before slicing and serving. Cut into squares or rectangles to serve.
Extra Tips:
When making Millefeuille, it’s crucial to allow the puff pastry to cool completely before layering with the custard to avoid sogginess.
Additionally, when slicing, use a serrated knife to achieve clean cuts without squishing the layers. For a festive touch, consider adding fresh fruits such as berries or figs between layers for a burst of flavor and color. Enjoy this rustic Greek treat with a cup of Greek coffee or tea for a comforting end to any meal!
Kataifi
Kataifi is a traditional Greek dessert that showcases the beauty of shredded phyllo pastry, enveloping a rich and fragrant filling, typically made from nuts and spices. This delightful dish is often soaked in a sweet syrup, making it a staple in Greek households, especially during festive occasions.
The texture of the kataifi is unique, with its fine strands forming a crispy exterior that contrasts beautifully with the tender and nutty interior. With its enchanting flavors and textures, kataifi is sure to impress anyone who tries it.
Making kataifi may seem intimidating at first due to the delicate nature of the pastry, but with a little patience, you can create this delicious treat at home. The combination of nuts, cinnamon, and sugar creates a filling that’s both aromatic and sweet, while the syrup adds a glossy finish that enhances the overall taste.
This recipe is perfect for serving 4-6 people and is sure to become a favorite in your dessert repertoire.
Ingredients (serving size: 4-6 people)
- 400g kataifi pastry
- 200g walnuts, finely chopped
- 100g almonds, finely chopped
- 150g unsalted butter, melted
- 1 teaspoon ground cinnamon
- 100g granulated sugar
- 200ml water
- 200g granulated sugar (for syrup)
- 1 tablespoon lemon juice
- 1 teaspoon vanilla extract
Cooking Instructions
- Prepare the Filling: In a large mixing bowl, combine the finely chopped walnuts, almonds, ground cinnamon, and 100g of granulated sugar. Mix them well until all the nuts are evenly coated with the sugar and cinnamon. Set aside to let the flavors meld together.
- Preheat the Oven: Preheat your oven to 180°C (350°F). This will guarantee that your kataifi bakes evenly and achieves a lovely golden color.
- Prepare the Kataifi Pastry: Take the kataifi pastry out of the package and gently loosen it with your fingers. Divide it into sections to make it easier to handle. If it feels too dry, you can lightly spray it with water to help soften it.
- Assemble the Kataifi: Take a portion of the kataifi pastry and spread some melted butter on it. Place a spoonful of the nut mixture at one end of the pastry, then roll it tightly into a coil shape. Repeat this process until all the pastry and filling are used up, placing each coil in a buttered baking dish.
- Bake the Kataifi: Once all the coils are assembled in the baking dish, drizzle the remaining melted butter over them. Bake in the preheated oven for about 30-35 minutes, or until the kataifi turns golden brown and crispy.
- Prepare the Syrup: While the kataifi is baking, prepare the syrup. In a saucepan, combine 200ml of water, 200g of granulated sugar, lemon juice, and vanilla extract. Bring to a boil and let it simmer for about 10 minutes, stirring occasionally until it thickens slightly. Remove from heat and let it cool.
- Soak the Kataifi: Once the kataifi is golden and baked, remove it from the oven and immediately pour the cooled syrup over the hot kataifi. Allow it to soak for at least 30 minutes before serving, so the syrup can penetrate the layers and enhance the sweetness.
- Serve and Enjoy: Cut the kataifi into portions and serve warm or at room temperature. It can be garnished with crushed nuts or a sprinkle of cinnamon for an extra touch.
Extra Tips
When making kataifi, it’s important to confirm that the pastry isn’t overly dry, as it can become brittle and hard to work with.
Keeping the melted butter handy is essential for brushing the pastry, as it adds flavor and helps the kataifi crisp up beautifully. If you want to elevate the flavor of the syrup, consider adding a hint of orange blossom water or rosewater for a fragrant twist.
Finally, kataifi can be stored in an airtight container at room temperature for a few days, making it a perfect make-ahead dessert for gatherings.
Yogurt With Honey and Nuts
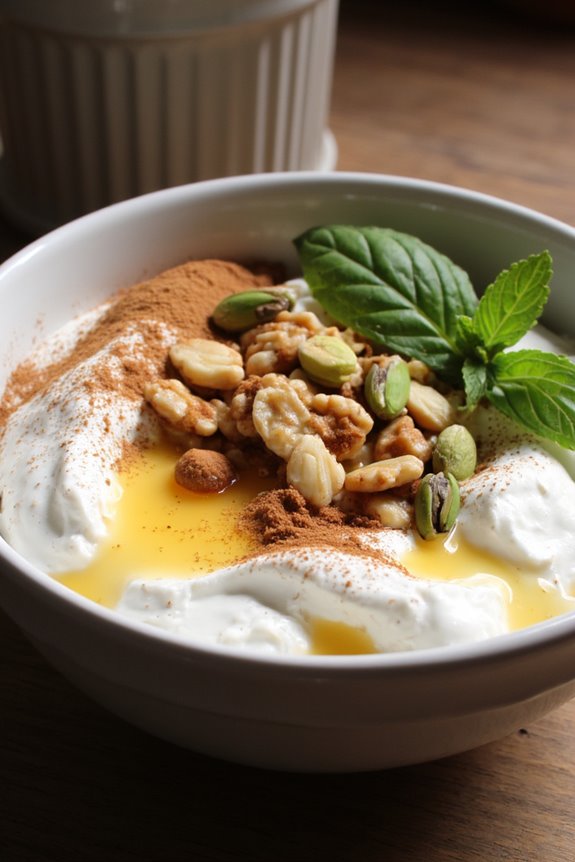
Yogurt with honey and nuts is a quintessential rustic Greek dessert that perfectly marries the creamy, tangy flavor of yogurt with the sweetness of honey and the crunch of assorted nuts. This simple yet delightful dish isn’t only quick to prepare but also incredibly satisfying, making it a favorite among many.
Served chilled, this dessert can be enjoyed at any time of the day, whether as a light breakfast, a revitalizing snack, or an indulgent dessert after a hearty meal.
The beauty of this dish lies in its versatility. You can customize it according to your taste by choosing different types of nuts or even adding fresh fruits like berries or figs for an extra layer of flavor. The combination of rich Greek yogurt and natural sweeteners offers a wholesome treat that’s as nutritious as it’s delicious.
Now, let’s explore the ingredients and the step-by-step instructions to create this delectable dessert.
Ingredients (serving size: 4-6 people)
- 4 cups Greek yogurt
- 1 cup honey
- 1 cup mixed nuts (such as walnuts, almonds, and pistachios), roughly chopped
- 1 teaspoon ground cinnamon (optional)
- Fresh mint leaves for garnish (optional)
Cooking Instructions
- Prepare the Yogurt Base: In a mixing bowl, take the Greek yogurt and give it a good stir to make it smooth and creamy. This step is essential as it helps to eliminate any lumps and guarantees a pleasant texture when served.
- Add Honey: Pour the honey over the yogurt. You can adjust the amount of honey according to your sweetness preference. Use a spatula or a spoon to gently fold the honey into the yogurt, making sure it’s evenly distributed throughout.
- Incorporate Nuts: Once the honey is mixed in, add the chopped mixed nuts to the yogurt mixture. Stir gently to combine, allowing the nuts to be evenly spread throughout the yogurt.
- Serve the Dish: Spoon the yogurt mixture into individual serving bowls or a large serving dish. If desired, drizzle a bit more honey on top for added sweetness and presentation.
- Garnish: Sprinkle a pinch of ground cinnamon on top for extra flavor and garnish with fresh mint leaves for a pop of color.
- Chill and Enjoy: For the best taste, refrigerate the dish for at least 30 minutes before serving. This allows the flavors to meld beautifully. Serve chilled.
Extra Tips
To elevate this dish even further, consider toasting the nuts lightly in a dry skillet over medium heat for a few minutes before adding them to the yogurt. This will enhance their flavor and add a delightful crunch.
Additionally, feel free to experiment with different types of yogurt, such as flavored or lower-fat options, to suit your dietary preferences. Remember that the quality of honey can greatly affect the taste, so opt for a high-quality, pure honey for the best results.
Enjoy this rustic Greek treat!