

Looking for easy and delicious recipes to elevate your next gathering? Greek appetizers are the perfect solution with their vibrant ingredients and Mediterranean flair. From creamy tzatziki to savory spanakopita, these bites will surely impress your guests. Plus, they can be prepped ahead of time, making entertaining stress-free. Let’s explore these delightful recipes together!
Tzatziki Sauce
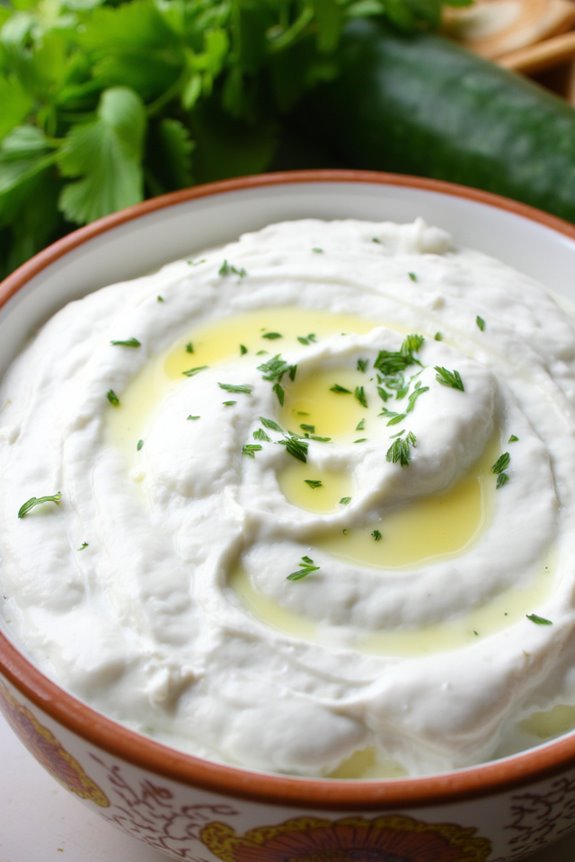
Tzatziki sauce is a classic Greek appetizer that brings a rejuvenating taste to any meal. Known for its creamy texture and zesty flavor, this yogurt-based dip is typically served with pita bread, grilled meats, or fresh vegetables. The combination of cool cucumber, tangy yogurt, and aromatic garlic makes tzatziki an essential part of Greek cuisine.
Whether you’re hosting a dinner party or simply looking for a delicious snack, this sauce is sure to impress.
Making tzatziki sauce at home is both simple and rewarding. The key to a perfect tzatziki lies in the quality of the ingredients and the balance of flavors. Fresh cucumbers, good-quality Greek yogurt, and fragrant herbs come together to create a delightful accompaniment to your favorite dishes.
With just a few ingredients and a little time, you can whip up this delightful dip that will transport your taste buds straight to the Mediterranean.
Ingredients (Serves 4-6)
- 1 cup Greek yogurt
- 1 medium cucumber
- 2 cloves garlic, minced
- 1 tablespoon olive oil
- 1 tablespoon white wine vinegar or lemon juice
- 1 teaspoon fresh dill, chopped (or 1/2 teaspoon dried dill)
- Salt and pepper, to taste
Instructions
- Prepare the Cucumber: Start by washing the cucumber thoroughly. You can peel it if you prefer a smoother texture, but leaving the skin on adds a bit of color and nutrients. Grate the cucumber using a box grater or food processor. Once grated, place the cucumber in a clean kitchen towel or cheesecloth and squeeze out as much excess moisture as possible. This step is vital to prevent the tzatziki from becoming watery.
- Mix the Yogurt Base: In a medium-sized mixing bowl, add the Greek yogurt. It’s important to use full-fat Greek yogurt for a creamier texture and richer flavor. Stir in the minced garlic, olive oil, and either white wine vinegar or lemon juice, depending on your taste preference. The vinegar or lemon juice adds a nice tanginess that complements the other flavors.
- Combine Ingredients: Add the grated cucumber to the yogurt mixture. Sprinkle in the chopped dill, along with a pinch of salt and pepper to taste. Mix everything together until well combined, ensuring that the flavors meld together. Taste the tzatziki and adjust seasoning if necessary, adding more salt, pepper, or dill as desired.
- Chill and Serve: Cover the bowl with plastic wrap and place it in the refrigerator for at least 30 minutes. Chilling allows the flavors to develop and intensify. Serve the tzatziki sauce cold, accompanied by warm pita bread, fresh veggies, or as a sauce for grilled meats.
Extra Tips
For an even more flavorful tzatziki, let it sit in the refrigerator for a few hours or overnight before serving. This resting time allows the flavors to blend beautifully.
Additionally, you can experiment with different herbs, such as mint or parsley, to give your tzatziki a unique twist. If you’re serving it at a gathering, consider garnishing with a drizzle of olive oil and a sprinkle of extra dill for an appealing presentation. Enjoy your homemade tzatziki sauce!
Spanakopita
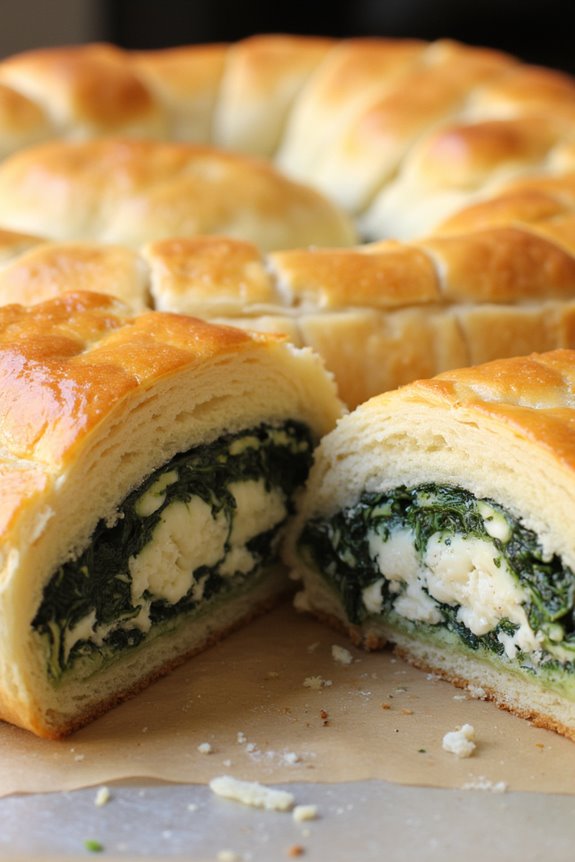
Spanakopita, a traditional Greek pastry, combines flaky phyllo dough with a savory filling of spinach, feta cheese, and herbs. This delightful appetizer isn’t only delicious but also visually appealing, making it a perfect addition to any gathering or celebration.
Originating from Greece, spanakopita has become a beloved dish worldwide, appreciated for its rich flavors and versatile nature. Whether served as a starter or a snack, this dish is sure to impress your guests.
Making spanakopita may seem intimidating at first due to the use of phyllo dough, but with a little patience and practice, anyone can master this recipe. The key to a perfect spanakopita lies in the quality of the ingredients and the careful layering of the phyllo.
The combination of fresh spinach and creamy feta, along with the aromatic herbs, creates a filling that’s both satisfying and fragrant. Once baked, the spanakopita develops a golden, crispy exterior that contrasts beautifully with its tender, flavorful interior.
Ingredients (Serves 4-6)
- 1 pound fresh spinach, washed and chopped
- 1 cup feta cheese, crumbled
- 1/2 cup ricotta cheese
- 1/2 cup onion, finely chopped
- 2 cloves garlic, minced
- 1/4 cup fresh parsley, chopped
- 1/4 cup fresh dill, chopped (or 1 tablespoon dried dill)
- 2 large eggs, beaten
- Salt and pepper, to taste
- 1 package phyllo dough (16 oz), thawed
- 1/2 cup unsalted butter, melted
Cooking Instructions
1. Prepare the Filling: In a large skillet over medium heat, add a drizzle of olive oil and sauté the chopped onion until translucent. Add the minced garlic and cook for another minute until fragrant.
Then, add the chopped spinach and cook until wilted, about 3-4 minutes. Remove from heat and let it cool slightly. In a bowl, combine the sautéed mixture with feta cheese, ricotta cheese, parsley, dill, and beaten eggs. Season with salt and pepper to taste, mixing well until all ingredients are combined.
2. Preheat the Oven: Preheat your oven to 375°F (190°C). This guarantees that the spanakopita bakes evenly and achieves a perfect golden-brown color.
3. Prepare the Phyllo Dough: Unroll the thawed phyllo dough and cover it with a damp towel to prevent it from drying out. Lay out a clean, dry surface to work on.
Take one sheet of phyllo dough and brush it lightly with melted butter. Layer another sheet on top and repeat the buttering process until you have 5 sheets layered together.
4. Fill the Dough: Place about 1/3 cup of the spinach filling along one edge of the layered phyllo, leaving some space at the sides. Fold the sides of the phyllo over the filling and then roll it up tightly like a cigar.
Place the rolled spanakopita seam-side down on a baking sheet lined with parchment paper. Repeat this process with the remaining phyllo and filling.
5. Brush and Bake: Once all the rolls are shaped, brush the tops lightly with more melted butter. Bake in the preheated oven for 25-30 minutes or until golden brown and crispy.
Keep an eye on them to prevent over-browning.
6. Serve: Remove the spanakopita from the oven and allow it to cool slightly before cutting into pieces. Serve warm or at room temperature, and enjoy!
Extra Tips
When working with phyllo dough, it’s important to keep it covered with a damp cloth to prevent it from drying out and becoming brittle.
Additionally, feel free to customize the filling by adding other ingredients such as sautéed mushrooms or sun-dried tomatoes for extra flavor. If you want to prepare the spanakopita ahead of time, you can assemble it and then freeze it before baking; just bake it straight from the freezer, adding a few extra minutes to the cooking time.
Enjoy your delicious spanakopita!
Dolmades (Stuffed Grape Leaves)
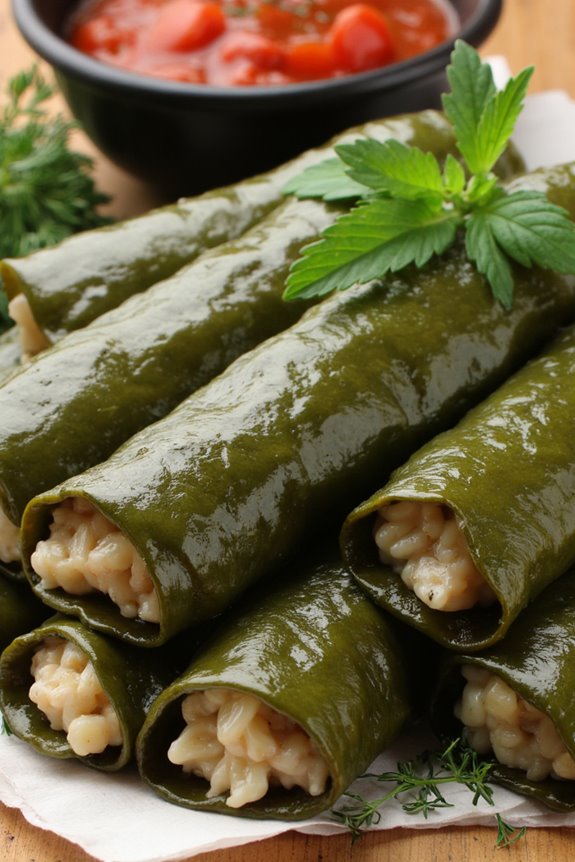
Dolmades, or stuffed grape leaves, are a classic Greek appetizer that embodies the rich flavors and traditions of Mediterranean cuisine. These delightful parcels are made by wrapping tender grape leaves around a savory filling, typically consisting of rice, herbs, and sometimes minced meat. The dish isn’t only delicious but also offers a beautiful presentation, making it perfect for gatherings or special occasions.
The beauty of dolmades lies in their versatility; you can customize the filling according to your taste preferences. Whether you prefer a vegetarian version packed with aromatic herbs and spices or a heartier option with ground meat, dolmades are sure to impress your guests. Serve them warm or at room temperature alongside a revitalizing yogurt dip for a true taste of Greece.
Ingredients (Serves 4-6)
- 1 jar of grape leaves (approximately 50 leaves, rinsed and drained)
- 1 cup of long-grain rice
- 1 onion, finely chopped
- 2 tablespoons olive oil
- 1/4 cup fresh parsley, chopped
- 1/4 cup fresh dill, chopped
- 1/4 cup fresh mint, chopped
- 1 teaspoon salt
- 1/2 teaspoon black pepper
- 1/2 teaspoon ground cinnamon
- 1 lemon, juiced
- 2 cups vegetable or chicken broth
- 1/4 cup pine nuts (optional)
Cooking Instructions
- Prepare the Grape Leaves: Start by carefully removing the grape leaves from the jar. Rinse them under cold water to eliminate excess brine and then lay them out on a clean surface, shiny side down. If the leaves are too tough, you can blanch them in boiling water for about 2-3 minutes to soften.
- Cook the Filling: In a large skillet, heat the olive oil over medium heat. Add the finely chopped onion and sauté until translucent, about 5 minutes. Stir in the rice and cook for an additional 2-3 minutes until the rice is slightly toasted. Add the parsley, dill, mint, salt, pepper, cinnamon, and half of the lemon juice. Mix everything well and remove from heat.
- Assemble the Dolmades: Take a grape leaf and place a tablespoon of the filling near the stem end. Fold in the sides and roll it up tightly from the stem end to the tip. Repeat this process with the remaining leaves and filling.
- Arrange in Pot: Place the dolmades seam-side down in a large pot. Pack them snugly in a single layer. If you have any leftover grape leaves, you can place them on top of the dolmades to prevent them from opening during cooking.
- Add Broth and Cook: Pour the vegetable or chicken broth over the dolmades until they’re just covered. Drizzle the remaining lemon juice on top. Place a plate over the dolmades to keep them submerged. Cover the pot and bring to a gentle simmer. Cook for about 30-40 minutes until the rice is tender and the leaves are cooked through.
- Serve: Once cooked, allow the dolmades to cool slightly before serving. They can be enjoyed warm or at room temperature, and they pair beautifully with a side of yogurt or tzatziki sauce.
Extra Tips
When making dolmades, it’s important to use tender grape leaves, as tougher leaves can be hard to chew. If you’re using fresh grape leaves, make sure to harvest them young and tender in late spring or early summer.
Additionally, feel free to experiment with the filling by adding spices or adjusting the herbs to suit your taste. Leftover dolmades can be stored in the refrigerator and taste even better the next day as the flavors meld together.
Greek Salad Skewers
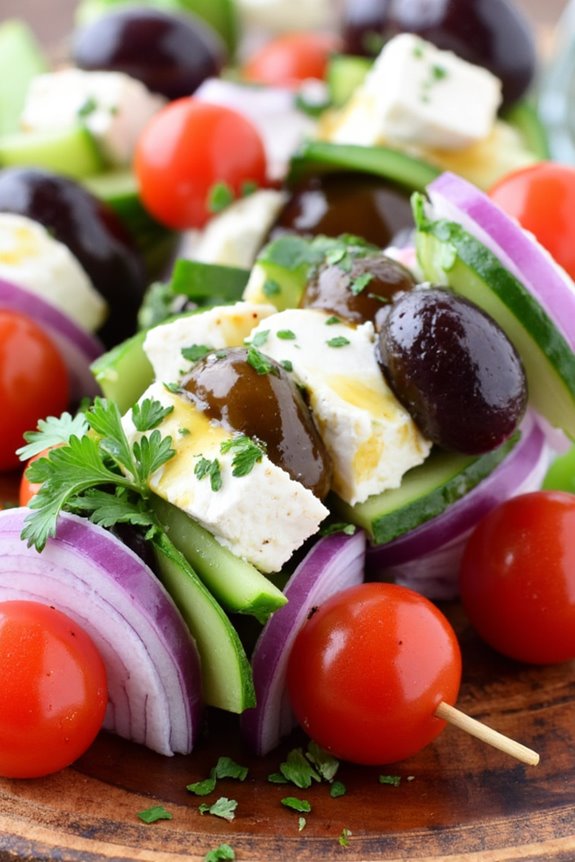
Greek Salad Skewers are a delightful and fresh appetizer that beautifully showcases the vibrant flavors of traditional Greek salad in a fun and portable format. Perfect for gatherings, barbecues, or as a light snack, these skewers combine juicy tomatoes, crisp cucumbers, tangy feta cheese, and briny olives, all drizzled with a zesty dressing. Not only are they visually appealing, but they also allow for easy serving and eating, making them a hit at any event.
The beauty of Greek Salad Skewers lies in their simplicity and versatility. You can easily adjust the ingredients based on personal preferences or what you have on hand. Whether you’re hosting a summer party, a holiday celebration, or just looking for a healthy appetizer to enjoy at home, these skewers can be assembled quickly and are sure to impress your guests with their burst of flavors and colors.
Ingredients (Serves 4-6 People):
- 1 cup cherry tomatoes, halved
- 1 cucumber, diced into bite-sized pieces
- 1 cup feta cheese, cubed
- 1/2 cup Kalamata olives, pitted
- 1/4 red onion, thinly sliced
- 2 tablespoons fresh parsley, chopped (optional for garnish)
- 3 tablespoons olive oil
- 1 tablespoon red wine vinegar
- 1 teaspoon dried oregano
- Salt and pepper to taste
- Skewers (wooden or metal)
Cooking Instructions:
- Prepare the Ingredients: Start by washing and cutting the cherry tomatoes in half. Dice the cucumber into bite-sized pieces, cube the feta cheese, and slice the red onion thinly. If you’re using wooden skewers, soak them in water for about 30 minutes to prevent them from burning.
- Make the Dressing: In a small bowl, whisk together the olive oil, red wine vinegar, dried oregano, salt, and pepper. This dressing will enhance the flavors of the ingredients, so make sure it’s well-combined.
- Assemble the Skewers: Take a skewer and begin threading the ingredients in this order: start with a cherry tomato half, followed by a cucumber piece, a cube of feta cheese, an olive, and a slice of red onion. Repeat this pattern until the skewer is filled, leaving a little space at the end for easy handling. Aim for 4-5 sets of ingredients per skewer.
- Drizzle with Dressing: Once all the skewers are assembled, place them on a serving platter. Drizzle the prepared dressing over the skewers, ensuring each gets a nice coating. If desired, sprinkle chopped parsley over the top for added color and freshness.
- Serve and Enjoy: Your Greek Salad Skewers are now ready to be served. These can be enjoyed immediately or refrigerated for up to an hour before serving, allowing the flavors to meld together a bit more.
Extra Tips:
For added flavor, consider marinating the feta cheese in olive oil and herbs a day before preparing the skewers. Additionally, you can customize these skewers by adding other ingredients such as bell peppers, artichoke hearts, or even grilled chicken for a heartier option.
Finally, serving these skewers with a side of tzatziki sauce can add an extra layer of deliciousness that complements the Greek flavors beautifully.
Feta Cheese Dip

Feta cheese dip is a delightful Greek appetizer that brings together the creamy, tangy flavors of feta with aromatic herbs and spices. It’s a versatile dip that pairs perfectly with fresh vegetables, pita bread, or even as a topping for grilled meats.
This simple recipe captures the essence of Greek cuisine, making it a crowd-pleaser at any gathering or dinner party. Making this feta cheese dip isn’t only quick and easy but also requires minimal ingredients.
With just a handful of items, you can whip up a delicious appetizer that will impress your guests. This dip is perfect for serving at summer barbecues, family gatherings, or as part of a Mediterranean-themed meal. The vibrant flavors and creamy texture make it a fantastic addition to any table.
Ingredients (Serves 4-6):
- 8 ounces feta cheese, crumbled
- 1/4 cup plain Greek yogurt
- 2 tablespoons olive oil
- 1 tablespoon lemon juice
- 1 clove garlic, minced
- 1 teaspoon dried oregano
- Salt and pepper to taste
- Fresh parsley, chopped (for garnish)
- Pita chips or fresh vegetable sticks (for serving)
Cooking Instructions:
- Prepare the Ingredients: Start by gathering all your ingredients. Make sure the feta cheese is crumbled for easy blending. Mince the garlic and chop the fresh parsley if you’re using it for garnish.
- Combine Feta and Yogurt: In a mixing bowl, add the crumbled feta cheese and plain Greek yogurt. The yogurt will add creaminess to the dip, making it smoother and more flavorful.
- Add Olive Oil and Lemon Juice: Drizzle in the olive oil and lemon juice. The olive oil enhances the richness of the dip, while the lemon juice adds brightness and acidity, balancing the flavors.
- Incorporate Garlic and Oregano: Next, add the minced garlic and dried oregano to the mixture. Garlic contributes a lovely aromatic flavor, and oregano is a classic herb in Greek cooking that complements the feta beautifully.
- Blend the Mixture: Using a fork or a hand mixer, blend the mixture until it reaches your desired consistency. For a smoother dip, blend longer; for a chunkier texture, mix just until combined.
- Season to Taste: Taste the dip and season with salt and pepper as needed. Remember that feta can be salty, so adjust accordingly.
- Garnish and Serve: Transfer the feta cheese dip to a serving bowl. Garnish with chopped fresh parsley for a pop of color. Serve immediately with pita chips or fresh vegetable sticks.
Extra Tips:
For an extra layer of flavor, consider adding a pinch of red pepper flakes or a drizzle of balsamic glaze on top before serving.
You can also customize this dip by incorporating other ingredients like sun-dried tomatoes, olives, or roasted red peppers for a unique twist. If you’re making it ahead of time, store it in an airtight container in the refrigerator to maintain freshness and flavors.
Just give it a good stir before serving to bring everything back together. Enjoy your feta cheese dip with a variety of dippers for a delightful appetizer experience!
Hummus With a Twist
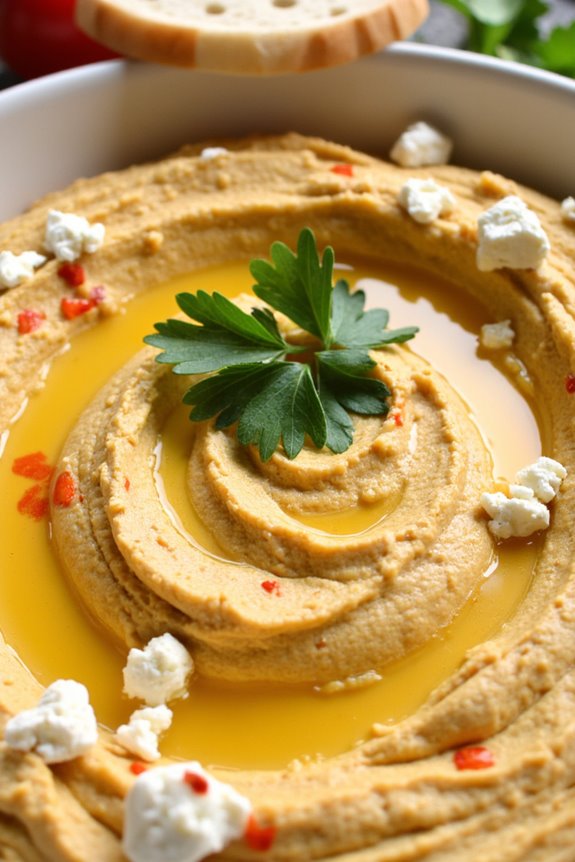
Hummus is a beloved Mediterranean dip that has earned its place in kitchens around the world. Traditionally made with chickpeas, tahini, olive oil, lemon juice, and garlic, it serves as a versatile base for countless variations. This ‘Hummus With a Twist’ recipe takes the classic flavor profile and adds unexpected ingredients like roasted red peppers and feta cheese, giving it a delightful tang and a burst of color that’s bound to impress your guests.
Not only is this hummus a fantastic appetizer, but it’s also a healthy choice packed with protein, fiber, and healthy fats. It pairs wonderfully with pita bread, fresh veggies, or even as a spread on sandwiches. Whether you’re hosting a party or just looking for a nutritious snack, this twist on hummus is both simple to make and delicious to enjoy.
Ingredients (Serves 4-6):
- 1 can (15 oz) chickpeas, drained and rinsed
- 1/4 cup tahini
- 2 cloves garlic, minced
- 1/4 cup fresh lemon juice
- 1/4 cup extra virgin olive oil
- 1/2 cup roasted red peppers, chopped
- 1/2 cup crumbled feta cheese
- 1/2 teaspoon ground cumin
- Salt and pepper to taste
- Fresh parsley, for garnish (optional)
Cooking Instructions:
- Prepare the Ingredients: Start by gathering all your ingredients. Drain and rinse the chickpeas thoroughly to remove any excess sodium and improve the flavor of your hummus. Have your roasted red peppers ready, whether they’re store-bought or homemade, as they’ll add a smoky sweetness to the dip.
- Blend the Base: In a food processor, combine the chickpeas, tahini, minced garlic, and lemon juice. Process the mixture for about 30 seconds until it becomes a thick paste. Scrape down the sides with a spatula to guarantee everything is evenly blended.
- Incorporate the Fats: With the food processor running, slowly drizzle in the extra virgin olive oil. This step helps to emulsify the ingredients, creating a creamy texture. Continue blending for another minute until the mixture is smooth.
- Add Flavor: Now, add the chopped roasted red peppers, crumbled feta cheese, and ground cumin to the hummus mixture. Process for an additional 1-2 minutes until everything is well combined. Taste and season with salt and pepper to your liking.
- Serve: Transfer the hummus to a serving bowl. You can create a swirl in the center using the back of a spoon and drizzle a little extra olive oil on top for added flavor and presentation. Garnish with fresh parsley if desired.
Extra Tips:
For an even creamier hummus, consider peeling the chickpeas before blending, as this removes the skins that can create a grainy texture. You can also adjust the amount of roasted red peppers and feta cheese to suit your taste preferences.
Feel free to experiment by adding herbs like dill or basil for a different flavor profile. Store any leftovers in an airtight container in the fridge for up to a week, and remember to stir before serving as the flavors tend to meld beautifully over time!
Saganaki (Fried Cheese)

Saganaki is a beloved Greek appetizer that features a deliciously crispy exterior and a gooey, melty interior. Traditionally made with a variety of cheeses, this dish is most commonly prepared using Kasseri, Kefalotyri, or Halloumi. The name “Saganaki” refers to the small frying pan used to cook the cheese, though many people now use a regular skillet or frying pan. This dish is simple to prepare and can be served as a delightful starter at any gathering, showcasing the rich flavors of Greek cuisine.
The beauty of Saganaki lies in its versatility. You can enjoy it plain, or elevate the dish by adding a squeeze of fresh lemon juice, a sprinkle of herbs, or even a drizzle of honey for a sweet twist. Whether you’re hosting a dinner party or enjoying a casual meal, Saganaki is sure to impress your guests and leave them craving more.
Ingredients (Serves 4-6)
- 400g Kasseri, Kefalotyri, or Halloumi cheese
- 1 cup all-purpose flour
- 1 teaspoon salt
- ½ teaspoon black pepper
- 1 large egg
- 1 cup breadcrumbs (optional for extra crunch)
- Olive oil for frying
- Fresh lemon wedges for serving
- Chopped fresh parsley for garnish (optional)
Cooking Instructions
- Prepare the Cheese: Slice the cheese into 1-inch thick pieces. If using Halloumi, you may want to cut it slightly thicker to maintain its texture. Pat the cheese slices dry with a paper towel to remove excess moisture, which helps achieve a crispy crust during frying.
- Set Up the Breading Station: In one shallow dish, combine the flour with salt and black pepper. In another dish, beat the egg until smooth. If you desire an extra crunchy texture, place the breadcrumbs in a third shallow dish.
- Bread the Cheese: First, coat each slice of cheese in the seasoned flour, ensuring an even layer. Shake off any excess flour, then dip the cheese into the beaten egg, allowing any excess to drip off. If using breadcrumbs, finally coat the cheese in breadcrumbs, pressing gently to adhere.
- Heat the Oil: Heat about ½ inch of olive oil in a large skillet over medium-high heat. To test if the oil is ready, drop a small amount of flour into the oil; if it sizzles, it’s time to fry.
- Fry the Cheese: Carefully place the breaded cheese slices in the hot oil, making sure not to overcrowd the pan. Fry for about 1-2 minutes on each side, or until golden brown and crispy. Use a slotted spatula to turn the cheese gently to avoid breaking it.
- Drain and Serve: Once the cheese is golden brown, transfer it to a plate lined with paper towels to absorb excess oil. Serve hot with fresh lemon wedges and a sprinkle of chopped parsley, if desired.
Extra Tips
For the best results, make sure your oil is hot enough before adding the cheese to prevent it from becoming soggy. If you’re preparing Saganaki for a gathering, consider frying it in batches to keep it warm and crispy.
You can also experiment with different cheeses to find your favorite variation. Don’t forget to serve it immediately, as Saganaki is best enjoyed hot and fresh!
Roasted Red Pepper and Walnut Dip
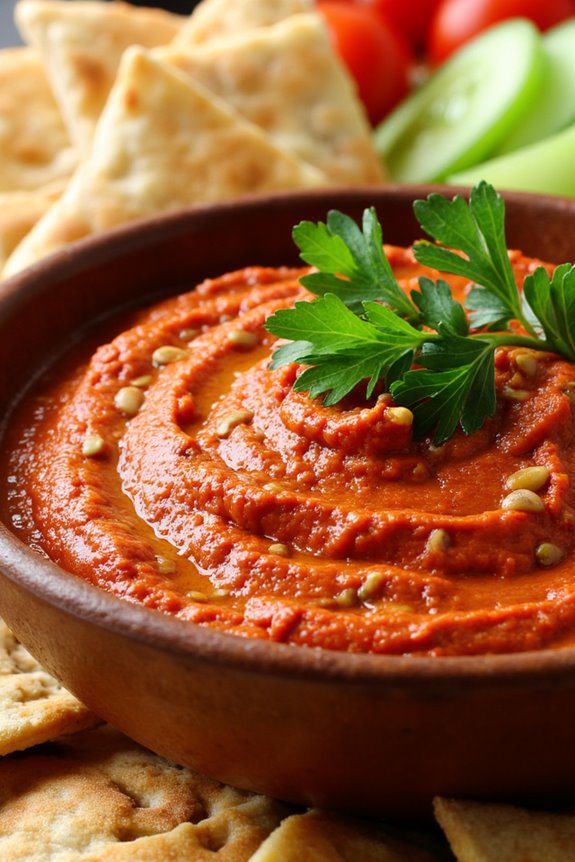
Roasted Red Pepper and Walnut Dip, known as “Muhammara” in Middle Eastern cuisine, is a delightful and flavorful appetizer that combines the smokiness of roasted red peppers with the earthy richness of walnuts.
This dish isn’t only simple to prepare but also brings a vibrant color and taste to any table. Perfect for serving at gatherings, it pairs wonderfully with pita bread, fresh vegetables, or as part of a mezze platter.
The combination of ingredients creates a smooth, creamy dip that’s both nutritious and satisfying. With the added hint of spices and the zest from lemon juice, this dip will leave your guests wanting more. Whether you’re hosting a festive event or enjoying a cozy night in, this Roasted Red Pepper and Walnut Dip is sure to impress.
Ingredients (Serves 4-6):
- 2 large roasted red bell peppers (jarred or homemade)
- 1 cup walnuts, toasted
- 2 garlic cloves, minced
- 2 tablespoons lemon juice
- 1 teaspoon ground cumin
- 1 teaspoon smoked paprika
- 1/4 teaspoon salt (adjust to taste)
- 2 tablespoons olive oil
- Fresh parsley (for garnish)
Cooking Instructions:
1. Prepare the Peppers: If you’re using fresh red bell peppers, roast them under a broiler or on a grill until the skin is charred and blistered. Place them in a bowl and cover with plastic wrap for about 10 minutes to steam.
Once cooled, peel off the skin, remove the seeds, and chop the flesh roughly. If using jarred peppers, simply drain and rinse them.
2. Toast the Walnuts: In a dry skillet over medium heat, Toast the Walnuts for about 5-7 minutes, stirring frequently until they’re fragrant and lightly browned. Be careful not to burn them as they can turn bitter. Allow them to cool before using.
3. Combine Ingredients: In a food processor, combine the roasted red peppers, toasted walnuts, minced garlic, lemon juice, ground cumin, smoked paprika, and salt. Pulse the mixture until it’s coarsely blended.
4. Add Olive Oil: With the food processor running, drizzle in the olive oil slowly until the dip reaches your desired consistency. You can keep it chunky or blend until smooth, depending on your preference.
5. Taste and Adjust: Stop the processor and taste the dip. Adjust the seasoning with more salt or lemon juice if necessary to enhance the flavors.
6. Serve: Transfer the dip to a serving bowl, drizzle with a little more olive oil, and garnish with fresh parsley. Serve with pita bread, crackers, or an assortment of vegetables.
Extra Tips:
For an added depth of flavor, consider incorporating spices like cayenne pepper for a bit of heat or a splash of balsamic vinegar for acidity.
This dip can be made a day in advance, allowing the flavors to meld beautifully; just store it in an airtight container in the refrigerator. Remember to let it come to room temperature before serving for the best taste and texture.
Greek Meatballs
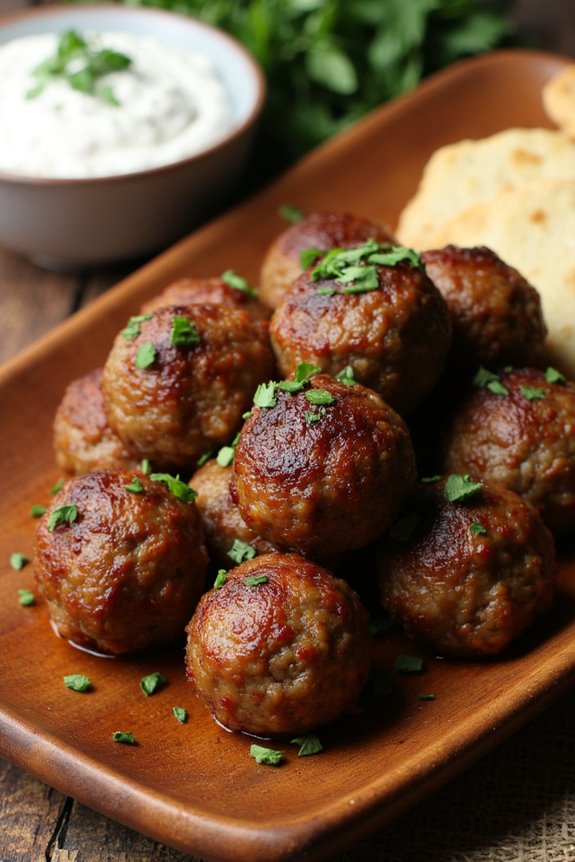
Greek meatballs, known as “keftedes,” are a flavorful and versatile appetizer that can be served hot or at room temperature. These delightful little bites are typically made with ground meat and a combination of herbs and spices, giving them a delicious Mediterranean flair. Often accompanied by a tangy tzatziki sauce for dipping, Greek meatballs can be a perfect addition to any gathering or a delightful snack for any occasion.
The key to making authentic Greek meatballs lies in the blend of ingredients and the method of preparation. Fresh herbs like parsley and mint add a unique aroma, while spices like cinnamon and allspice bring warmth and depth to the flavor profile. Whether served as a starter at a dinner party or enjoyed as a part of a mezze platter, these Greek meatballs are sure to impress your guests and satisfy your taste buds.
Ingredients (Serves 4-6)
- 1 pound ground beef or lamb
- 1/2 cup breadcrumbs
- 1/4 cup finely chopped onion
- 2 cloves garlic, minced
- 1/4 cup fresh parsley, chopped
- 1/4 cup fresh mint, chopped
- 1 egg
- 1 teaspoon dried oregano
- 1/2 teaspoon ground cinnamon
- 1/4 teaspoon ground allspice
- Salt and pepper to taste
- Olive oil for frying
Cooking Instructions
- Prepare the Mixture: In a large mixing bowl, combine the ground meat, breadcrumbs, chopped onion, minced garlic, parsley, mint, egg, oregano, cinnamon, allspice, salt, and pepper. Use your hands to mix everything until well combined. Be careful not to overmix, as this can lead to tough meatballs.
- Shape the Meatballs: Once the mixture is well combined, take a small portion of the mixture (about 1-2 tablespoons) and roll it into a ball between your palms. Repeat this process until all the mixture is formed into meatballs, placing them on a plate or tray as you go.
- Heat the Oil: In a large skillet, heat a generous amount of olive oil over medium heat. You want enough oil to cover the bottom of the skillet, as this will help the meatballs cook evenly and develop a nice golden crust.
- Cook the Meatballs: Once the oil is hot, carefully add the meatballs to the skillet, making sure not to overcrowd the pan. Fry them for about 4-5 minutes on each side, or until they’re browned and cooked through. You may need to do this in batches depending on the size of your skillet.
- Drain and Serve: Once cooked, transfer the meatballs to a paper towel-lined plate to drain any excess oil. Serve warm with tzatziki sauce on the side for dipping, and garnish with additional fresh herbs if desired.
Extra Tips
To enhance the flavor of your Greek meatballs, consider letting the mixture rest for about 30 minutes in the refrigerator before shaping them. This allows the flavors to meld together.
Additionally, if you prefer a healthier option, you can bake the meatballs in a preheated oven at 400°F (200°C) for about 20 minutes, turning them halfway through, for a lower-fat alternative. Enjoy your delicious Greek meatballs with friends and family!
Chickpea Salad

Chickpea salad is a vibrant and nutritious dish that showcases the flavors of the Mediterranean. Packed with protein-rich chickpeas, fresh vegetables, and a zesty dressing, this salad isn’t only easy to prepare but also makes for a perfect appetizer or side dish for any gathering.
It can be enjoyed on its own or paired with pita bread or grilled meats, making it a versatile addition to any meal.
This Greek-inspired chickpea salad combines the crispness of cucumbers, the sweetness of bell peppers, and the tanginess of red onion, all tossed together with a light dressing of olive oil, lemon juice, and fresh herbs.
The result is a revitalizing dish that brings a taste of the Mediterranean right to your table. Whether you’re hosting a dinner party or simply looking for a healthy snack, this chickpea salad is sure to impress your guests.
Ingredients (serving size: 4-6 people)
- 2 cans (15 oz each) of chickpeas, drained and rinsed
- 1 cup cherry tomatoes, halved
- 1 cucumber, diced
- 1 bell pepper (red or yellow), diced
- 1/2 red onion, finely chopped
- 1/4 cup fresh parsley, chopped
- 1/4 cup feta cheese, crumbled (optional)
- 1/4 cup olive oil
- 2 tablespoons lemon juice
- 1 teaspoon dried oregano
- Salt and pepper to taste
Cooking Instructions
1. Prepare the Vegetables: Begin by rinsing and draining the canned chickpeas. This helps remove any excess sodium and improves the overall texture of the salad.
Then, chop the cherry tomatoes in half, dice the cucumber and bell pepper, and finely chop the red onion. Finally, chop the fresh parsley. Set all the vegetables aside in a large mixing bowl.
2. Combine Ingredients: Once your vegetables are prepared, add the chickpeas to the mixing bowl along with the chopped parsley and, if desired, the crumbled feta cheese.
The chickpeas will provide a hearty base for the salad, while the vegetables add color and crunch.
3. Make the Dressing: In a separate small bowl, whisk together the olive oil, lemon juice, dried oregano, salt, and pepper.
This dressing will enhance the flavors of the salad and bring everything together. Adjust the seasoning according to your taste preference.
4. Toss the Salad: Pour the dressing over the chickpea and vegetable mixture. Gently toss everything together using a spatula or wooden spoon, ensuring that the dressing evenly coats all the ingredients.
Be careful not to mash the chickpeas; you want them to remain whole for texture.
5. Chill and Serve: For the best flavor, allow the salad to chill in the refrigerator for at least 30 minutes before serving.
This resting period allows the flavors to meld together beautifully. Once ready, give the salad a quick toss and enjoy it chilled as a revitalizing appetizer or side dish.
Extra Tips
When preparing chickpea salad, feel free to customize it with your favorite ingredients or seasonal vegetables.
For additional crunch, consider adding diced bell peppers or shredded carrots. If you prefer a spicier kick, toss in some chopped jalapeños or a sprinkle of red pepper flakes.
The salad can be made a few hours in advance, and it keeps well in the refrigerator for up to two days, making it a great option for meal prep or entertaining.
Just remember to give it a good stir before serving!
Pita Chips With Olive Tapenade
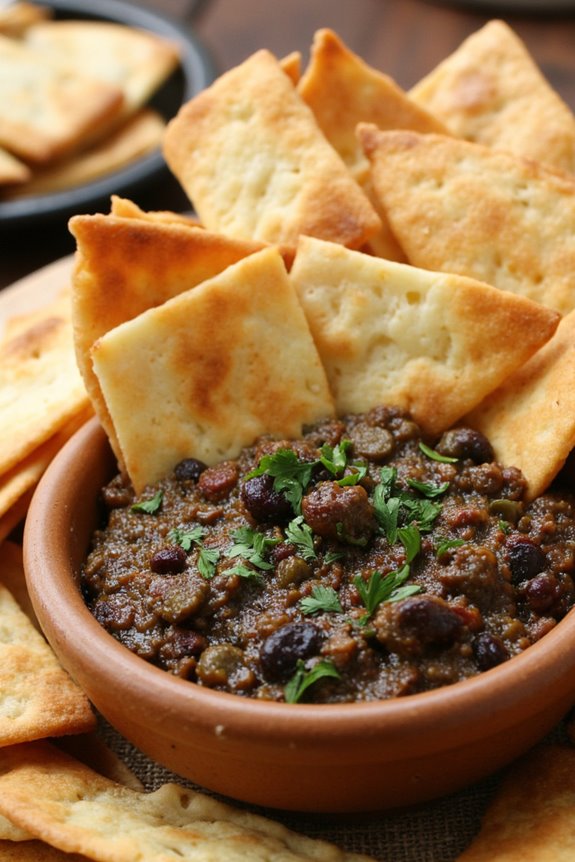
Pita chips with olive tapenade is a delightful and flavorful Greek appetizer that perfectly blends the crispiness of baked pita chips with the rich, savory taste of olives. This dish isn’t only simple to prepare but also makes for a perfect starter for gatherings or a light snack for any occasion.
The combination of textures and flavors is sure to please a crowd, making it a favorite among Mediterranean cuisine enthusiasts.
Making your own pita chips is a healthier alternative to store-bought varieties, and they can be seasoned to your liking. The olive tapenade, a paste made from finely chopped olives, capers, and herbs, serves as a delicious dip that elevates the flavor of the chips. Together, they create a harmonious balance that’s both satisfying and indulgent without being overly heavy.
Ingredients (Serves 4-6)
- 4 whole pita breads
- 1/4 cup olive oil
- 1 teaspoon garlic powder
- 1 teaspoon sea salt
- 1/2 teaspoon black pepper
- 1 cup mixed olives (green and black), pitted and chopped
- 2 tablespoons capers, rinsed and chopped
- 2 tablespoons fresh parsley, finely chopped
- 1 tablespoon lemon juice
- 1 teaspoon dried oregano
Cooking Instructions
- Preheat the Oven: Start by preheating your oven to 375°F (190°C). This step is crucial as it guarantees that your pita chips will bake evenly and become crispy.
- Prepare the Pita Chips: Cut each pita bread into wedges, typically 8 pieces per pita. This allows for easy dipping and snacking. Place the wedges in a large bowl.
- Season the Pita Wedges: Drizzle the olive oil over the pita wedges. Sprinkle the garlic powder, sea salt, and black pepper on top. Toss everything together until the pita wedges are evenly coated with oil and seasonings.
- Bake the Pita Chips: Arrange the seasoned pita wedges in a single layer on a baking sheet. Bake in the preheated oven for about 10-15 minutes, or until they’re golden brown and crispy. Be sure to turn them halfway through for even cooking.
- Prepare the Olive Tapenade: While the pita chips are baking, combine the chopped olives, capers, parsley, lemon juice, and dried oregano in a mixing bowl. Stir everything together until well combined. Adjust the seasoning if necessary.
- Serve: Once the pita chips are done, remove them from the oven and let them cool slightly. Serve them warm alongside the olive tapenade for dipping.
Extra Tips
To enhance the flavor of your pita chips, consider experimenting with additional spices or herbs such as paprika or thyme.
If you prefer a more robust tapenade, try adding a splash of balsamic vinegar or a clove of minced garlic to the olive mixture. For a pop of color, serve your dish with a side of cherry tomatoes or cucumber slices.
This appetizer pairs wonderfully with a glass of white wine or a revitalizing Greek salad for a complete Mediterranean experience.
Marinated Olives
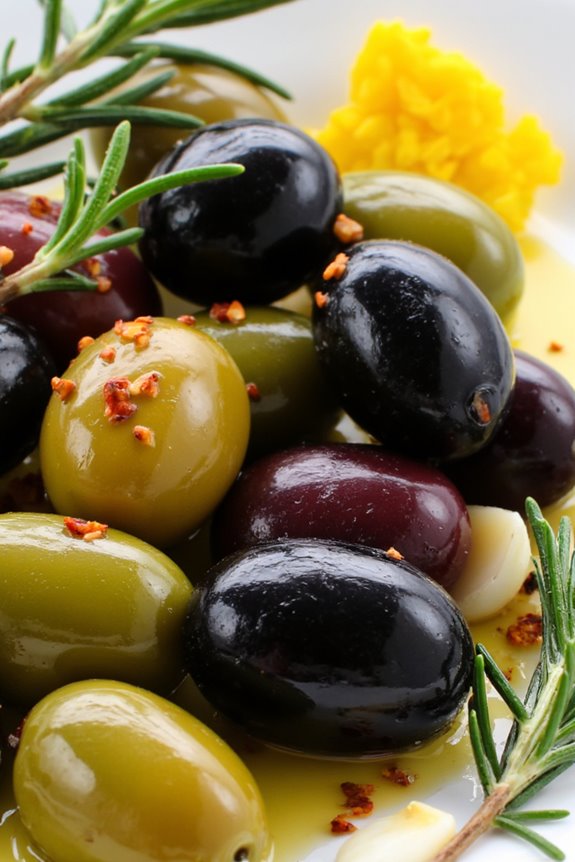
Marinated olives are a delicious and versatile Greek appetizer that can add a burst of flavor to any gathering. This dish brings together a variety of olives, infused with aromatic herbs, garlic, and citrus. Perfect for serving alongside a glass of wine or as part of a meze platter, marinated olives aren’t only easy to prepare but also customizable to suit your taste preferences.
The marinade allows the olives to absorb the rich flavors, creating a perfect blend that will delight your guests.
To make marinated olives, you can use a mix of Kalamata, green, and black olives, which provide different textures and flavors. The marinade typically consists of high-quality olive oil, fresh herbs like thyme and rosemary, along with lemon zest, garlic, and red pepper flakes for a hint of spice. This dish isn’t only a simple yet elegant appetizer but also a great way to showcase the bountiful produce of the Mediterranean region.
Ingredients (Serves 4-6):
- 2 cups mixed olives (Kalamata, green, black)
- 1/2 cup extra virgin olive oil
- 2 cloves garlic, thinly sliced
- 1 tablespoon fresh thyme leaves
- 1 tablespoon fresh rosemary, chopped
- Zest of 1 lemon
- 1 teaspoon red pepper flakes (optional)
- Salt and pepper to taste
Cooking Instructions:
1. Prepare the Olives: Begin by rinsing the mixed olives under cold water to remove any excess brine. This step will help to guarantee that the flavors of the marinade can penetrate the olives effectively.
After rinsing, pat them dry with a clean kitchen towel.
2. Make the Marinade: In a medium bowl, combine the extra virgin olive oil, sliced garlic, thyme, rosemary, lemon zest, and red pepper flakes (if using). Stir well to combine all the ingredients, making sure the garlic and herbs are evenly distributed throughout the oil.
3. Combine Olives and Marinade: Add the rinsed olives to the bowl with the marinade. Gently toss the olives in the marinade, making sure they’re fully coated. This step is vital as it allows the olives to absorb the flavors of the marinade.
4. Marinate: Transfer the olives and marinade to an airtight container or a glass jar with a lid. Seal it tightly and let the olives marinate in the refrigerator for at least 2 hours, but ideally overnight. This allows the flavors to meld beautifully, resulting in a more flavorful dish.
5. Serve: Once marinated, remove the olives from the refrigerator and let them sit at room temperature for about 30 minutes before serving. This will enhance the flavors and aroma. Serve the marinated olives in a bowl with toothpicks or small forks for easy snacking.
Extra Tips:
When preparing marinated olives, feel free to experiment with different herbs and spices according to your preference. Adding ingredients like orange zest, bay leaves, or even a splash of balsamic vinegar can provide unique flavor profiles.
Additionally, the longer the olives sit in the marinade, the more flavorful they become, so consider making a larger batch to enjoy over several days. Just remember to store them in the fridge and consume them within a week for the best taste!
Mini Gyro Bites

Mini Gyro Bites are a delightful twist on the traditional Greek gyro, condensing all the beloved flavors into bite-sized morsels perfect for appetizers. These little delights feature tender, spiced meat wrapped in soft pita bread, topped with fresh veggies and a creamy tzatziki sauce.
They’re simple to prepare and are bound to impress your guests at any gathering, be it a casual get-together or a festive celebration.
These Mini Gyro Bites aren’t only delicious but also incredibly versatile. You can customize them with your choice of protein, whether it’s lamb, chicken, or even a vegetarian option with grilled vegetables or falafel. The fresh ingredients, combined with the homemade tzatziki, guarantee that each bite bursts with flavor.
Serve them on a platter with toothpicks for easy eating, and watch them disappear as your friends and family enjoy these tasty Greek appetizers.
Ingredients (Serves 4-6):
- 1 pound ground lamb or beef
- 2 cloves garlic, minced
- 1 teaspoon dried oregano
- 1 teaspoon ground cumin
- 1 teaspoon salt
- ½ teaspoon black pepper
- 1 tablespoon olive oil
- 4 small pita breads, cut into quarters
- 1 cup diced cucumber
- 1 cup diced tomatoes
- ½ cup red onion, thinly sliced
- ½ cup tzatziki sauce (store-bought or homemade)
- Fresh parsley, chopped for garnish (optional)
Cooking Instructions:
- Prepare the Meat Mixture: In a large bowl, combine the ground lamb or beef, minced garlic, dried oregano, ground cumin, salt, and black pepper. Mix well until all ingredients are thoroughly combined. This mixture will provide the flavorful base for your Mini Gyro Bites.
- Cook the Meat: Heat olive oil in a skillet over medium heat. Once hot, add the meat mixture and cook for about 8-10 minutes, breaking it up with a spatula, until browned and cooked through. Make sure the meat is no longer pink and has a nice caramelization, which enhances the flavor.
- Warm the Pita Bread: In the last couple of minutes of cooking the meat, warm the pita bread quarters in another skillet or in the oven for a few minutes. This will make them pliable and easier to fold around the filling.
- Assemble the Mini Gyro Bites: Take a warm piece of pita bread, add a spoonful of the cooked meat mixture, and top with diced cucumber, tomatoes, and red onion. Drizzle a generous amount of tzatziki sauce over the top.
- Garnish and Serve: If desired, sprinkle chopped parsley over the assembled Mini Gyro Bites for a fresh touch. Secure them with a toothpick if necessary and serve immediately on a platter.
Extra Tips:
For an even more flavorful experience, consider marinating the meat in the spices and garlic for a few hours or overnight in the refrigerator before cooking. This allows the flavors to meld together beautifully.
Additionally, homemade tzatziki can elevate the dish—simply mix Greek yogurt, grated cucumber, minced garlic, lemon juice, and fresh dill for a revitalizing sauce.
Finally, don’t hesitate to get creative with toppings; feta cheese, olives, or pickled vegetables can add an extra layer of flavor to your Mini Gyro Bites.